|
Main Menu
|
|
|
|
My 2007 4Runner
|
|
|
|
4Runner History
|
|
|
|
Other
|
|
|
|
|
Concept:
This modification allows you to open the rear hatch door from inside the vehicle.
Why I want to perform this modification:
The Toyota 4Runner does NOT come with any way to open the rear hatch door from inside the vehicle.
Benefits of this mod are seen primarily when vehicle camping during overland excursions to allow for a much easier exit then using the rear side doors.
Features of this modification:
We will add a switch inside the cargo area within easy reach when sleeping inside the vehicle.
This switch addition will function the same as the factory exterior rear hatch door release in that it can operate only when the vehicle is
unlocked. You can unlock the vehicle while camping inside the vehicle using your wireless remote control.
Having the switch addition function like the factory exterior release will make it so that unintended activation of the switch will
not open the door, an example of which can be someone using a coat hanger from outside the vehicle to depress the newly added switch button
for purposes of theft or by items banging around in the cargo area and hitting the button while driving
as you should be driving with your doors locked anyhow.
What needs to be accomplished:
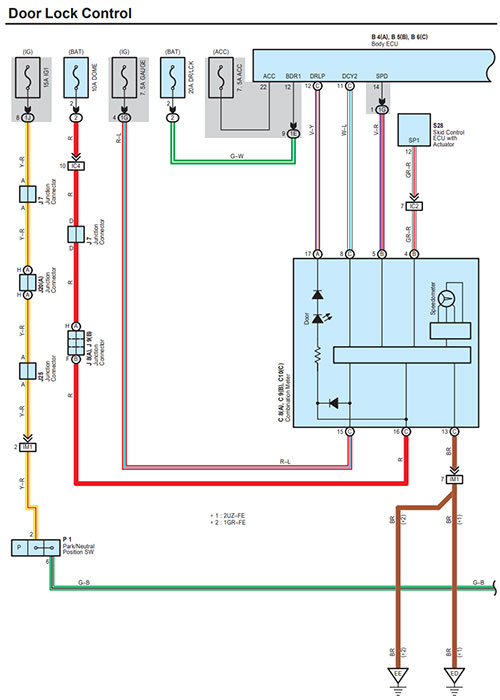
Wire a 12V momentary push button style switch in parallel with the factory exterior rear hatch door release wiring.
Back Door Components:
First, familiarize yourself with the back door components.
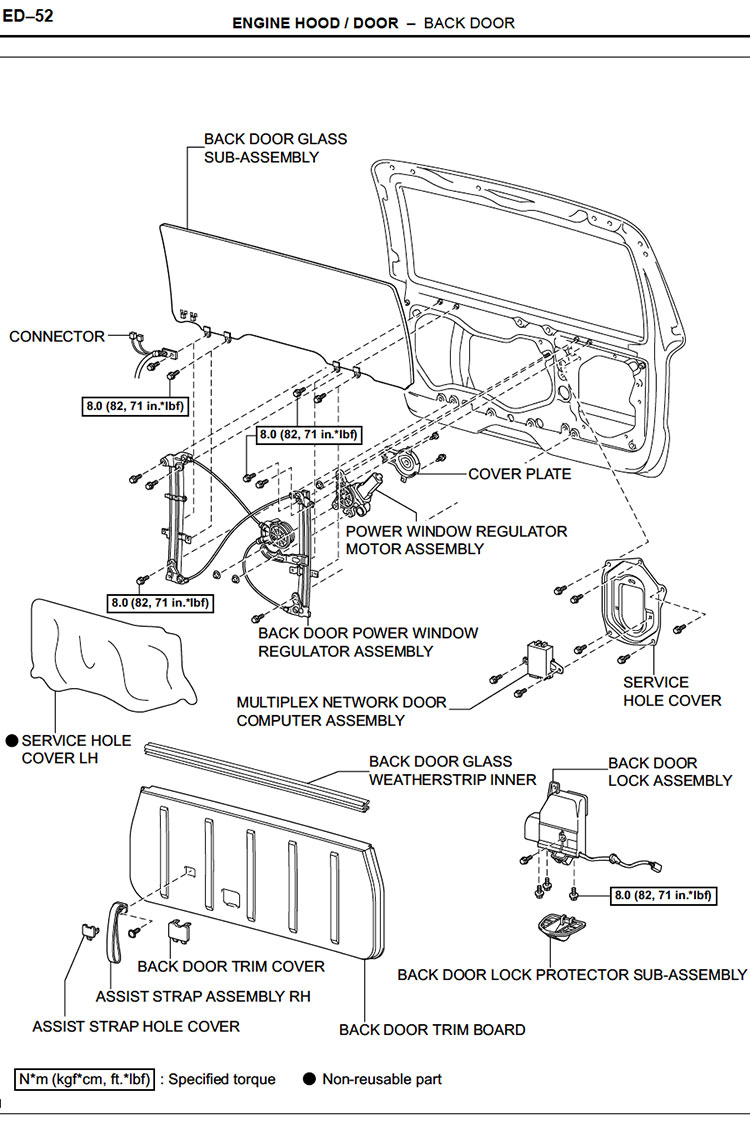
Back Door Components |
Procedure:
Start by removing the back door trim board:
A. Remove the assist strap hole cover using a plastic pry tool.
B. Remove the screw holding the assist strap with a 10mm socket.
C. Using the plastic pry tool, disengage the 10 clips and the back door trim cover.
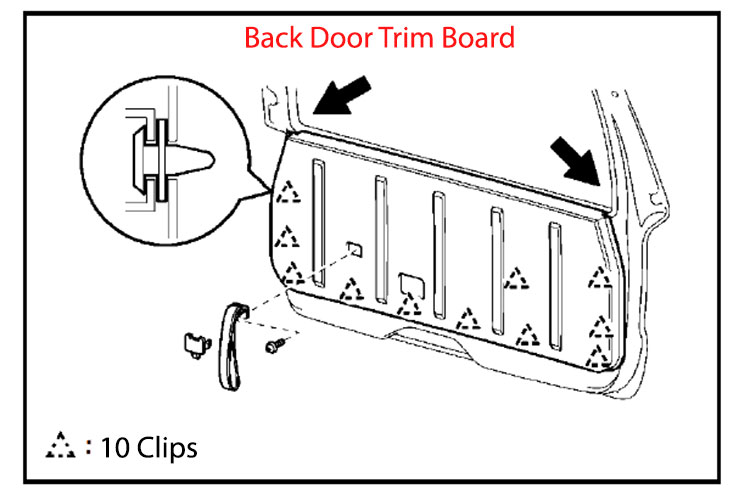
Back Door Trim Board |
Remove the assist strap hole cover |
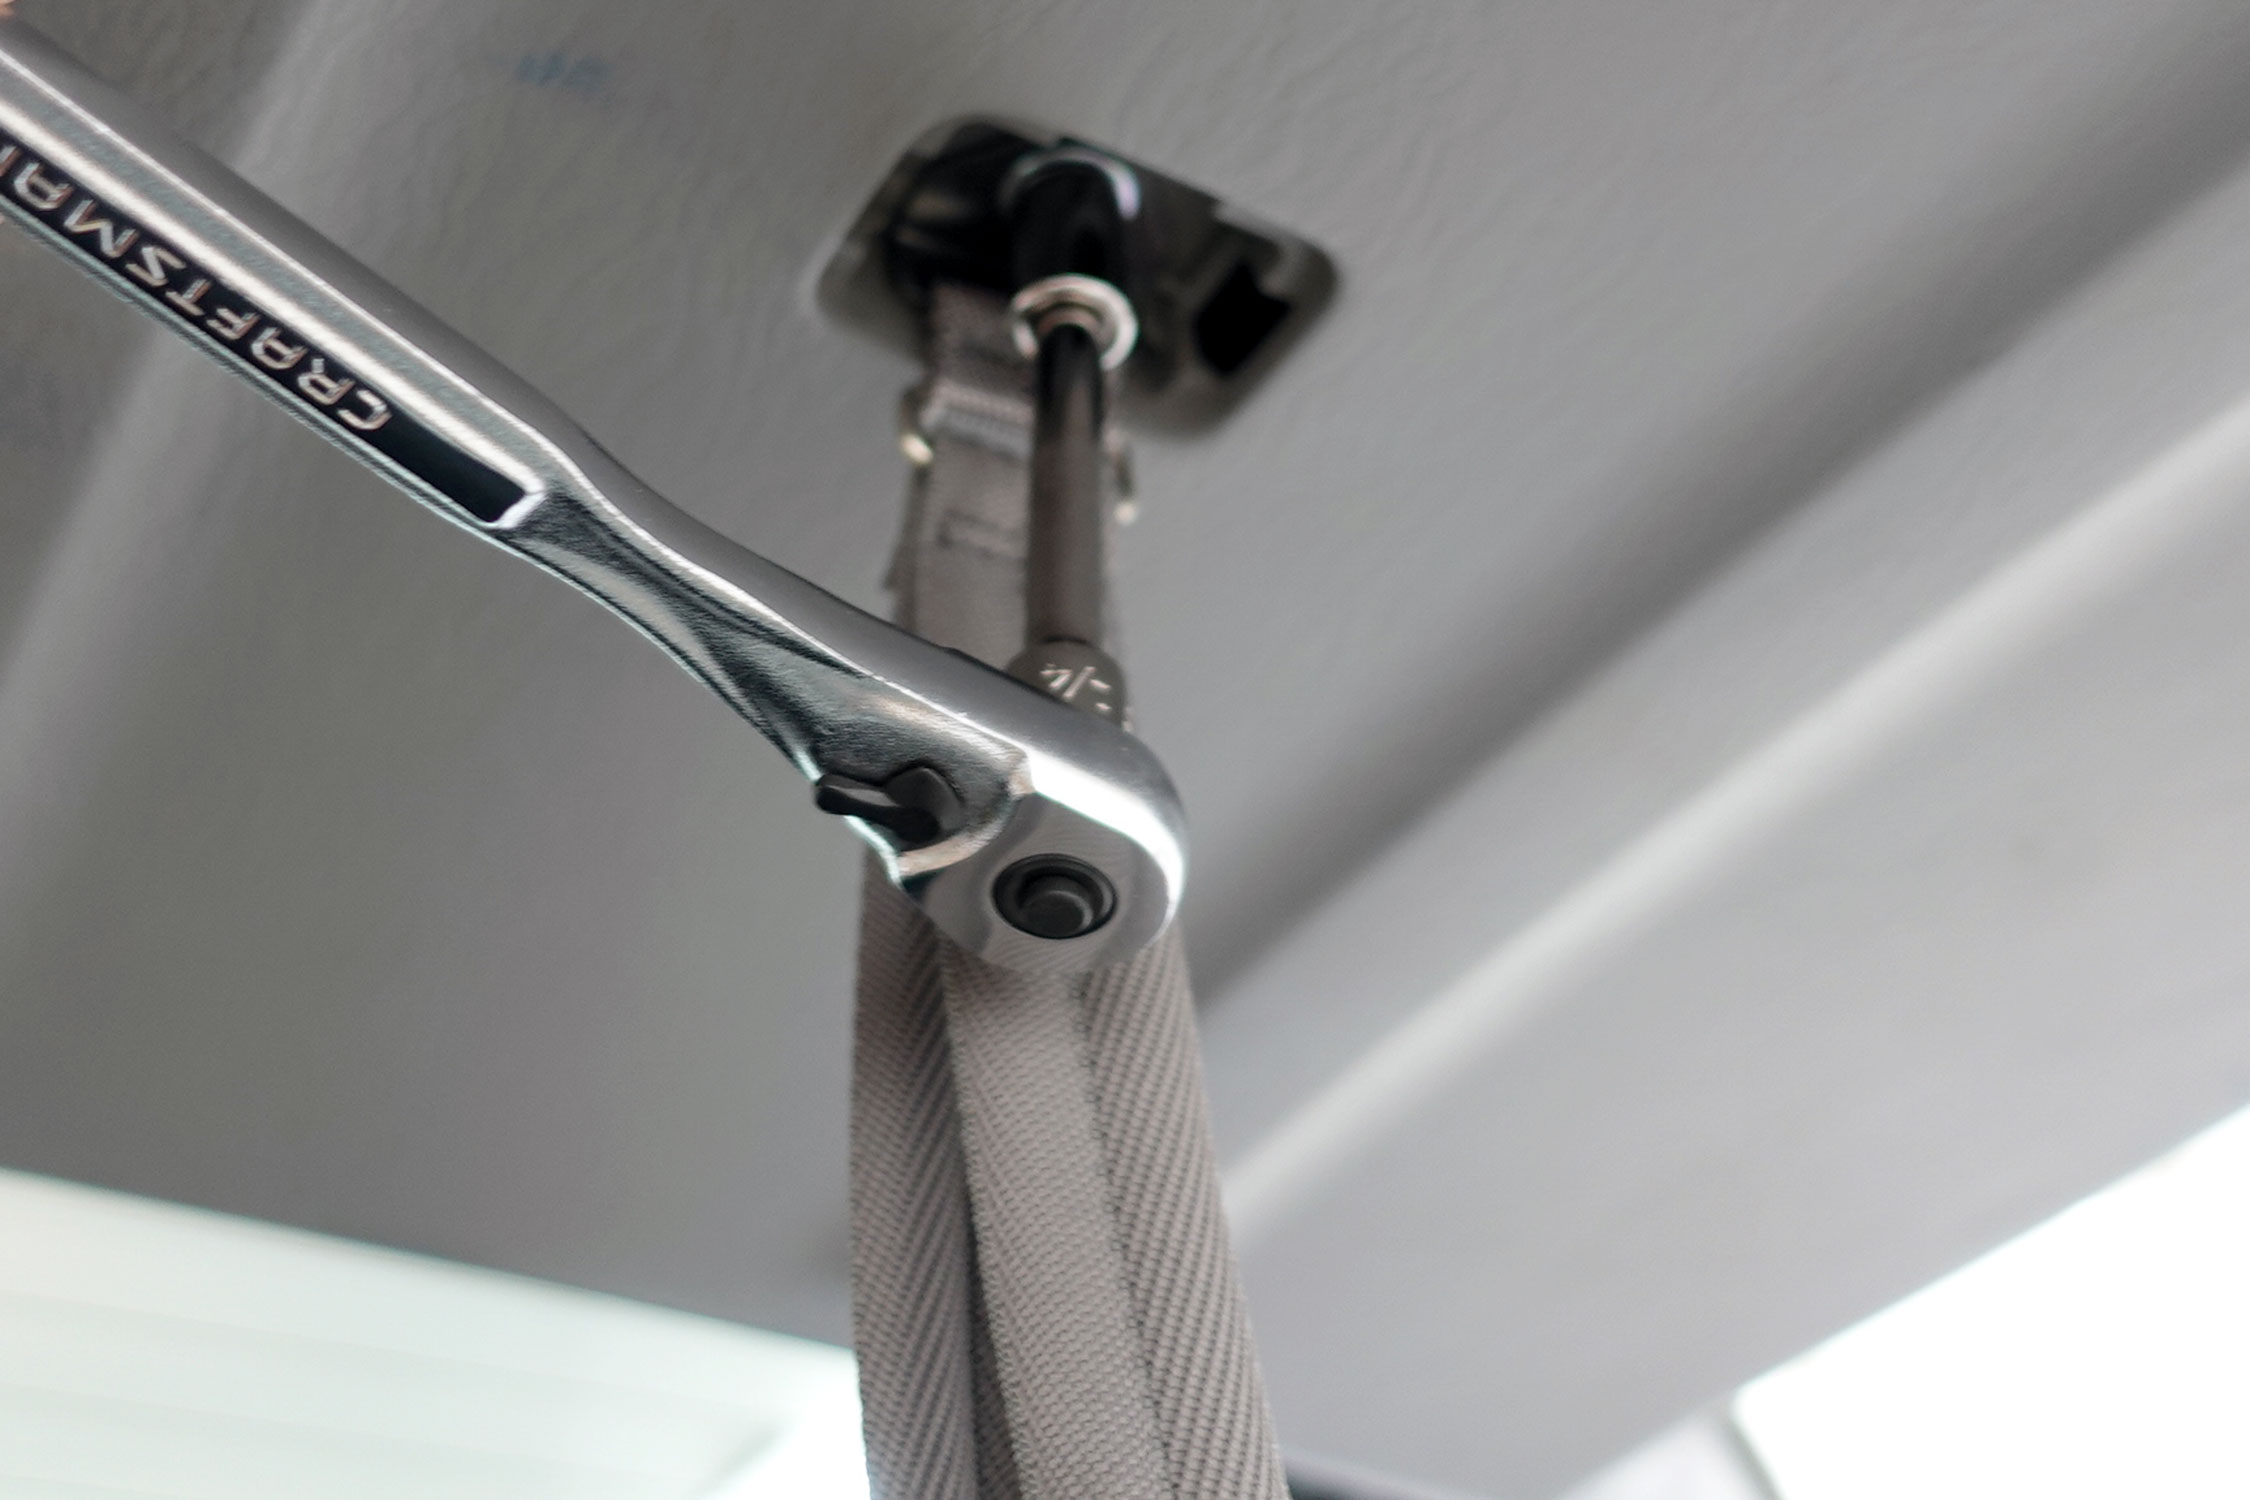
Remove the assist strap |
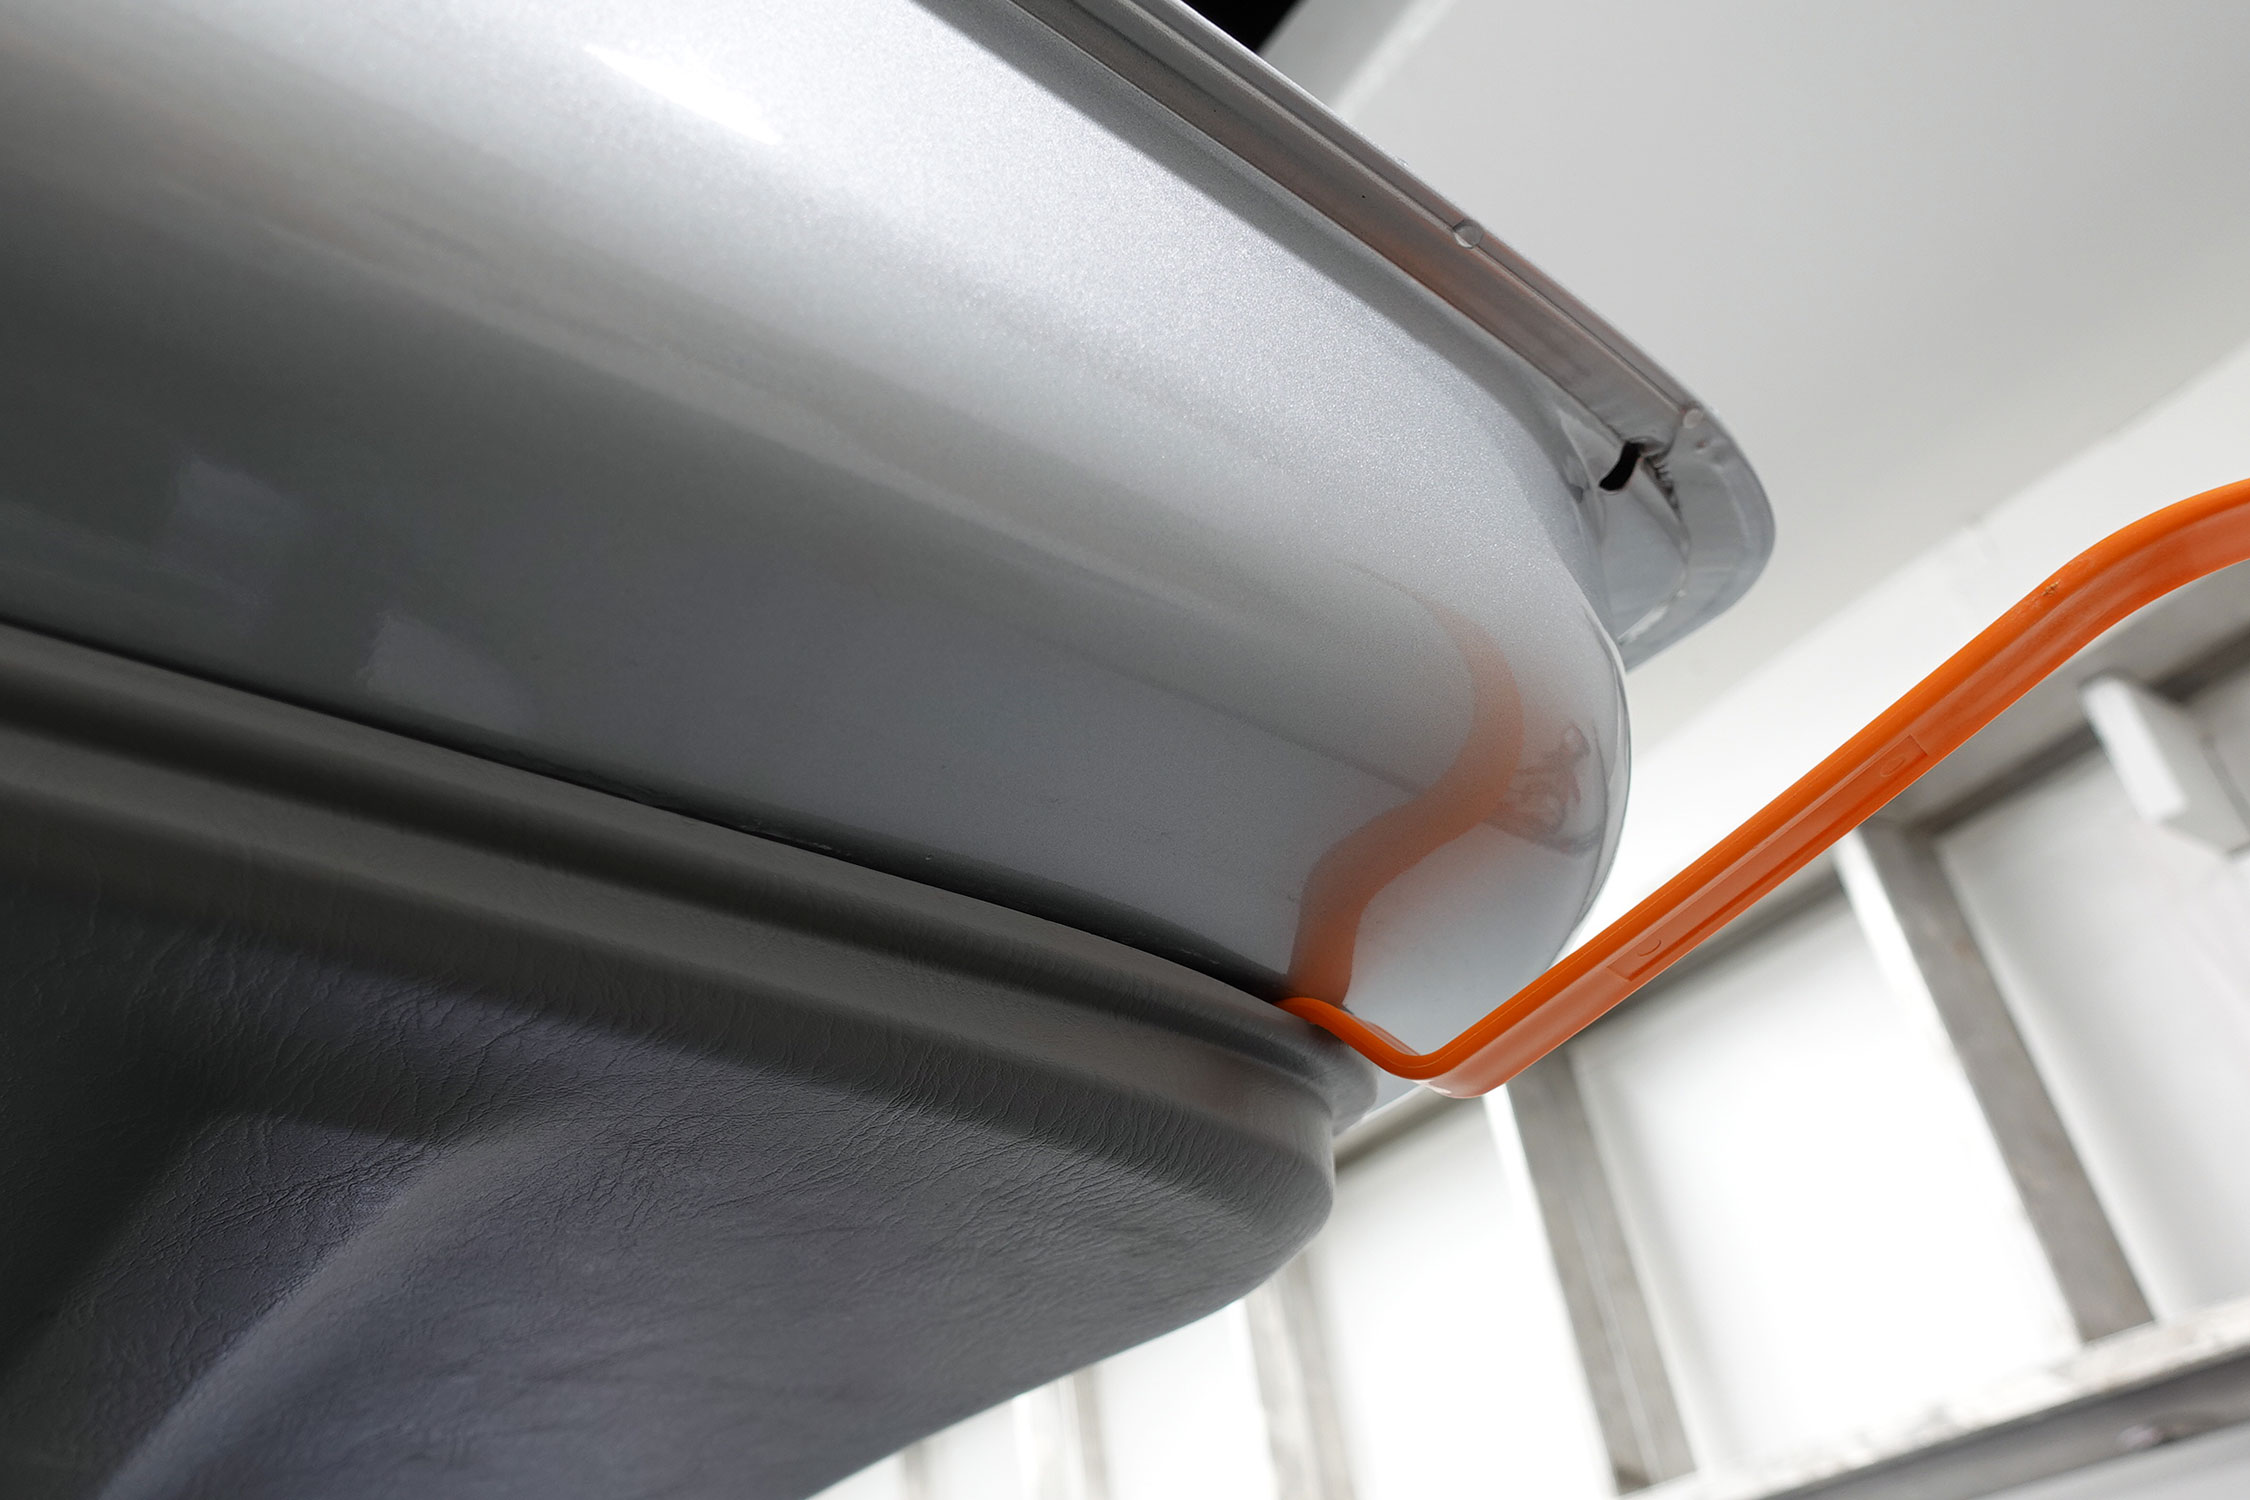
Using the plastic pry tool disengage clips |

Pull down to disengage clips |
Pull down to disengage clips |
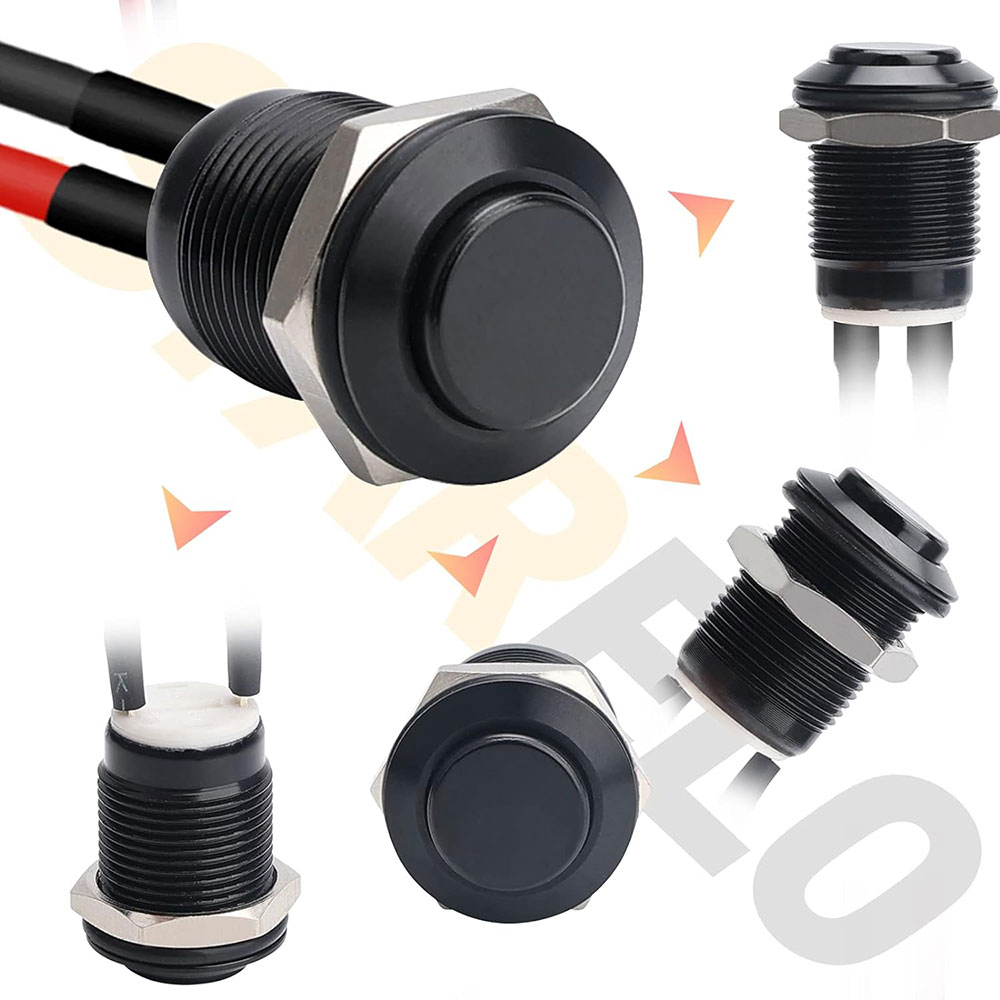
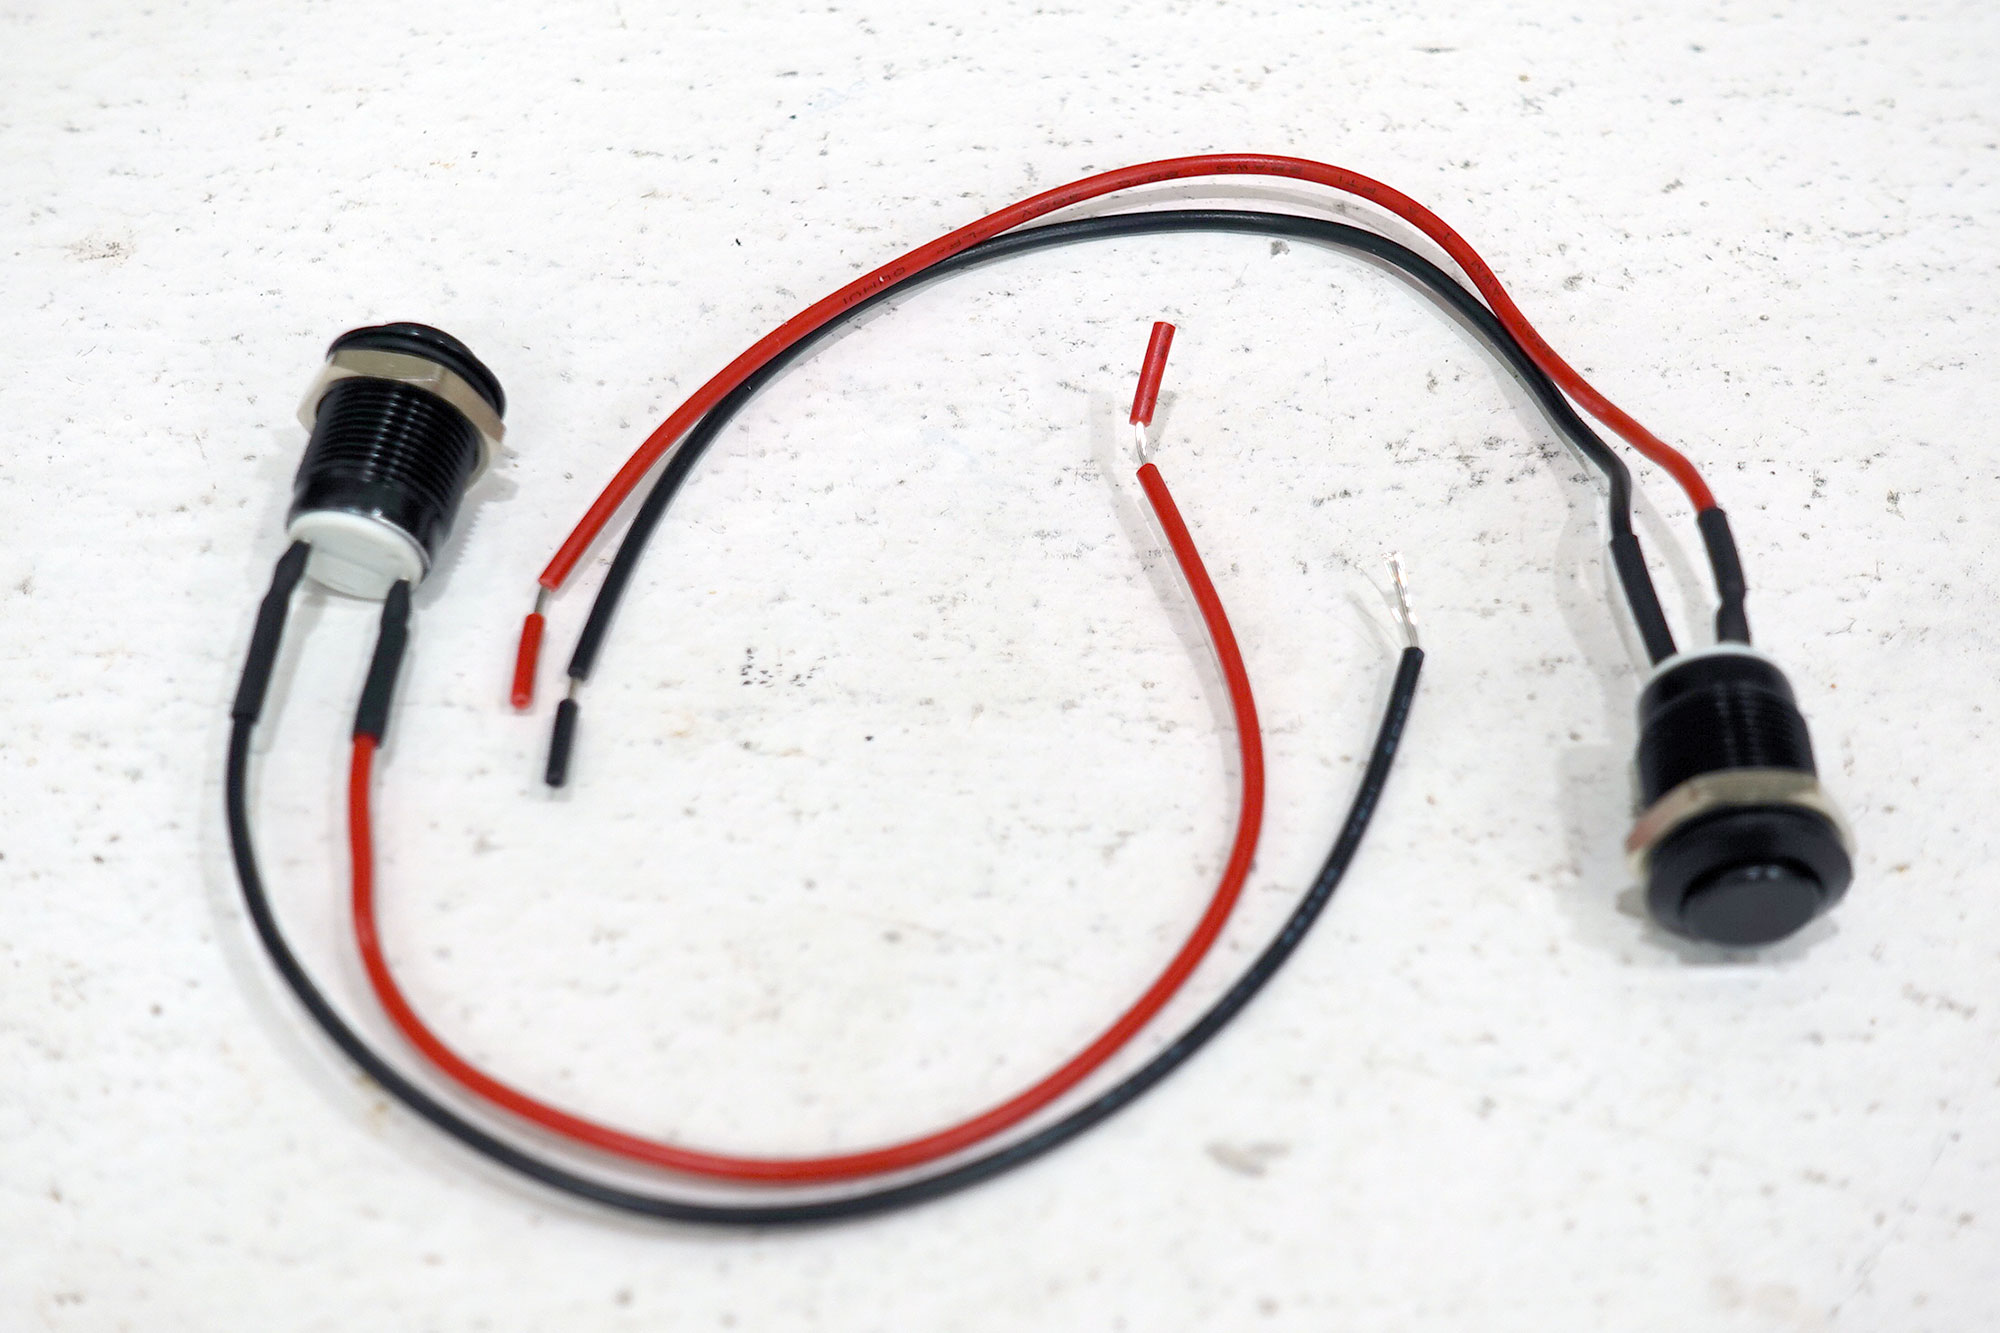
Switch information.
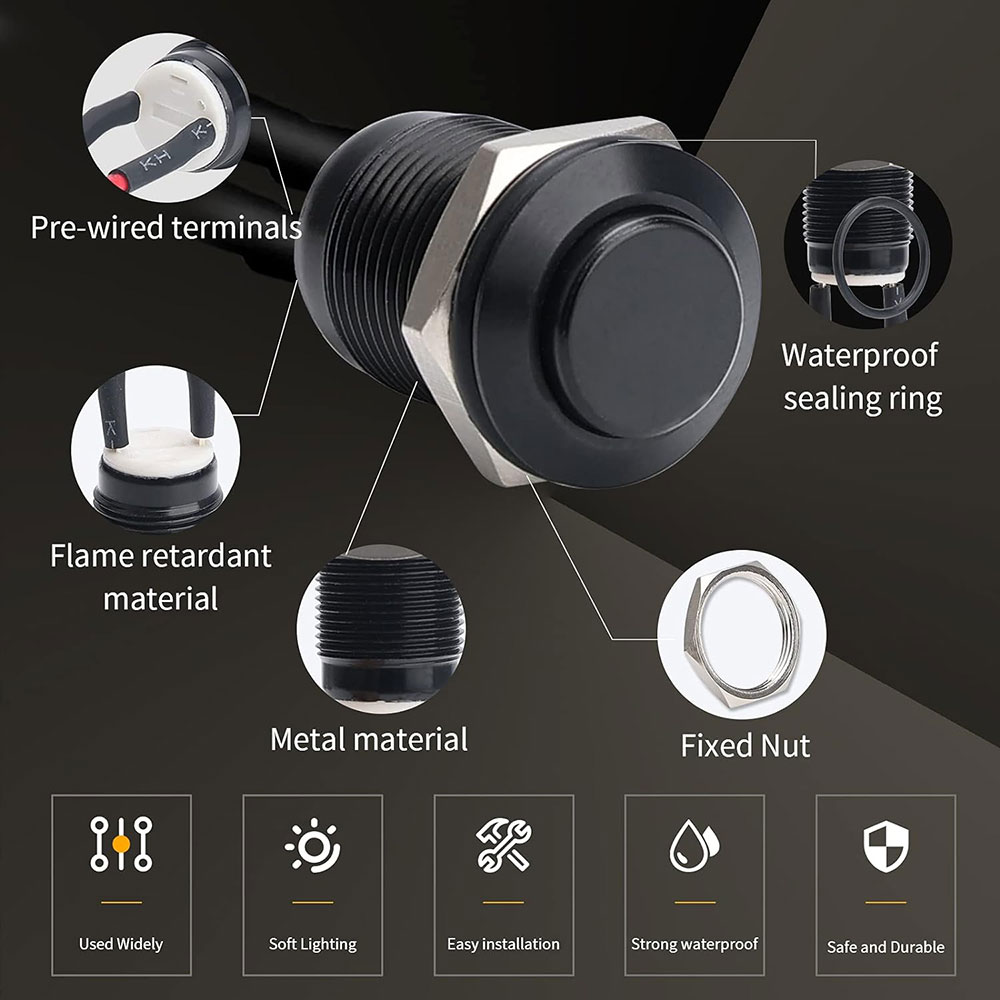
A momentary switch with "normally open" type functionality will be used to activate the hatch release when pressed from inside the vehicle.
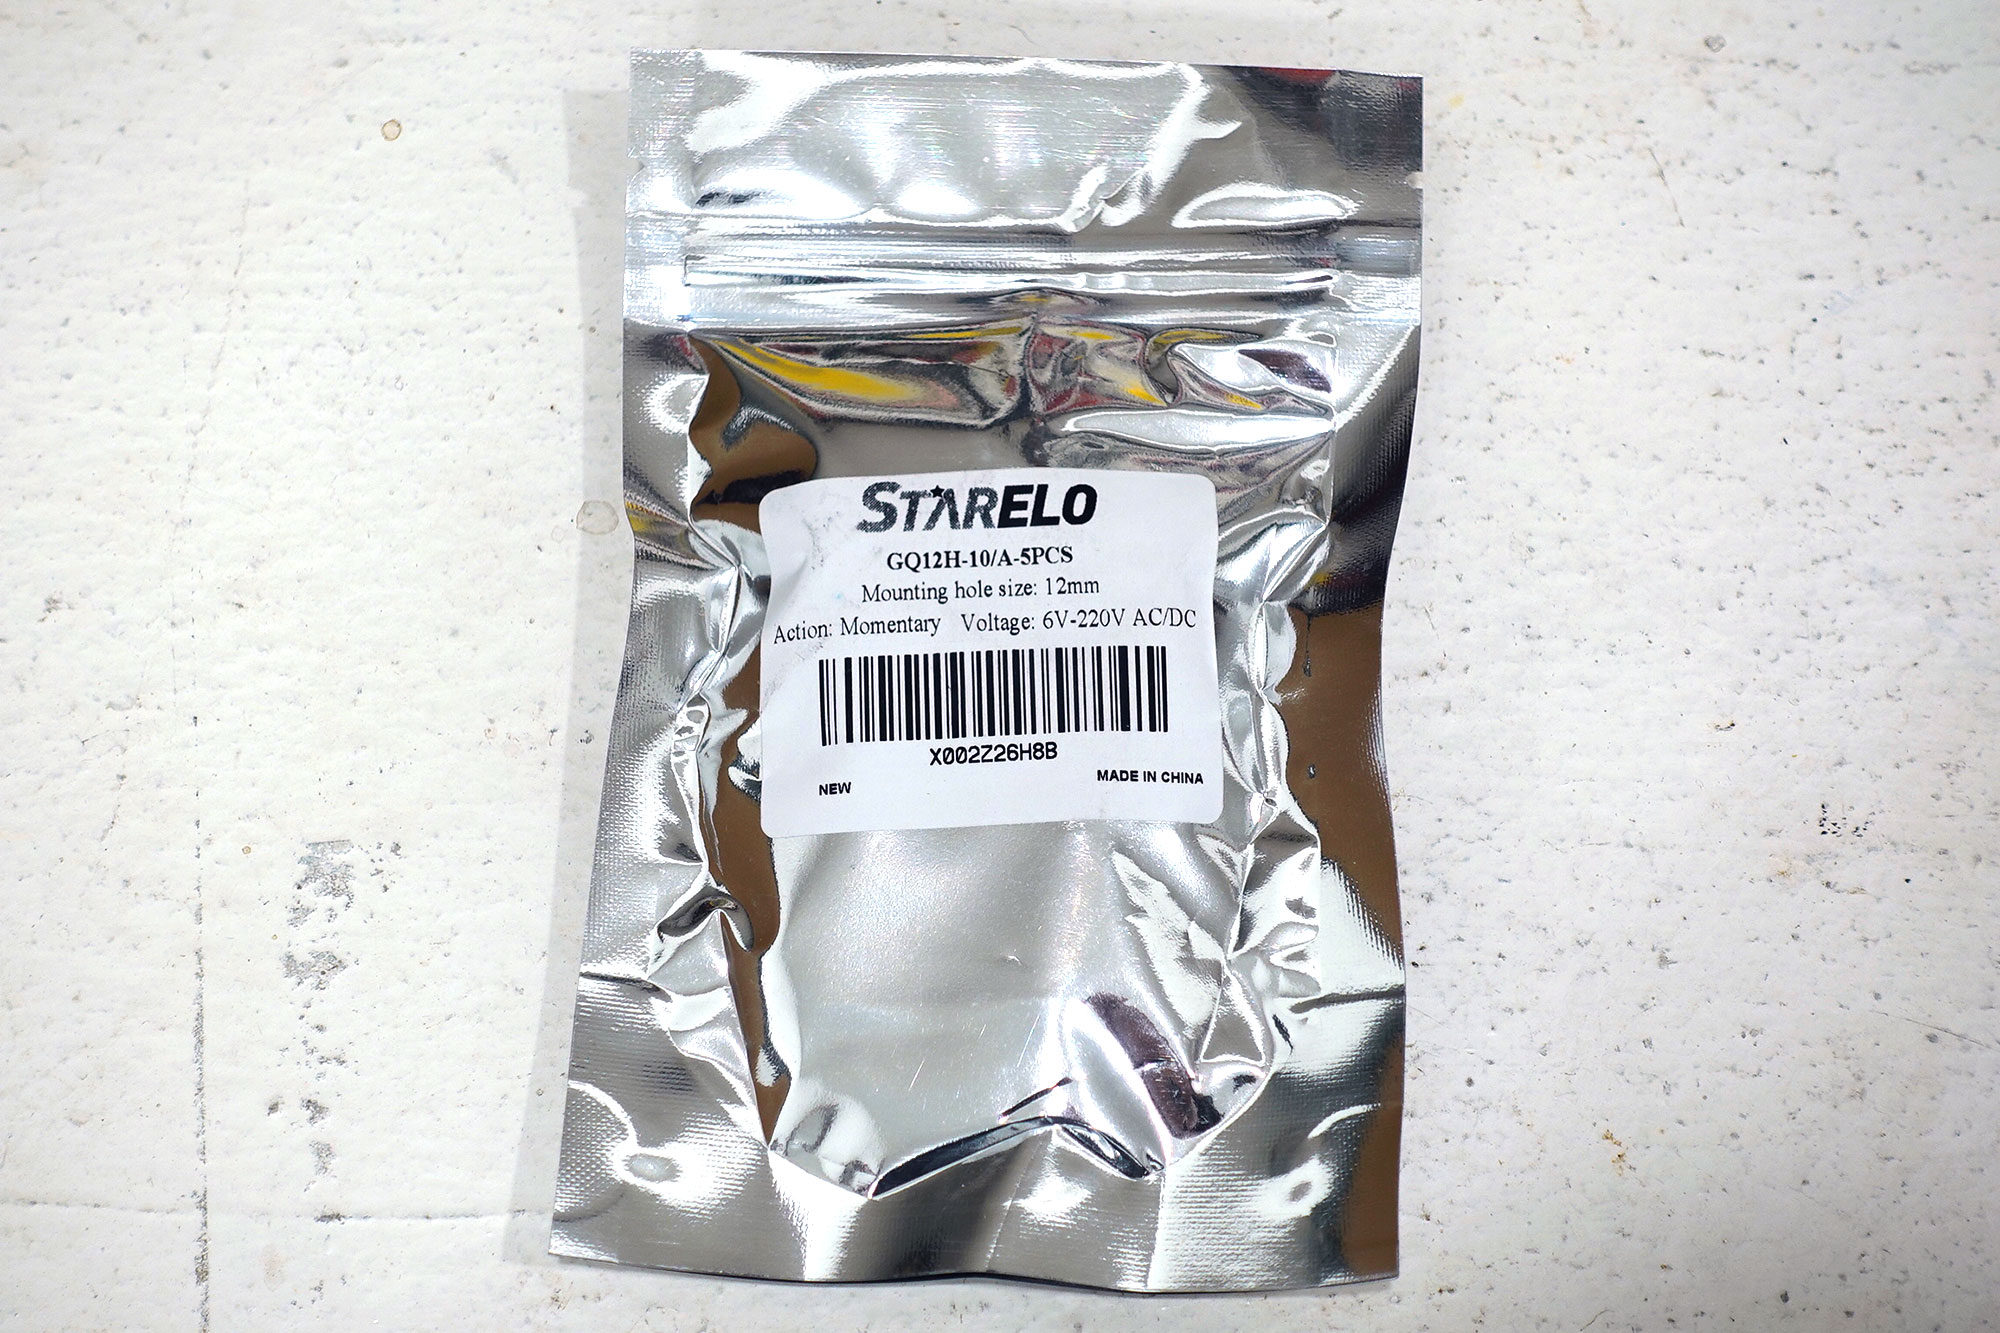
Manufacturer: Starelo
Part #: 12A-B11P-T-5
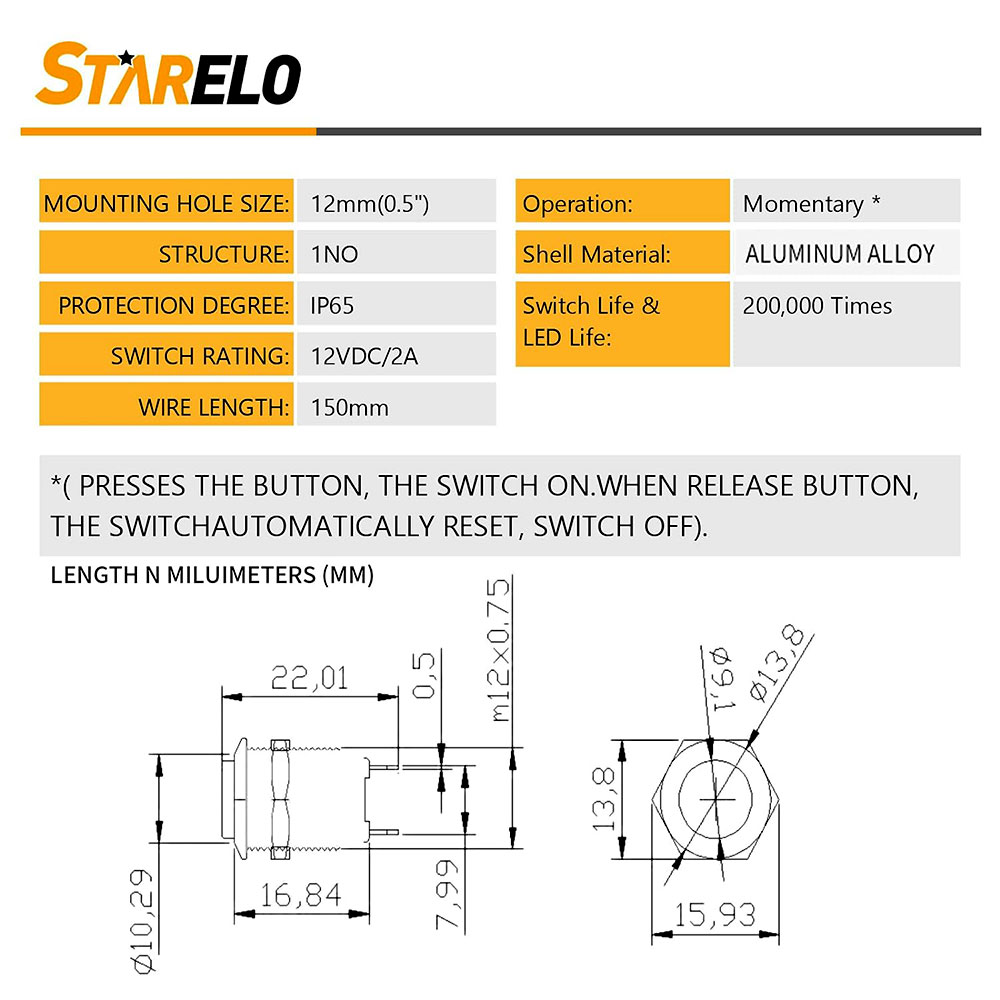
Specifications: 12mm Momentary push button switch with Pre-Wiring without Led.
Usage: The button switch operation type of this product is Momentary, keep pressing and holding the button = ON, hand off the button = OFF).
Switch rating: 12V DC 2A.
Contact Material: Silver alloy.
Mounting hole size: 12mm / 0.50".
Protection Rating: IP65 Waterproof.
Electrical life: 200,000 times.
Illuminated: No.
Starelo Momentary Switch |
Starelo Momentary Switch |
Starelo Momentary Switch |
12V Momentary Switch |
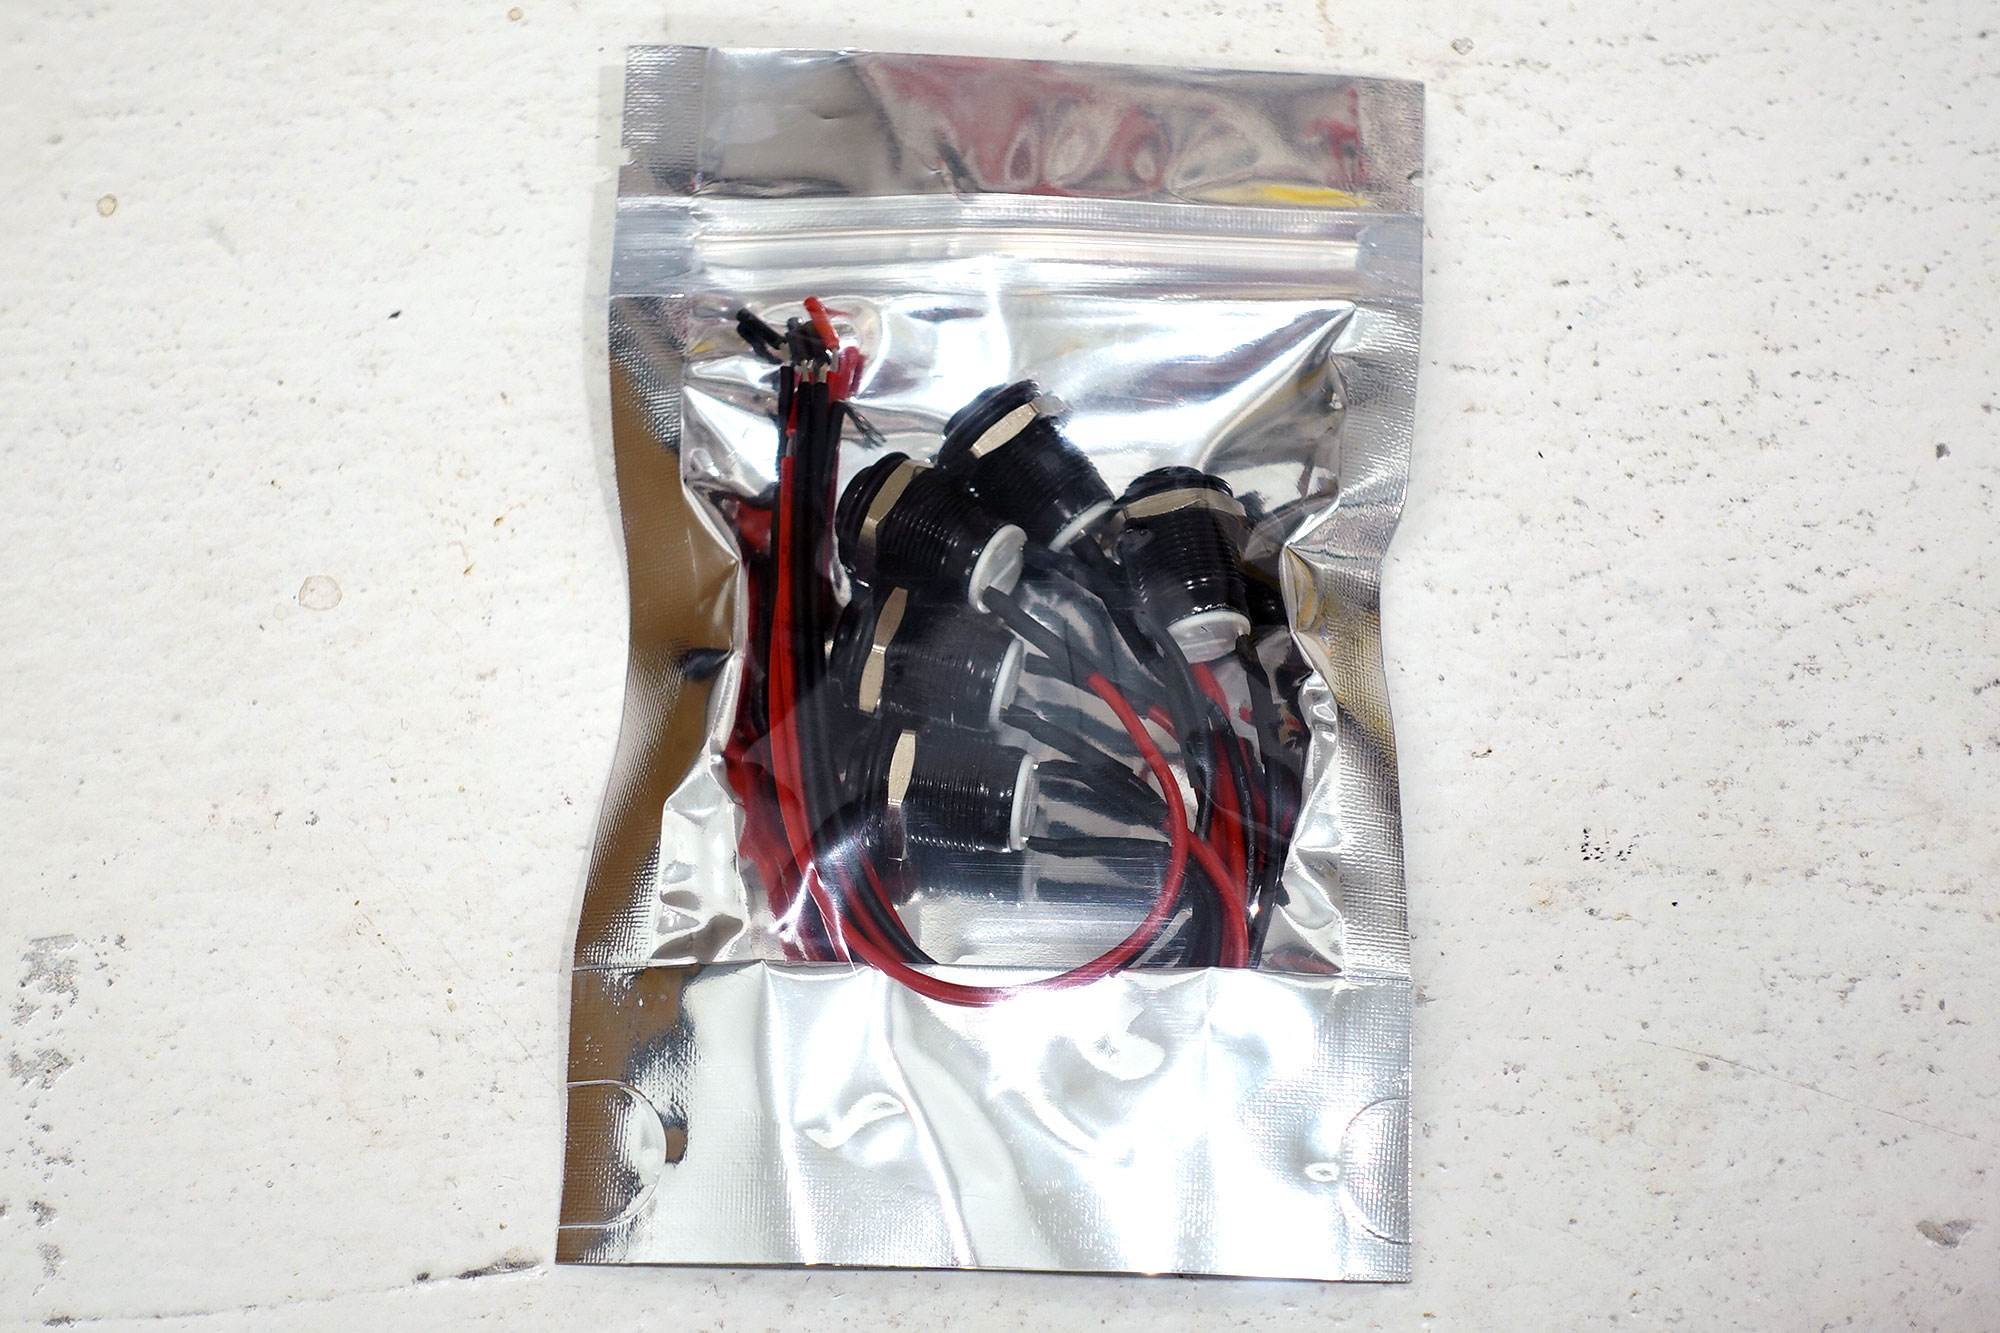
12V Momentary Switch |
12V Momentary Switch |
Mount the switch.
I chose to mount the switch on the back door trim board itself.
Using a step drill bit, I bored a hole 1/2" in diameter in the desired location.
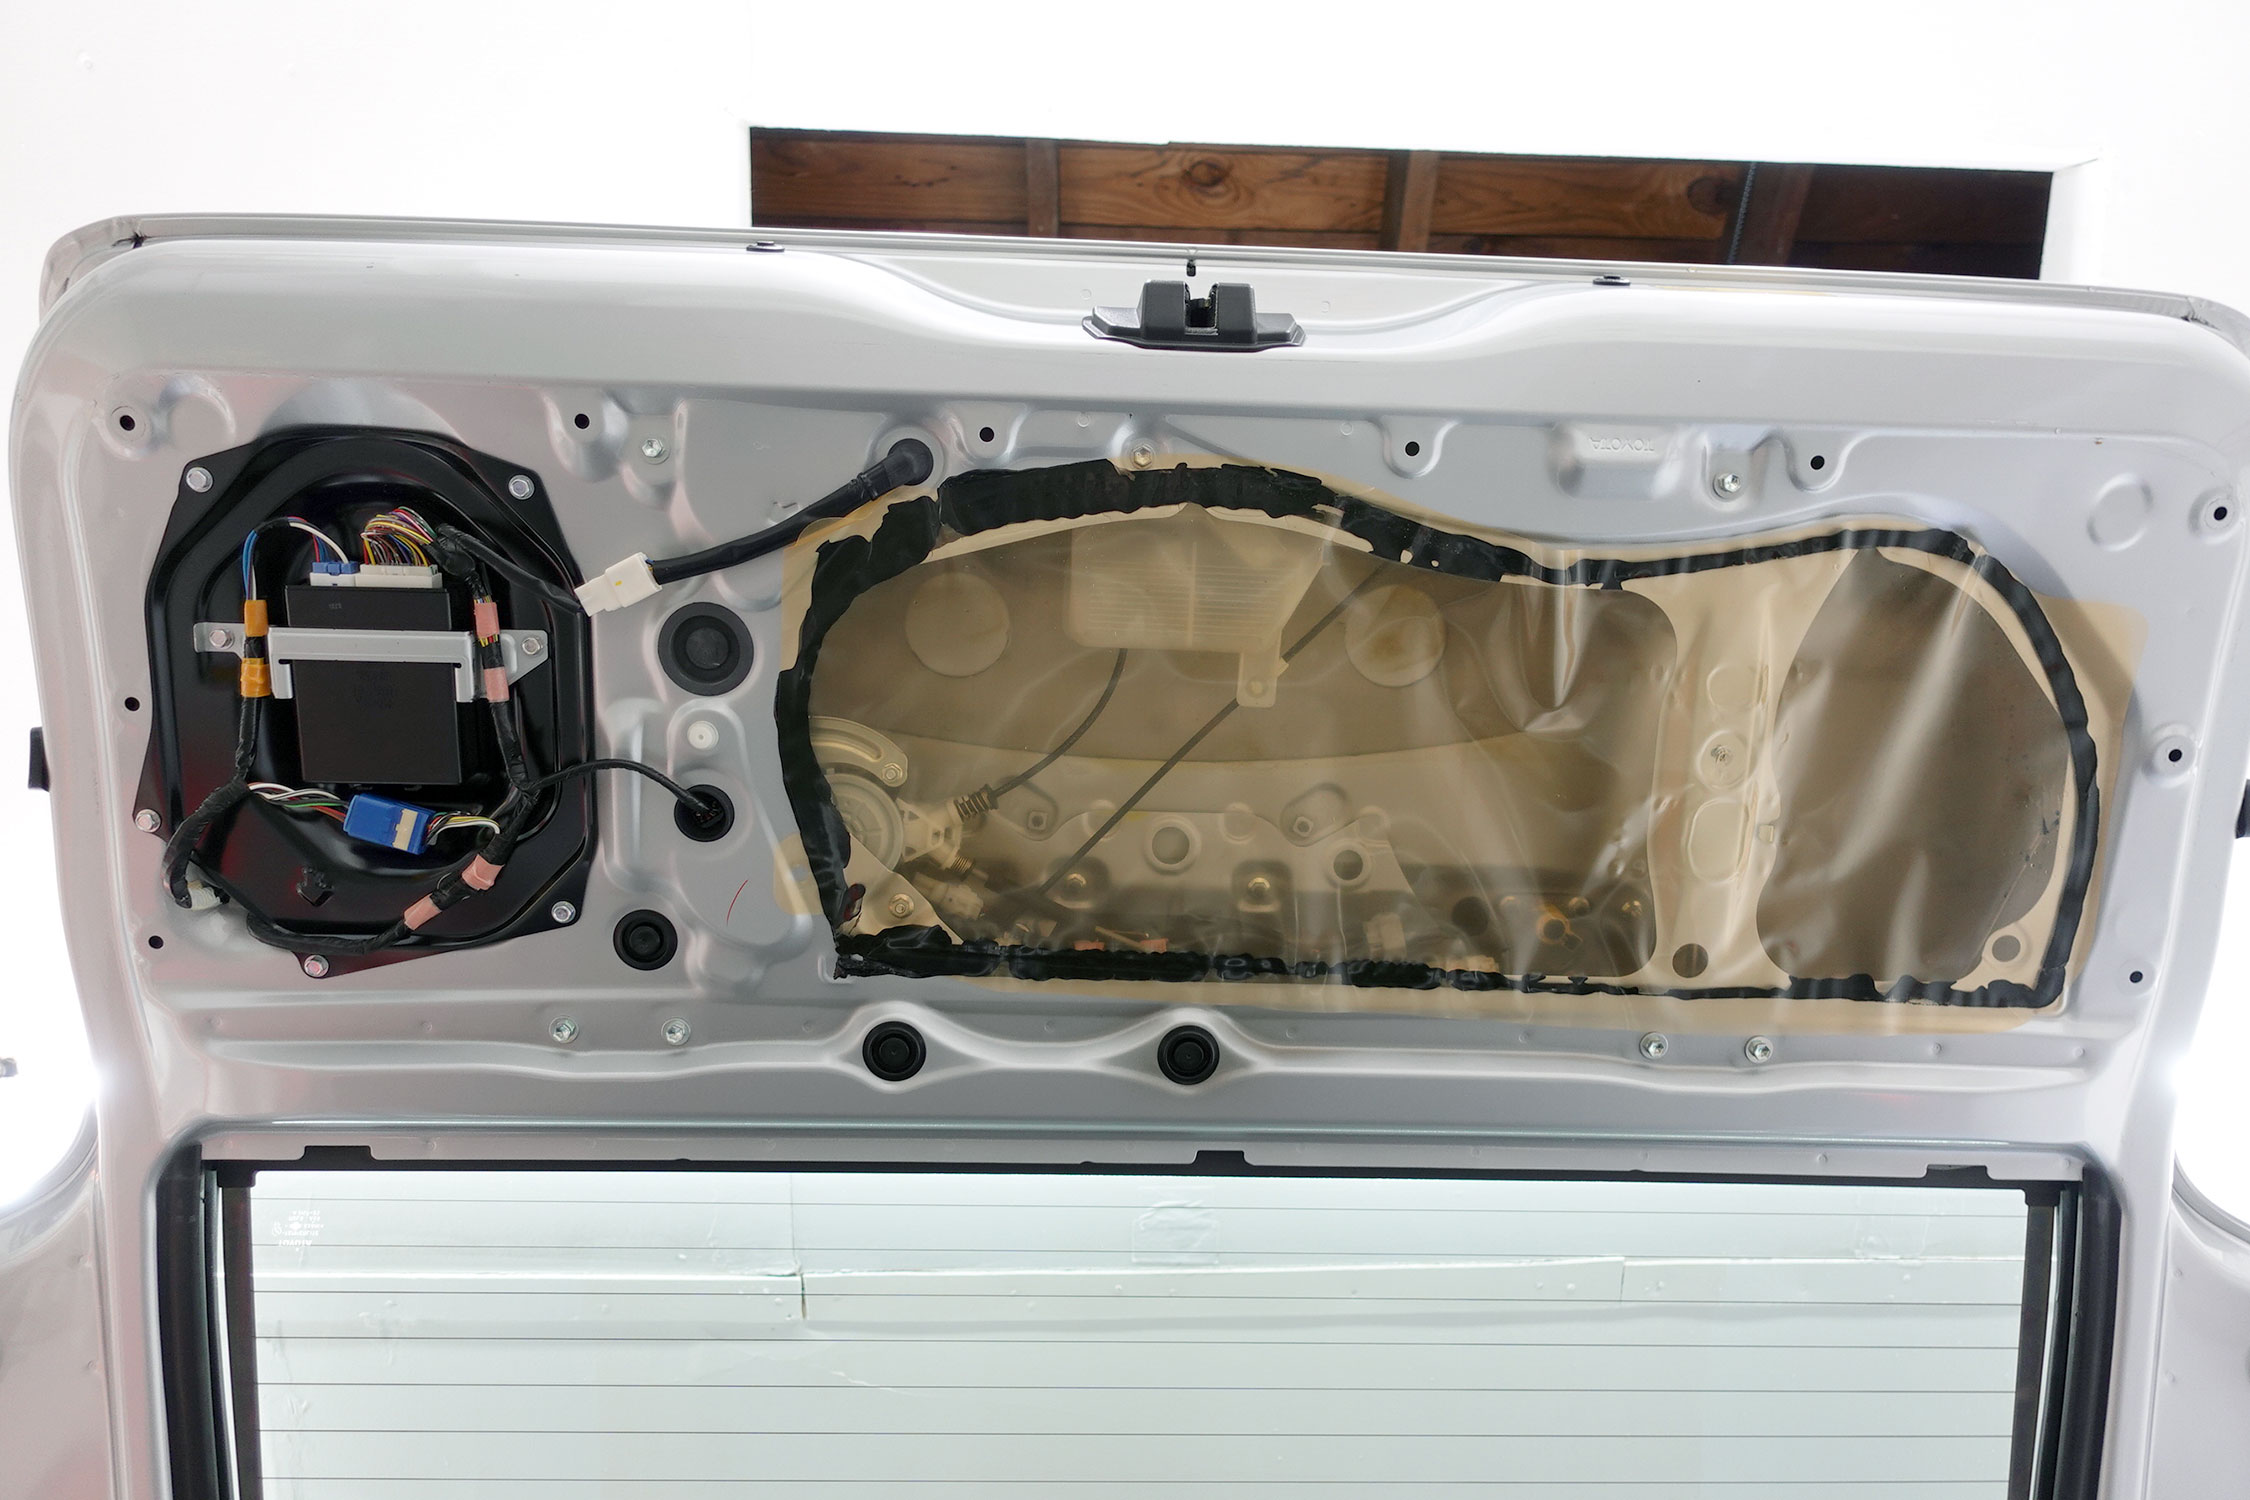
Tap into the factory wiring.
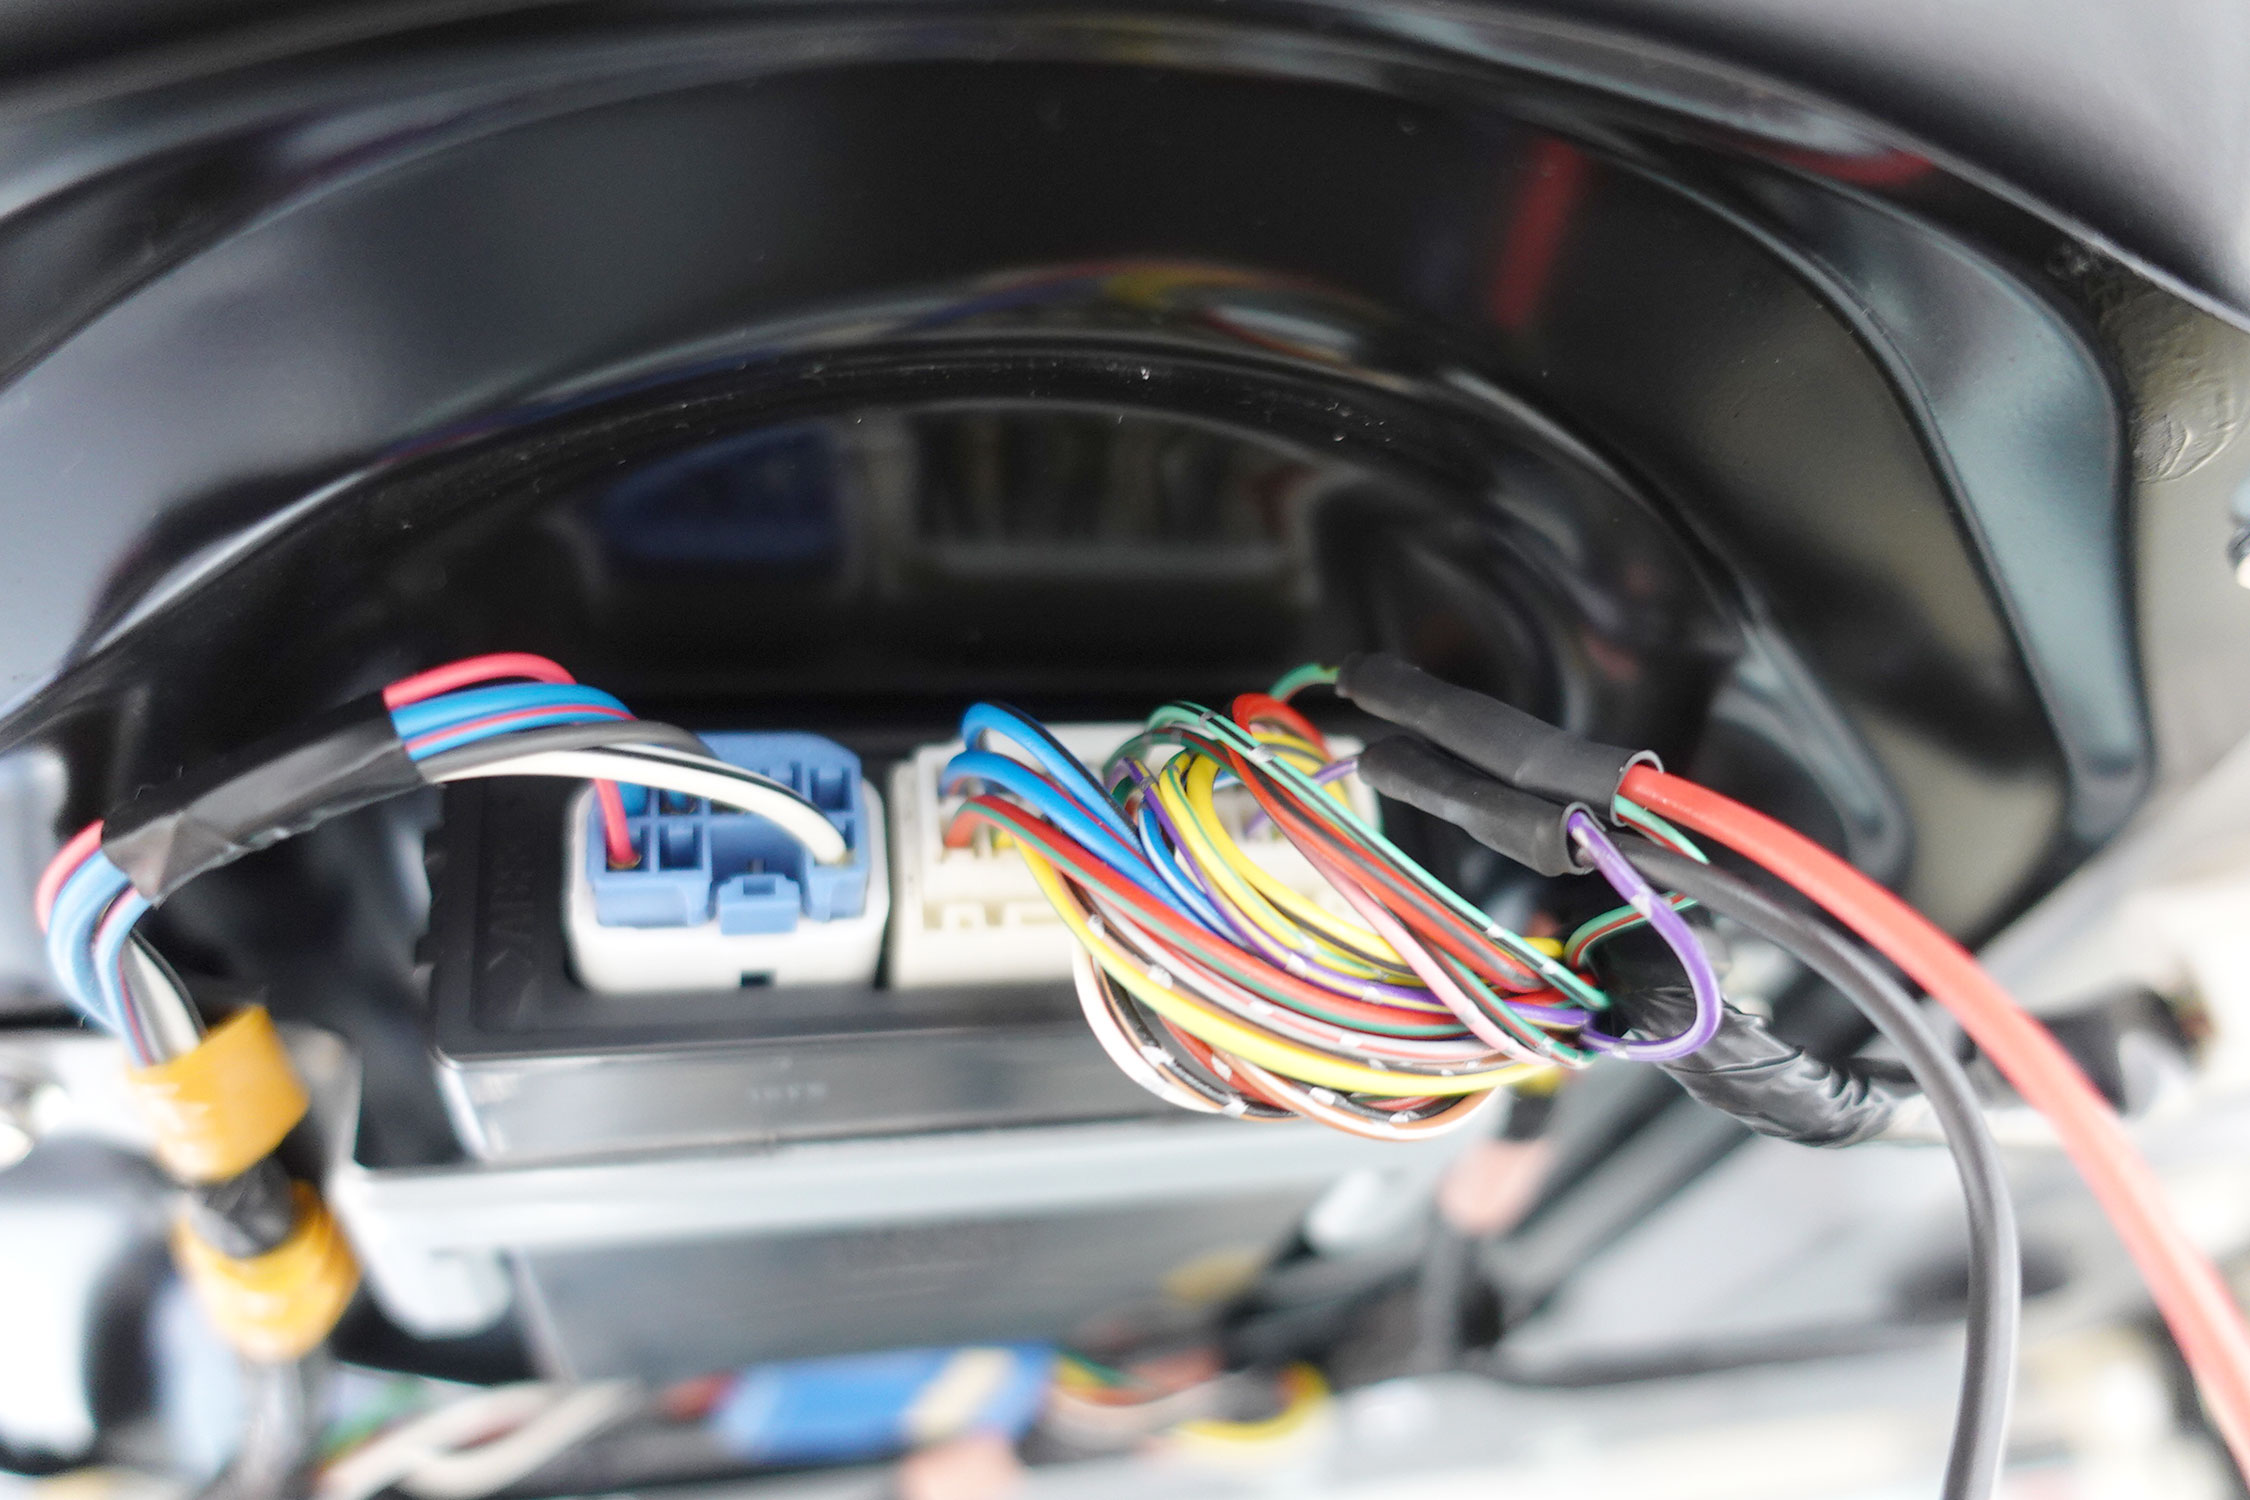
Locate the B9 Connector at the Back Door ECU which is located inside the rear hatch.
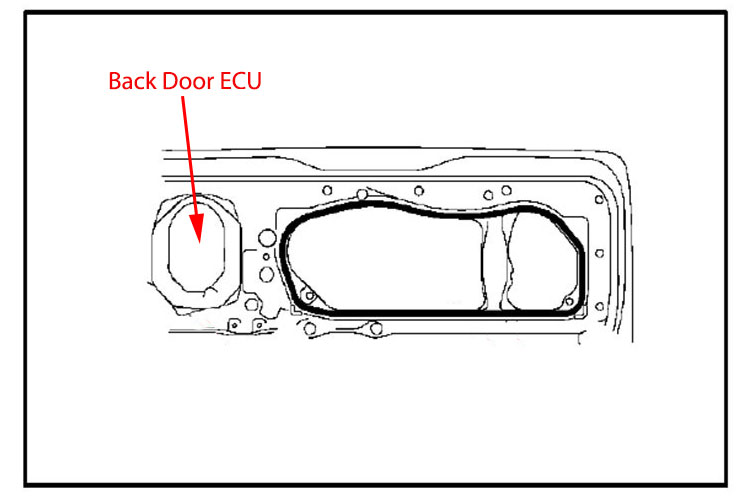
Back Door ECU Location |
Back Door ECU Location |

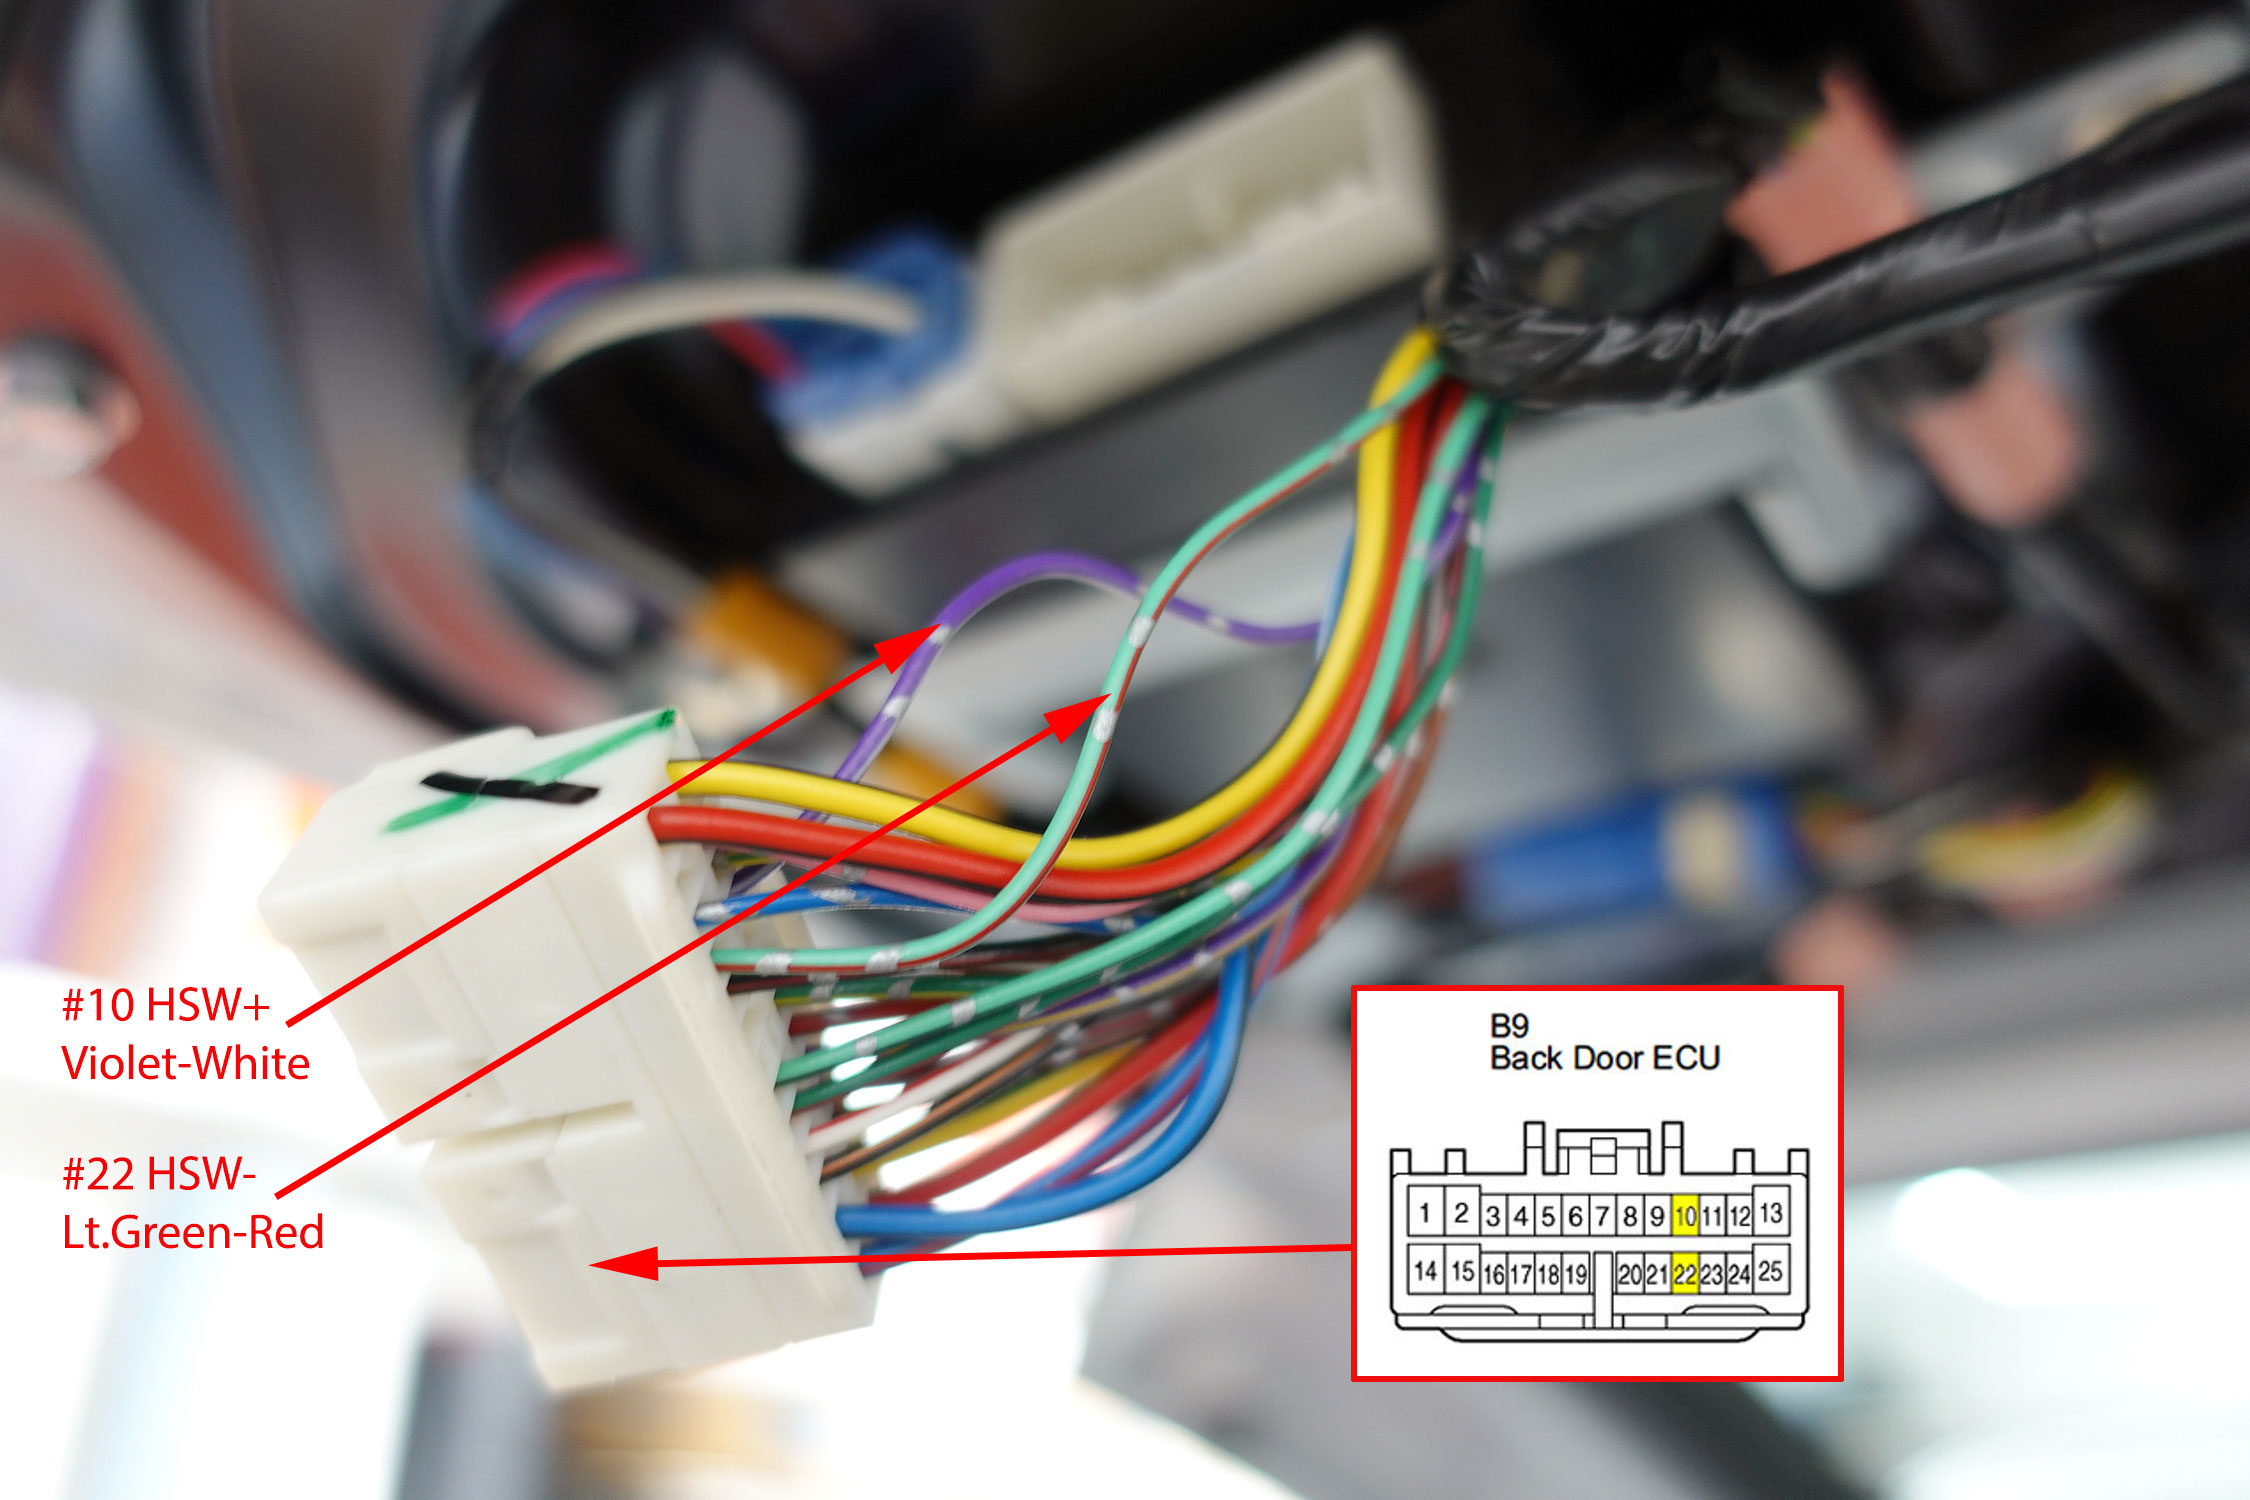
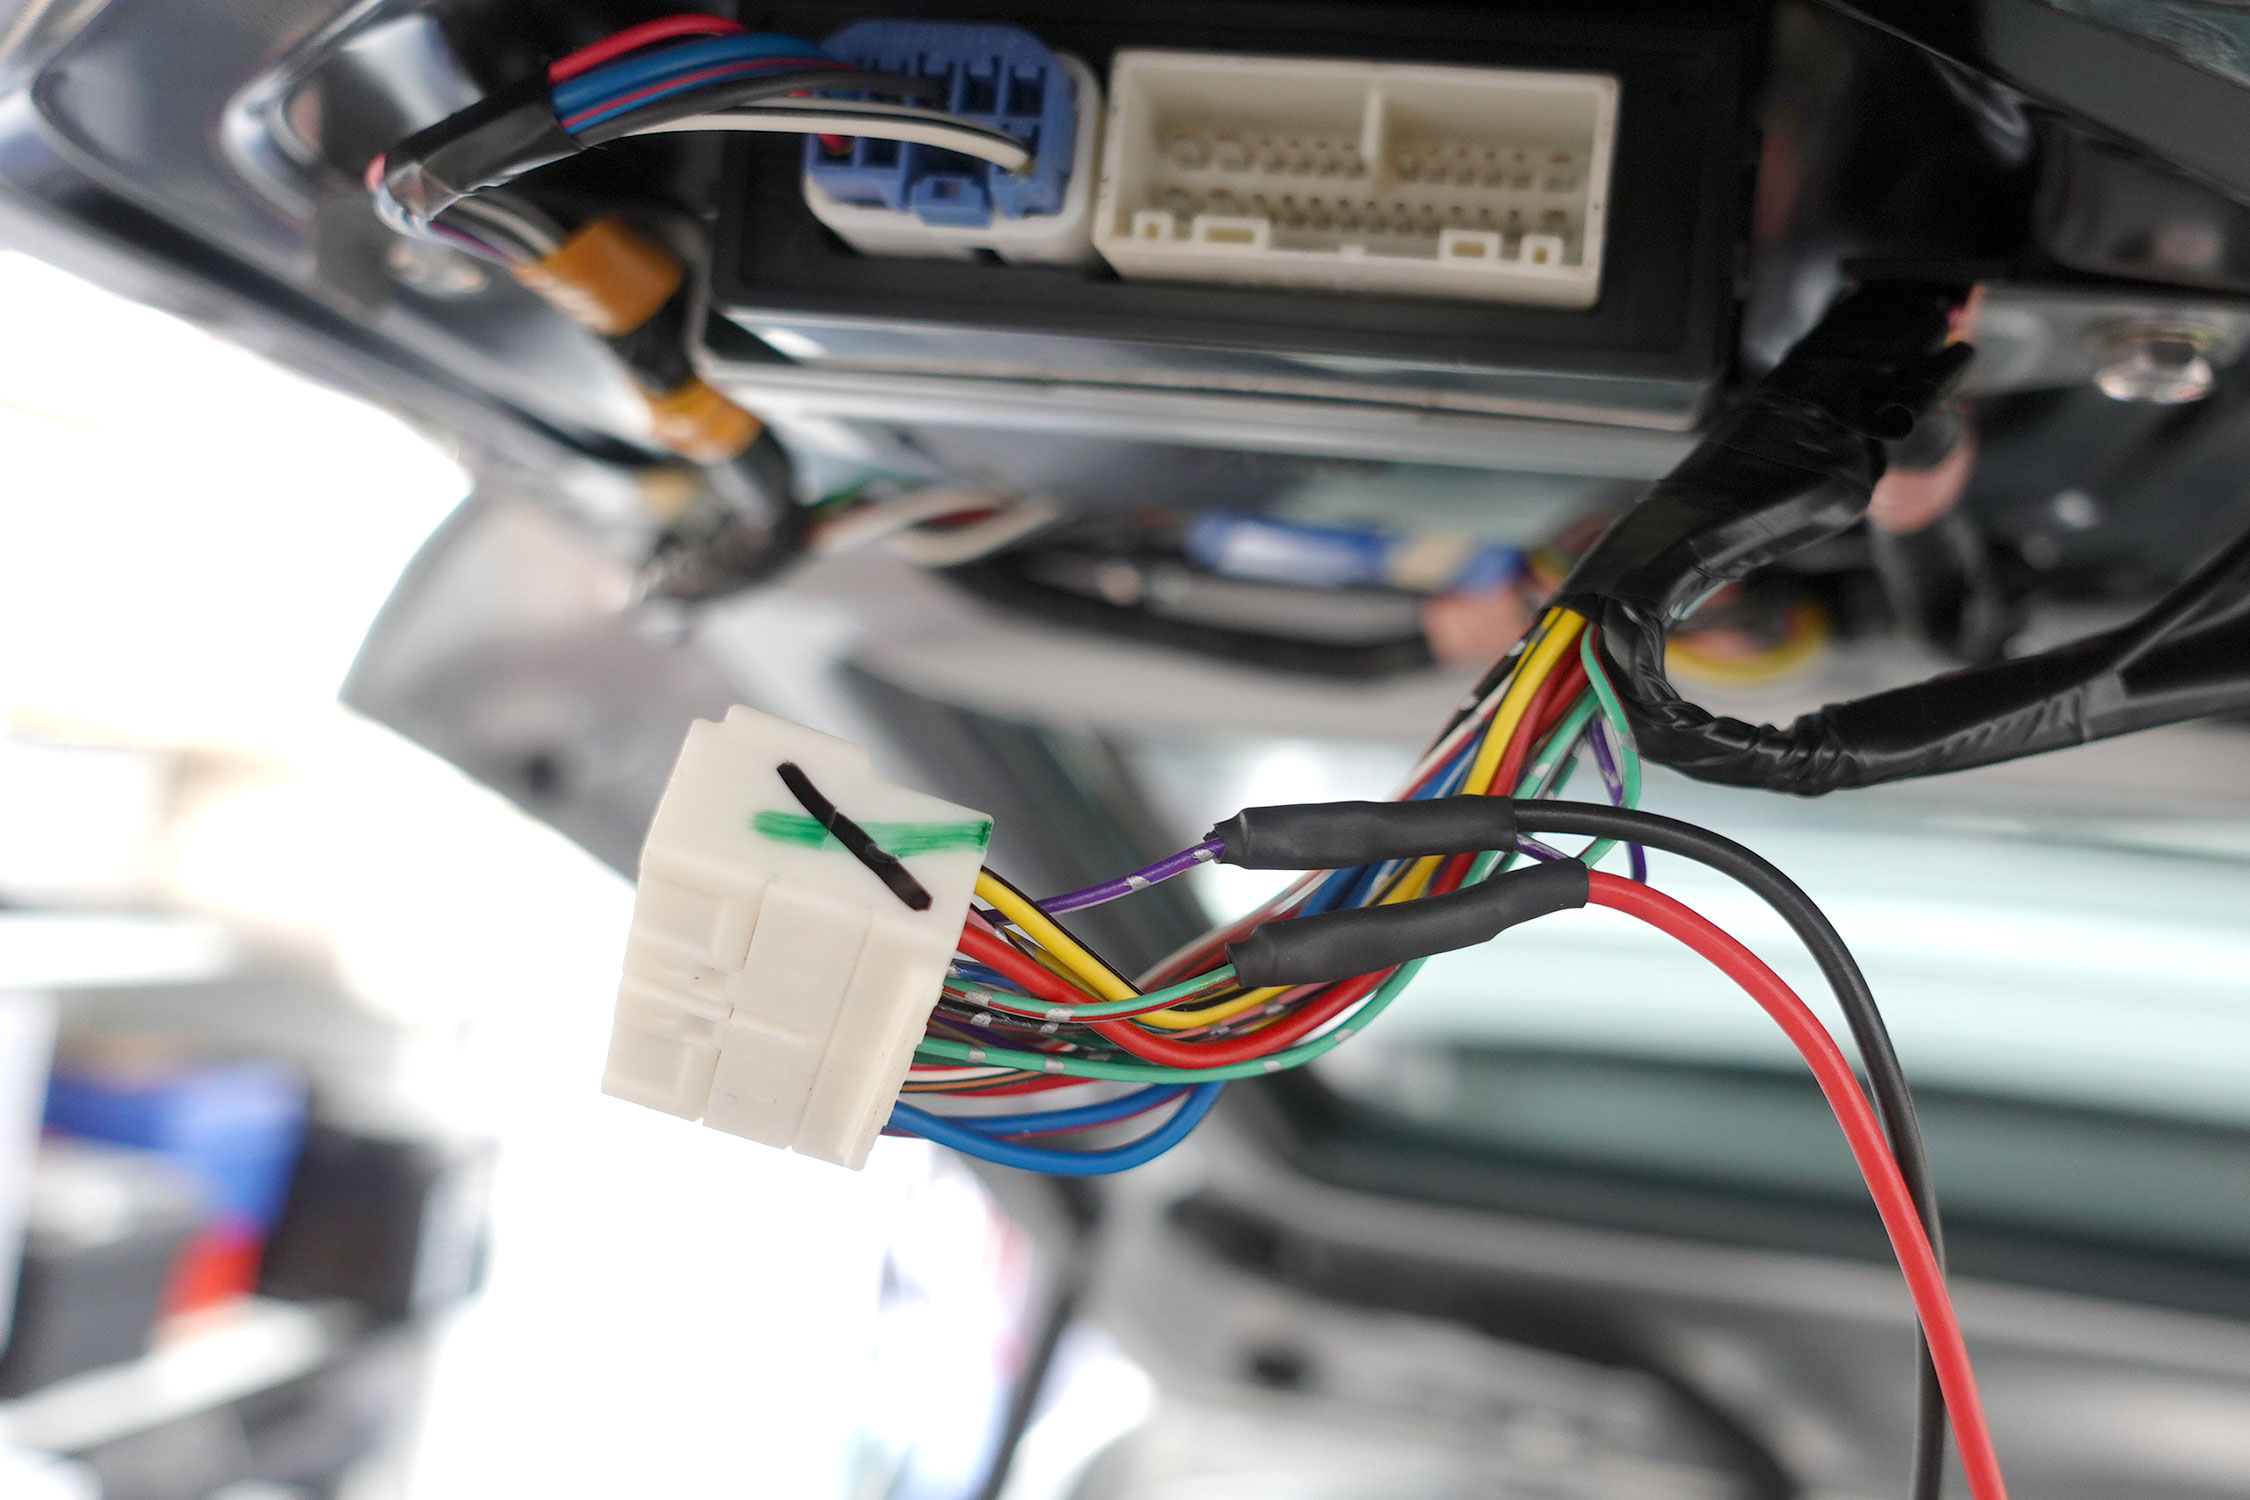
B9 Connector at the Back Door ECU |
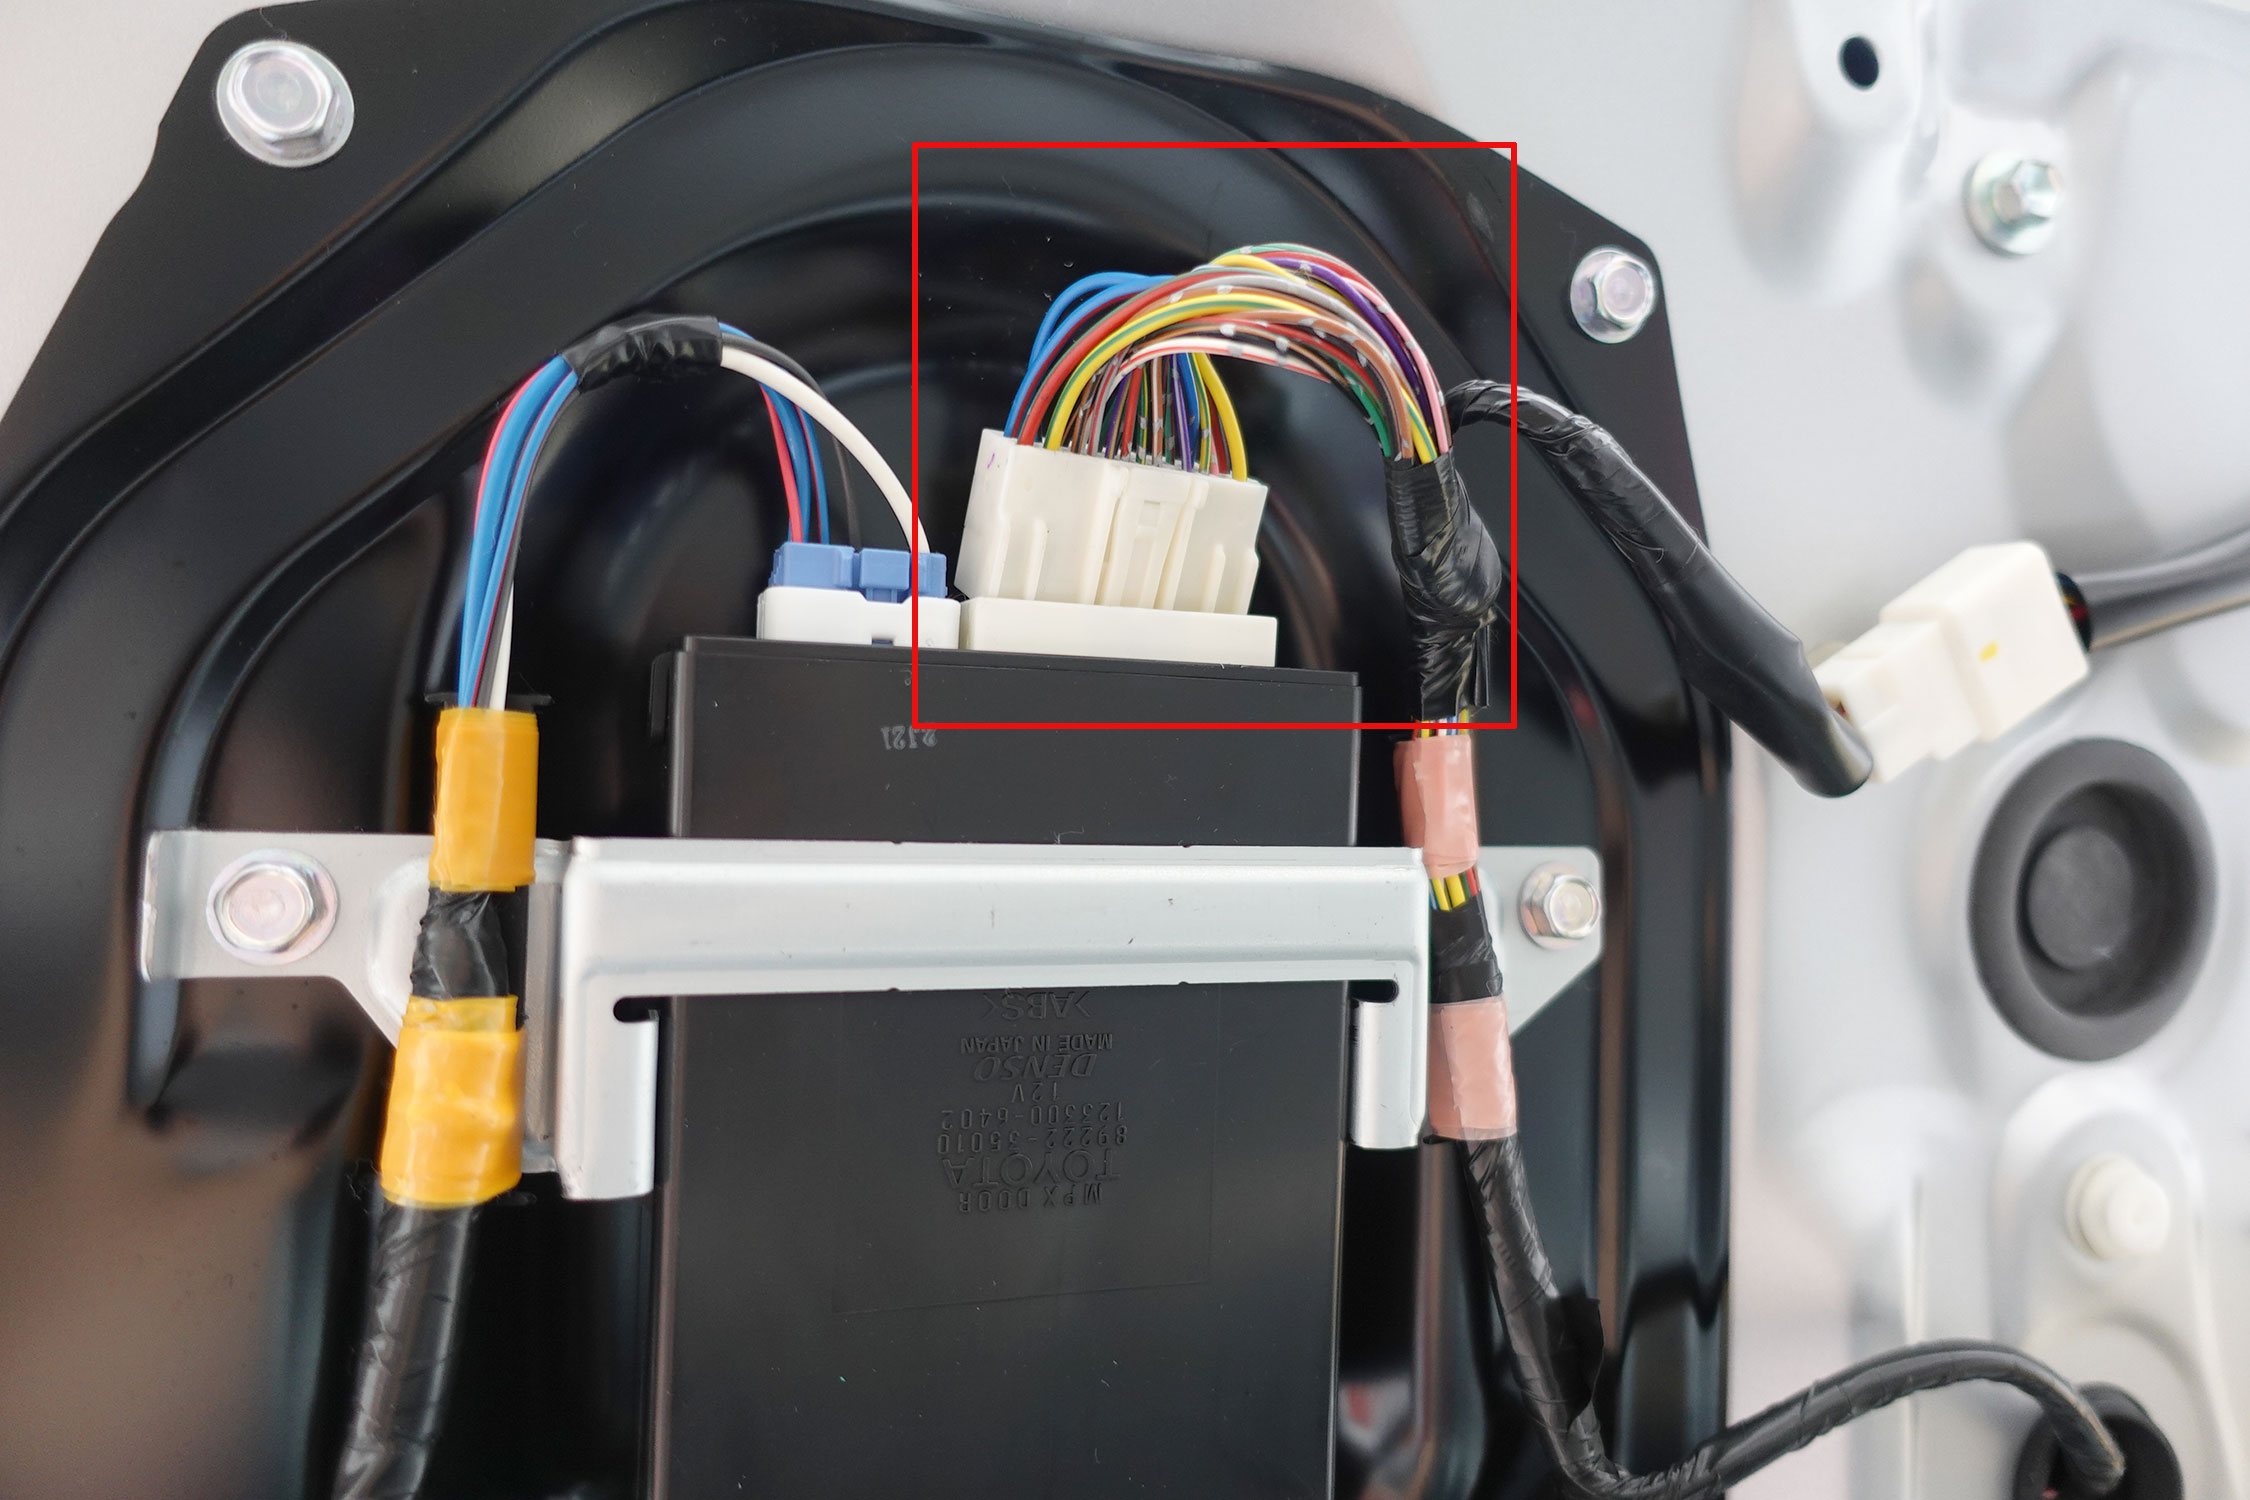
B9 Connector at the Back Door ECU |
Identify the pin #10 HSW+ (Violet-White) and #22 HSW- (Lt.Green-Red) wires.
These are the wires that when connected together via pressing the factory back door opener switch,
tell the back door ECU to pop the rear hatch door open if it is unlocked.
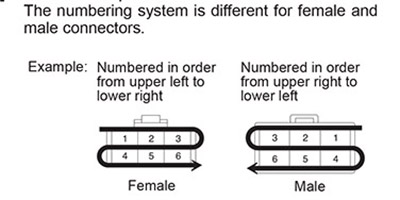
Pin Numbering System |

Harness Connector |
|
We need to tap a 12V momentary push button style switch in parallel with these two wires as shown in the
Interior Hatch Release Mod Schematic I have created below.
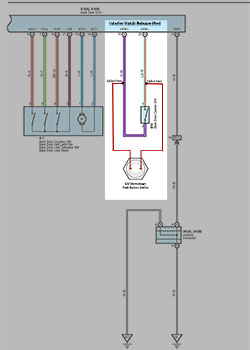
Interior Hatch Release Mod Schematic |
You can use two Blue 3M Scotchlok Electrical IDC (insulation displacement connection) #560 connectors to do the wire tapping.
This style IDC accommodates 18 to 14 AWG solid/stranded wire and is used for two wire PARALLEL splicing like in this situation.
Or you can do what I did which is to cut the factory wires and use crimp style uninsulated butt connectors to make a rock solid connection
and then protect the butt splice with heat shrink tubing.
To tap into the factory wiring I used two 36" lengths of 18awg (American wire gauge) wire, one red and one black.
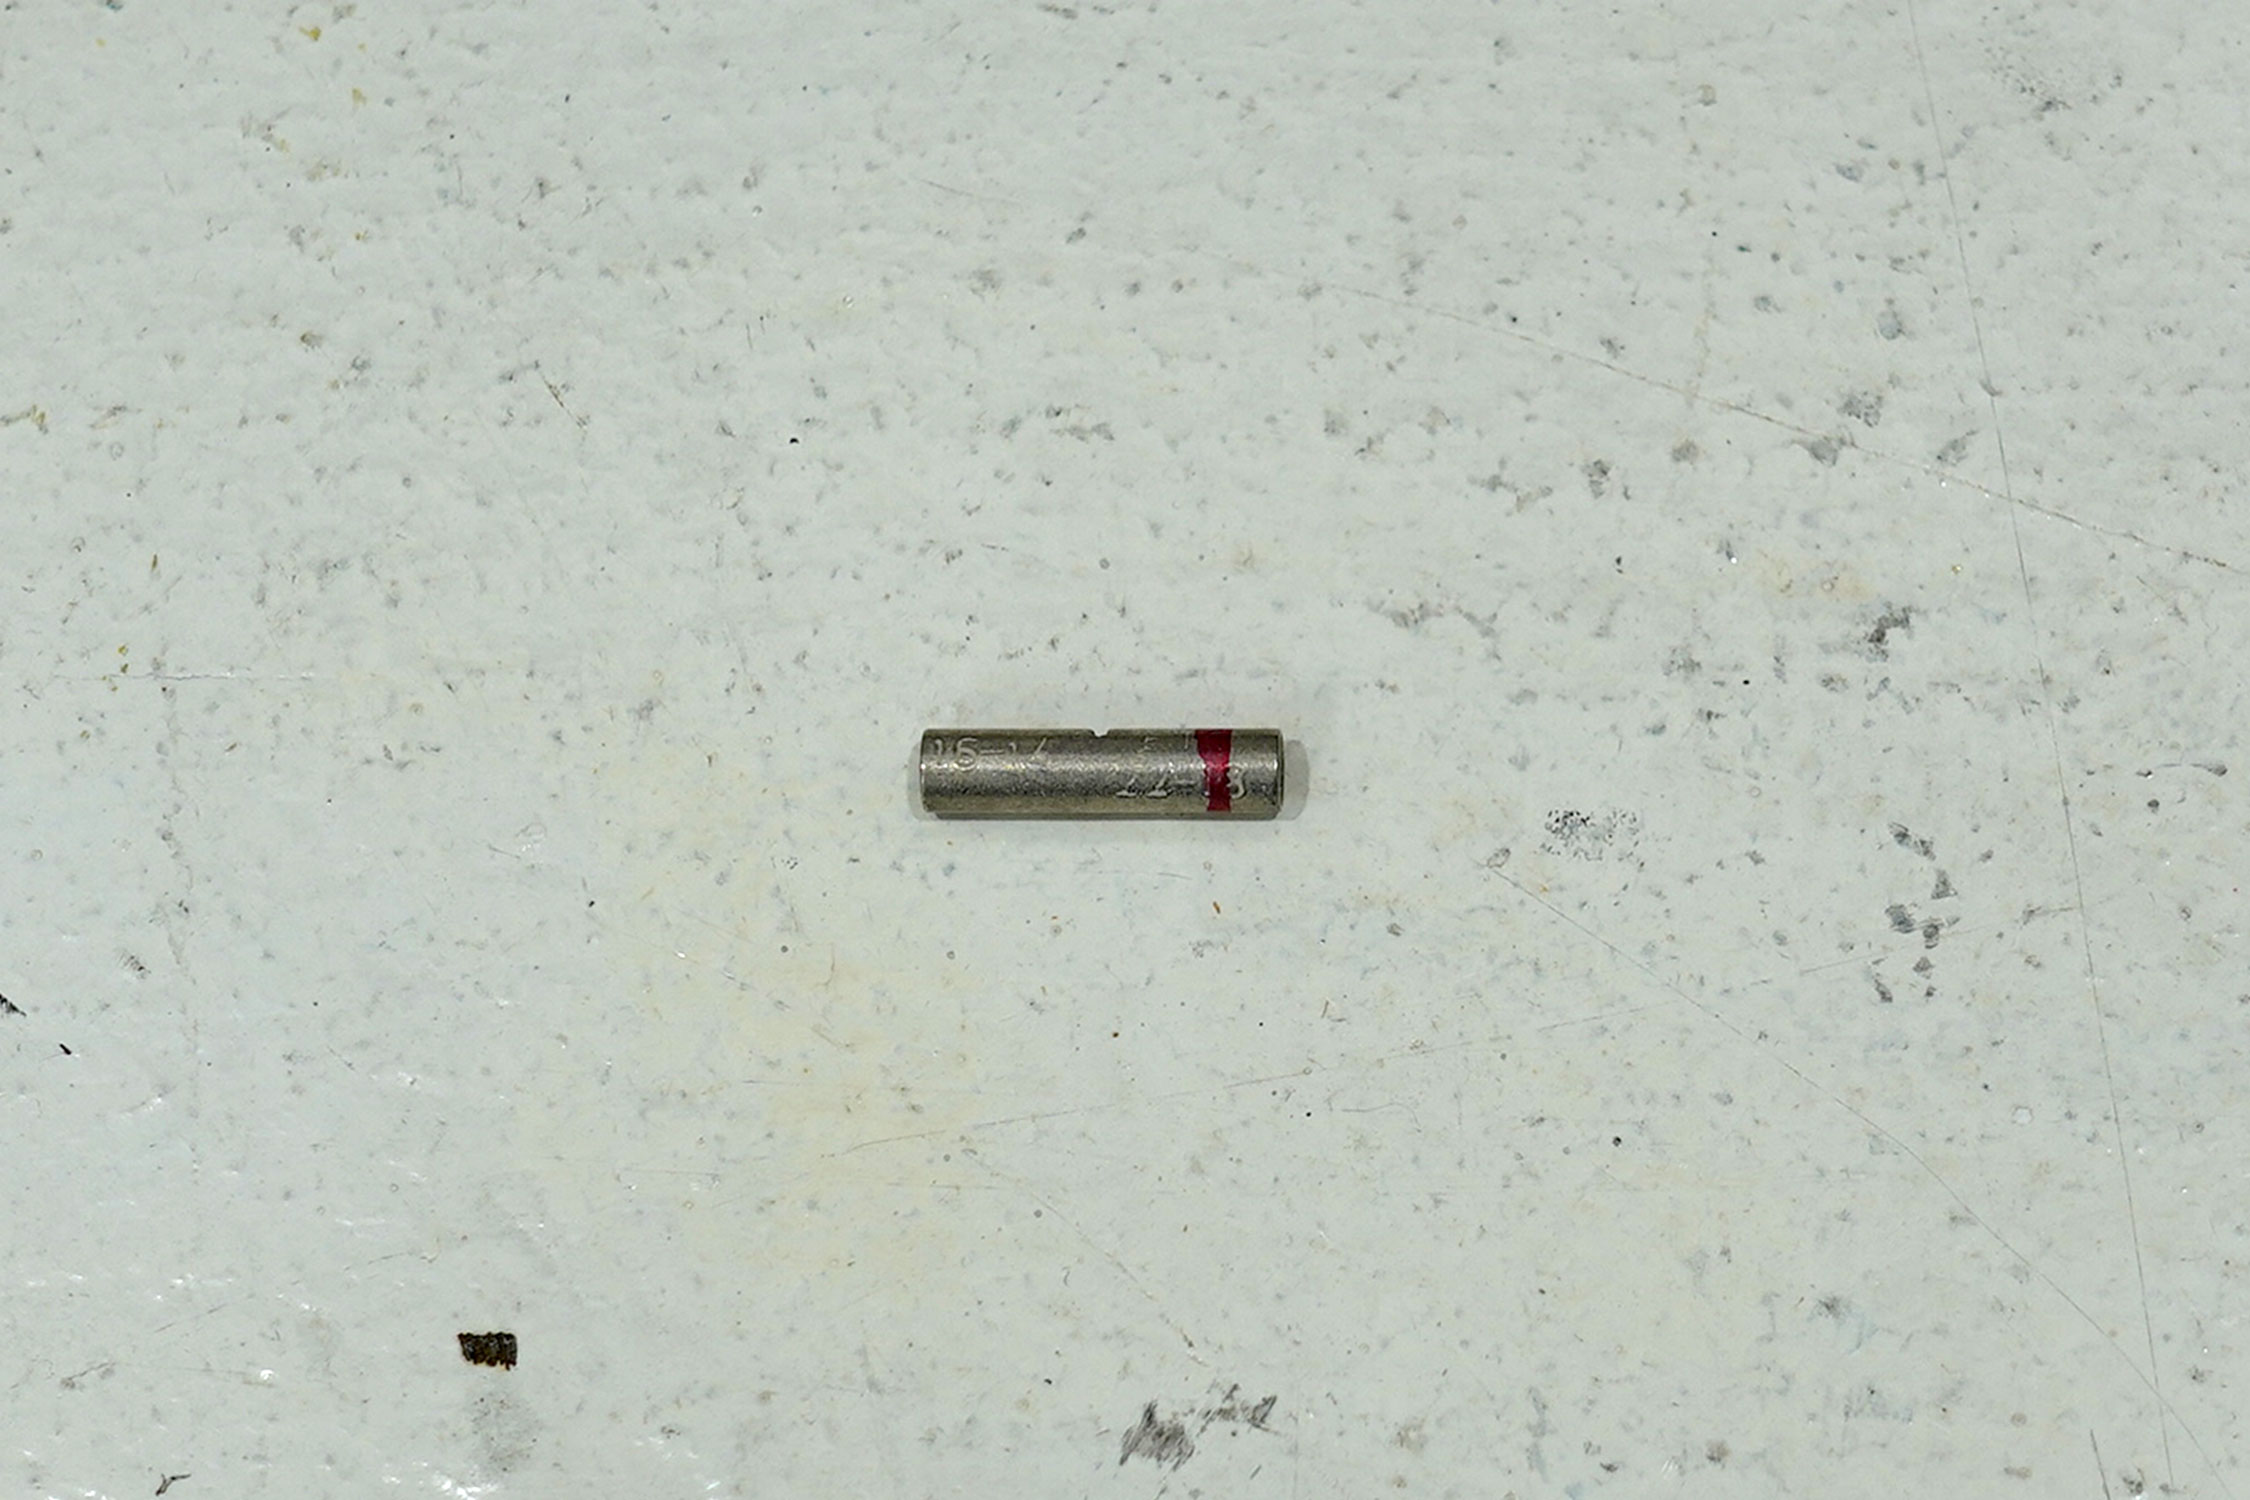
Crimp style Step-Down Uninsulated Butt Connector
Left side is sized for 14-16ga. wire
I was able to fit both the factory 22ga. wire and the new 18ga. switch wires together
Right side (red stripe) is sized for 18-22ga. wire
I used it for the connector side of the factory 22ga. wire. |
Wires crimped and heat shrunk |
B9 Connector put back into the ECU |
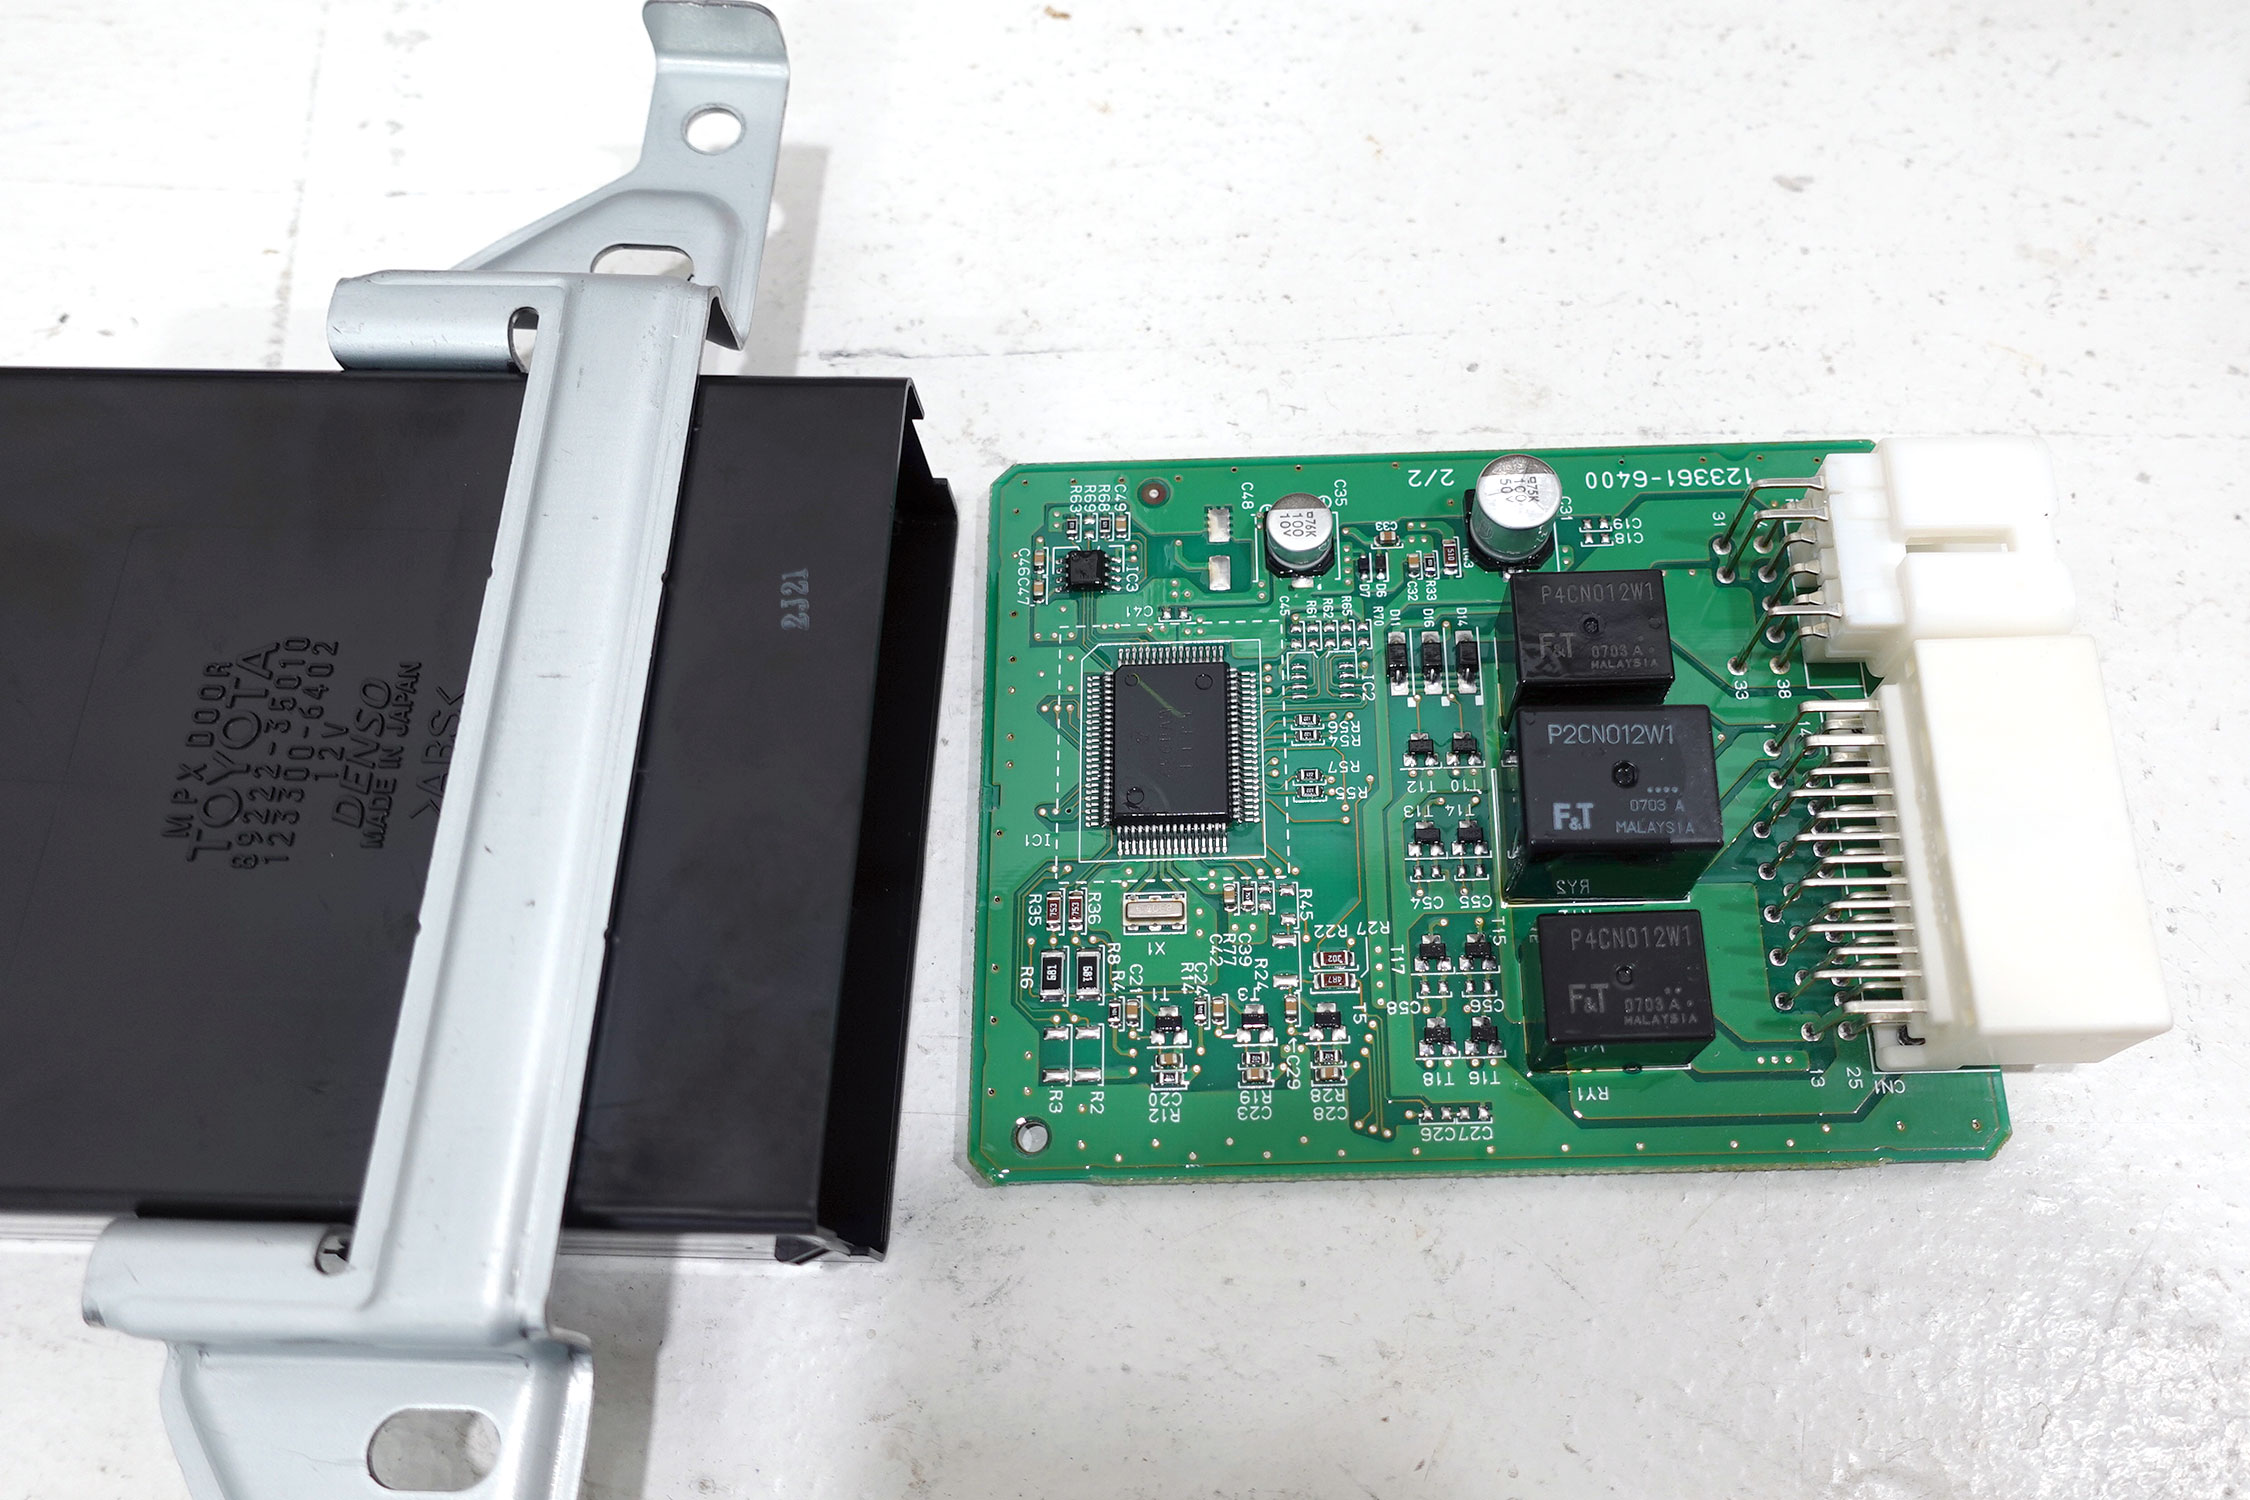
If you are curious as to what is inside the Back Door ECU |
Then I ran the two 36" lengths of wire just connected to the B9 Connector down to where I mounted the interior switch and made a similar splice there.
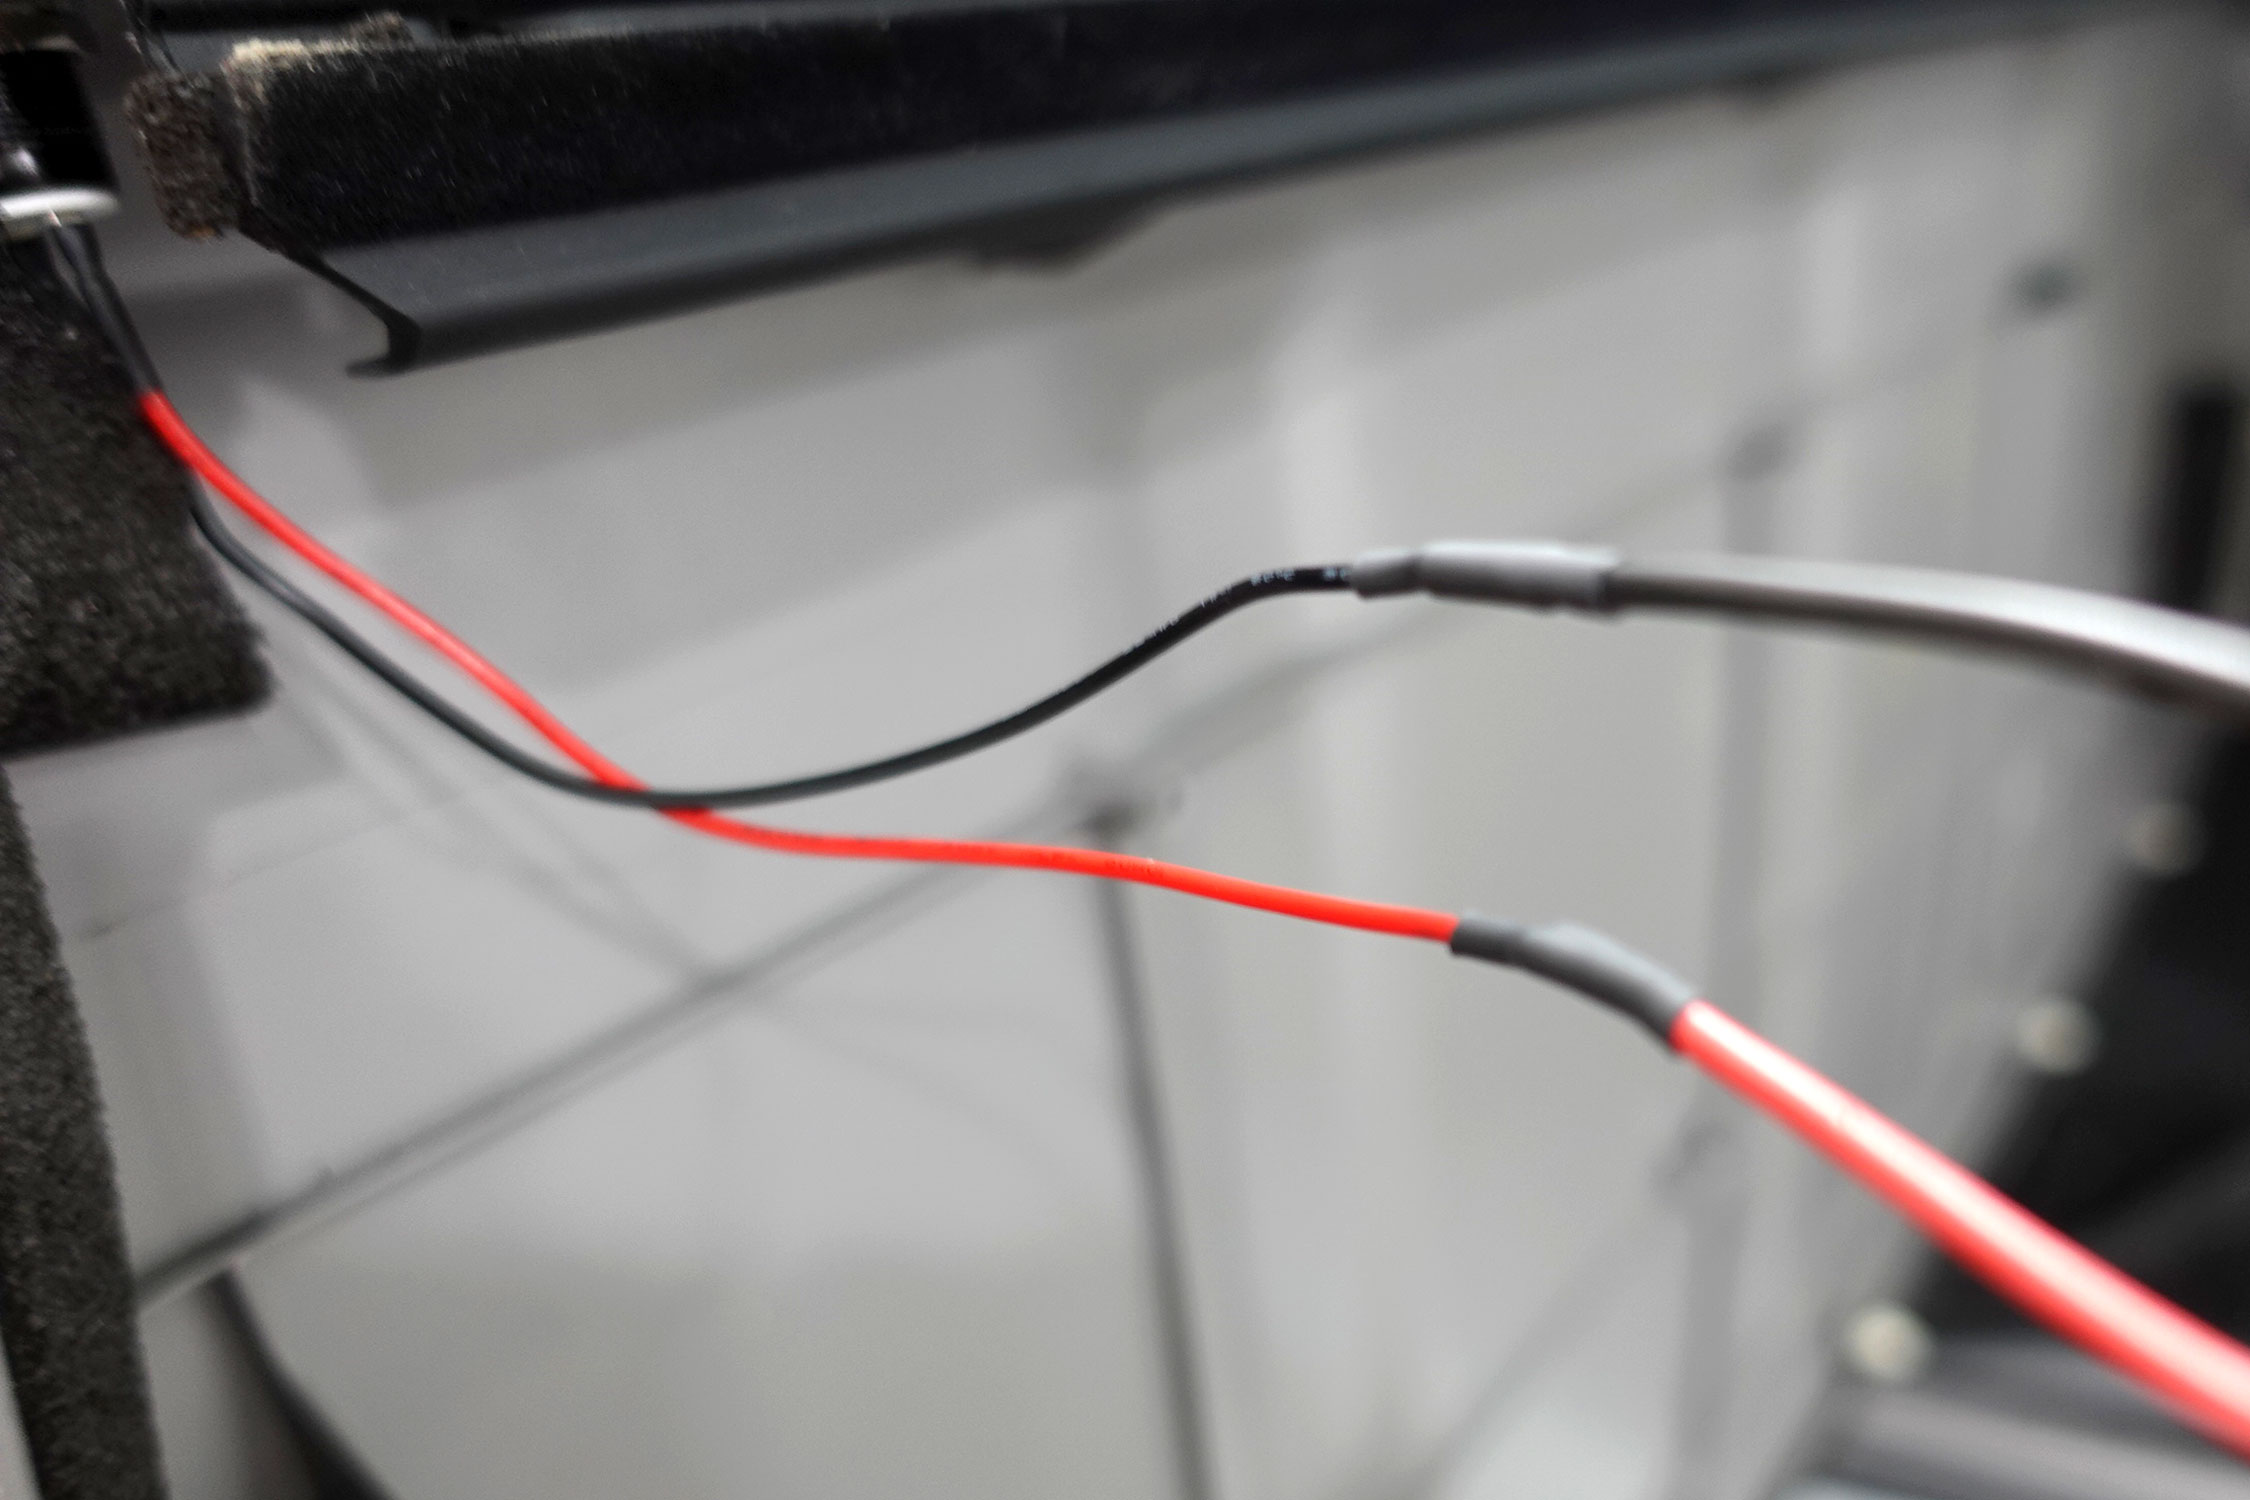
Splices made at switch |
End Result:
Back Door Trim Panel BEFORE adding switch |
Back Door Trim Panel BEFORE adding switch |
Back Door Trim Panel AFTER adding switch |
Back Door Trim Panel AFTER adding switch |
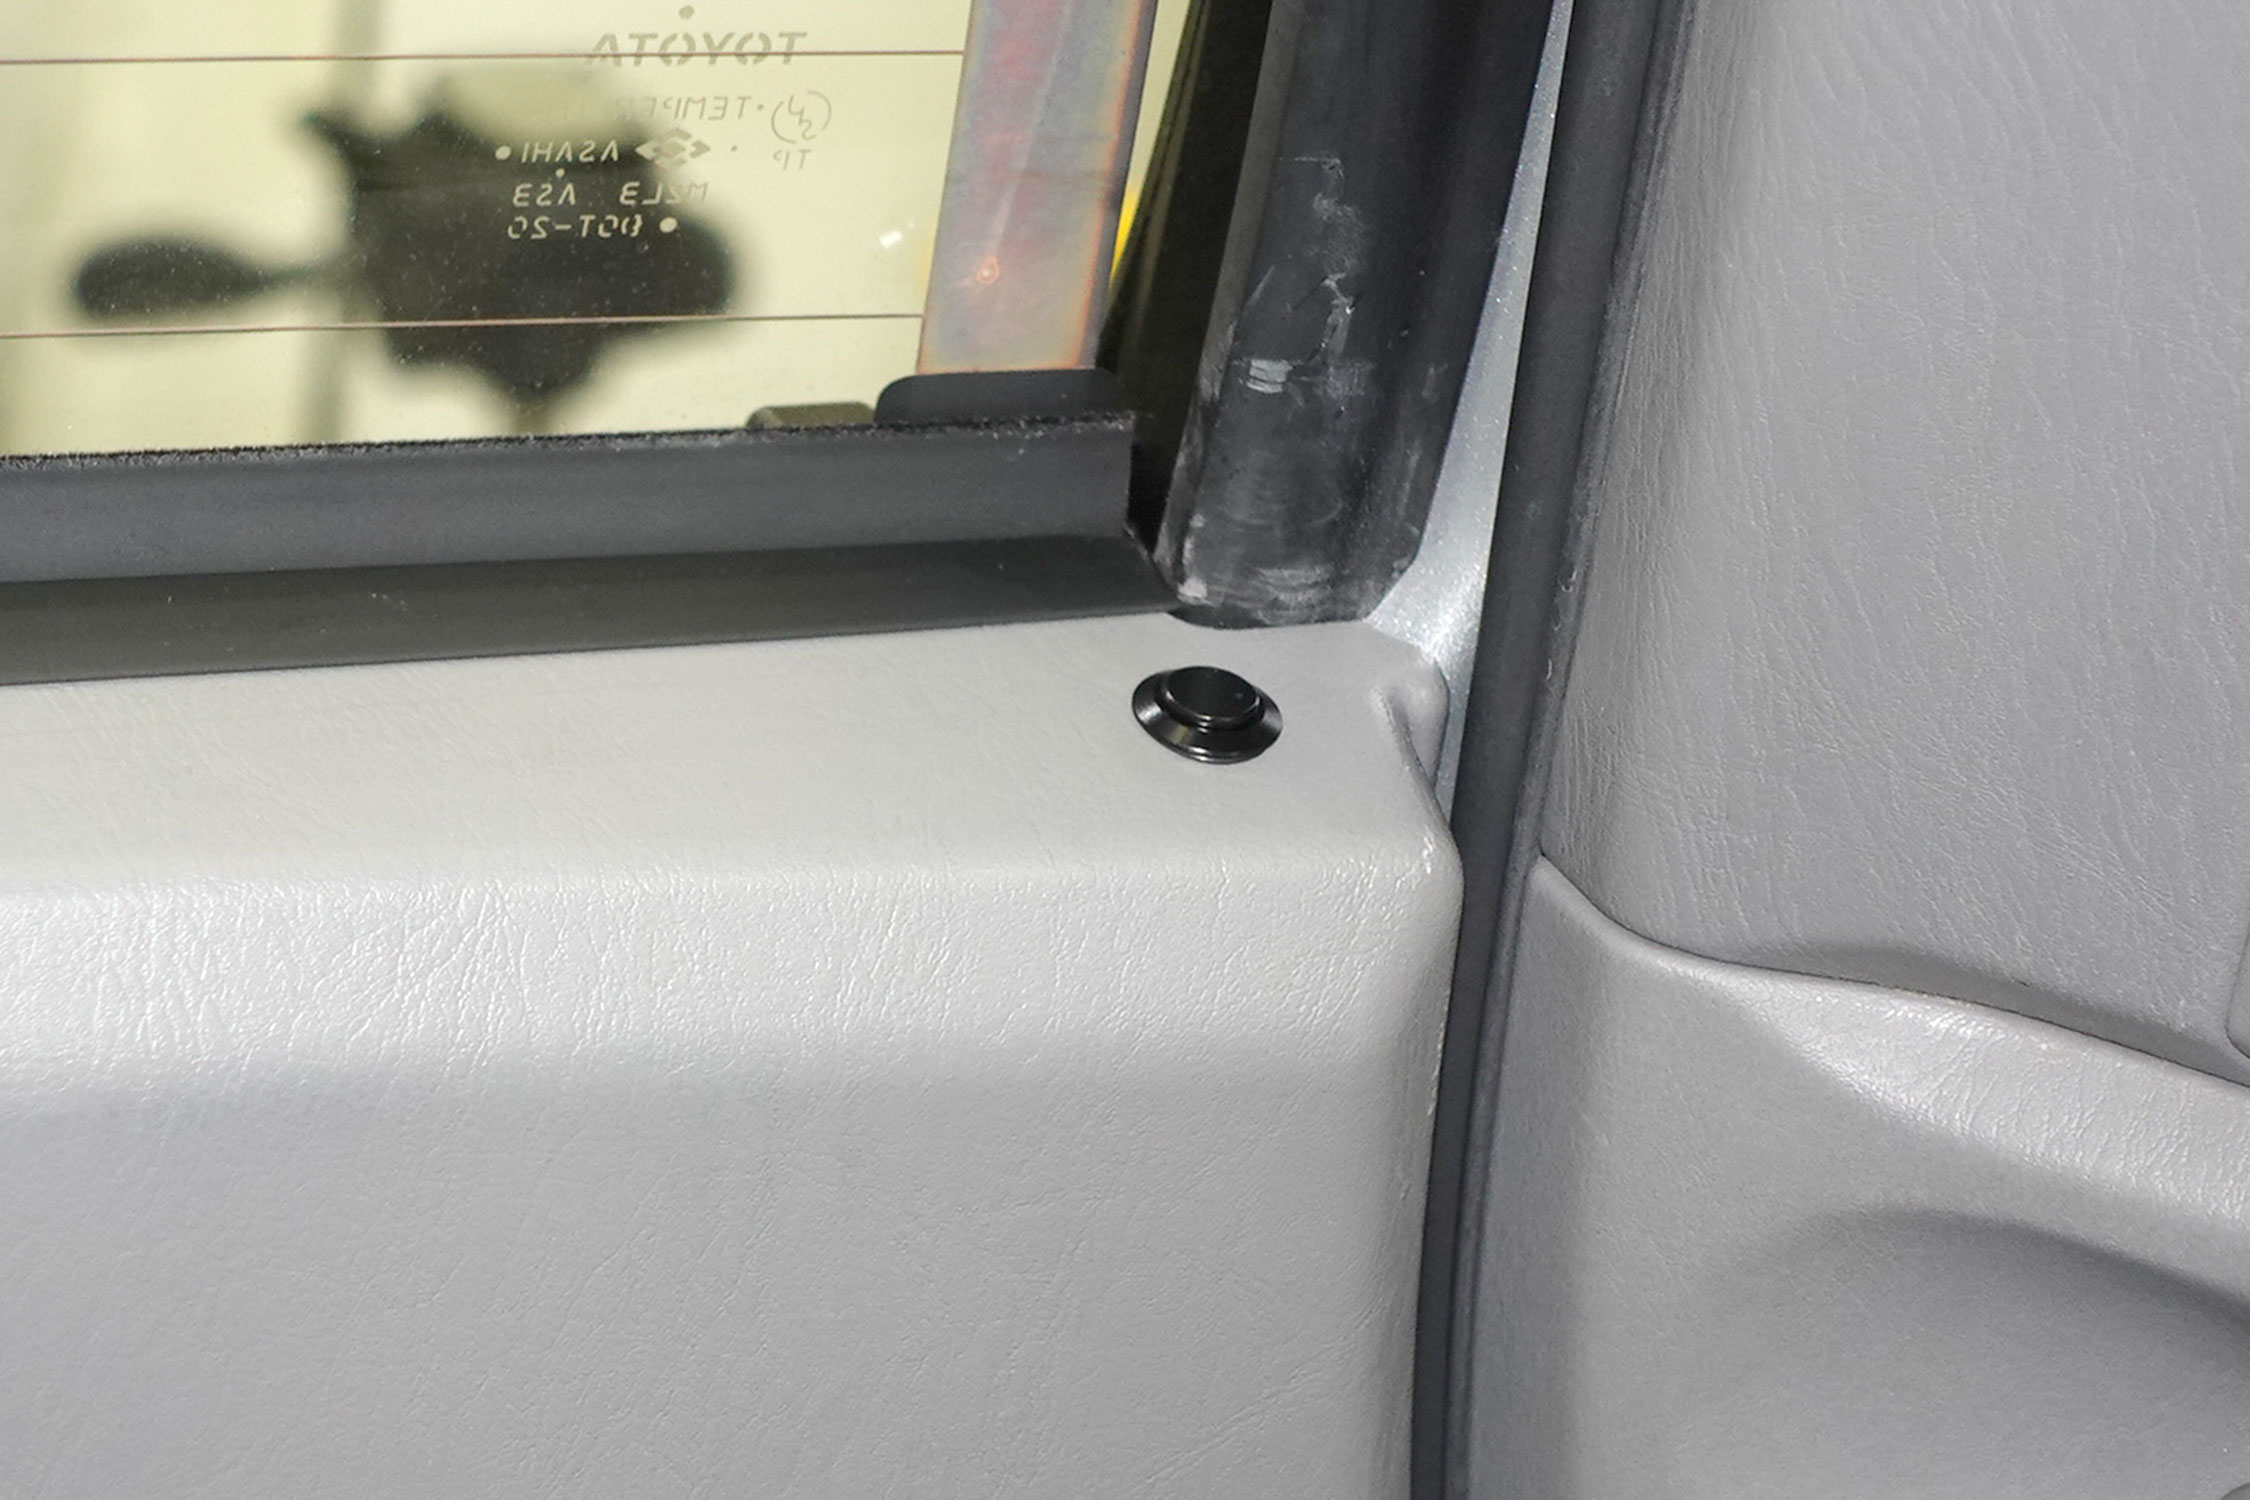
Back Door Trim Panel AFTER adding switch |
Exterior Hatch Release Switch Replacement:
A widely experienced issue with the 4th Gen (2003-2009) Toyota 4Runners is the melting of the rubber factory exterior hatch release switch cover.
The rubber cover on the switch melts in the heat and gets very sticky and at times hinders proper operation of the button.
Even though my vehicle is garage kept, rarely ever sits outside during the day, and resides in the Northeast...
I have still encountered this issue, albeit not until the 15 year old mark.
An ideal time to address this issue is while performing the Interior Hatch Release Mod since you will already have
the rear hatch door trim board removed and access to the necessary components to replace this item.
You can purchase just the rubber cover or an entirely new switch with cover included.
It is best to just buy the whole switch since cleaning off the old melted sticky rubber residue is a job
not warranted due to the low cost of the entire new switch assembly.
Back Door Garnish Removal:
First, familiarize yourself with the back door garnish components.
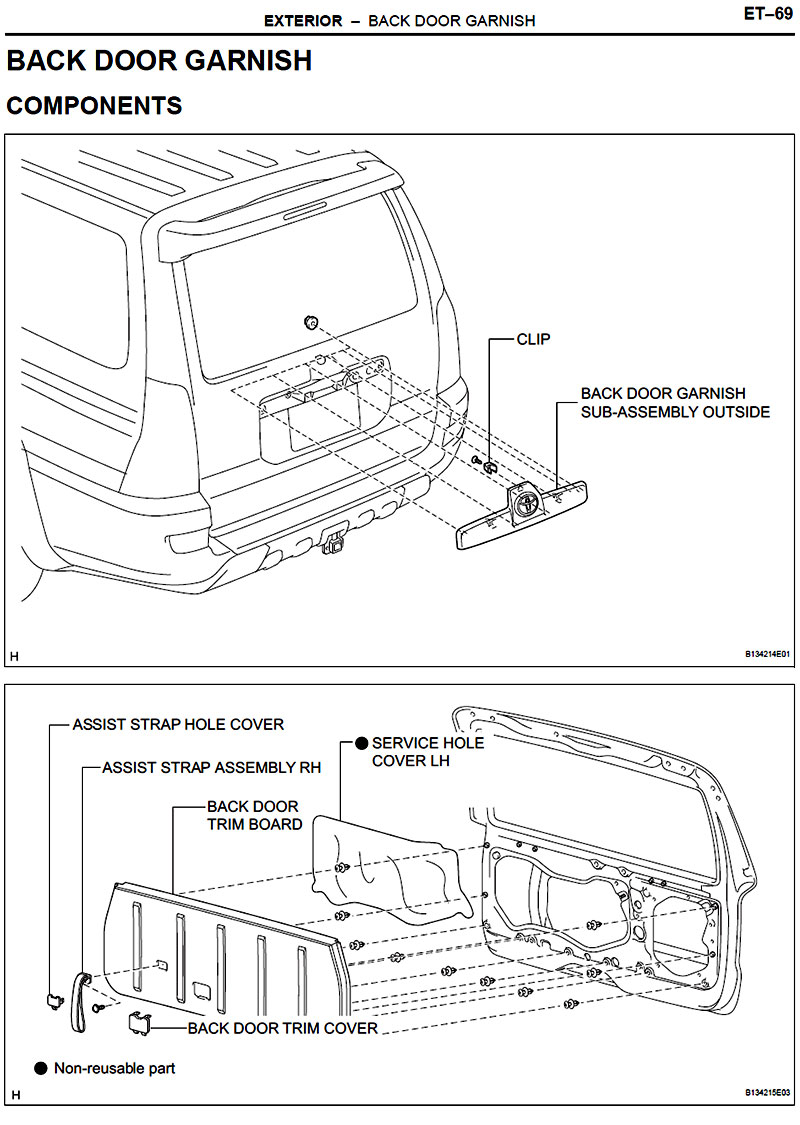
Back Door Garnish Removal |
Procedure:
While you already have the back door trim board removed as described earlier...
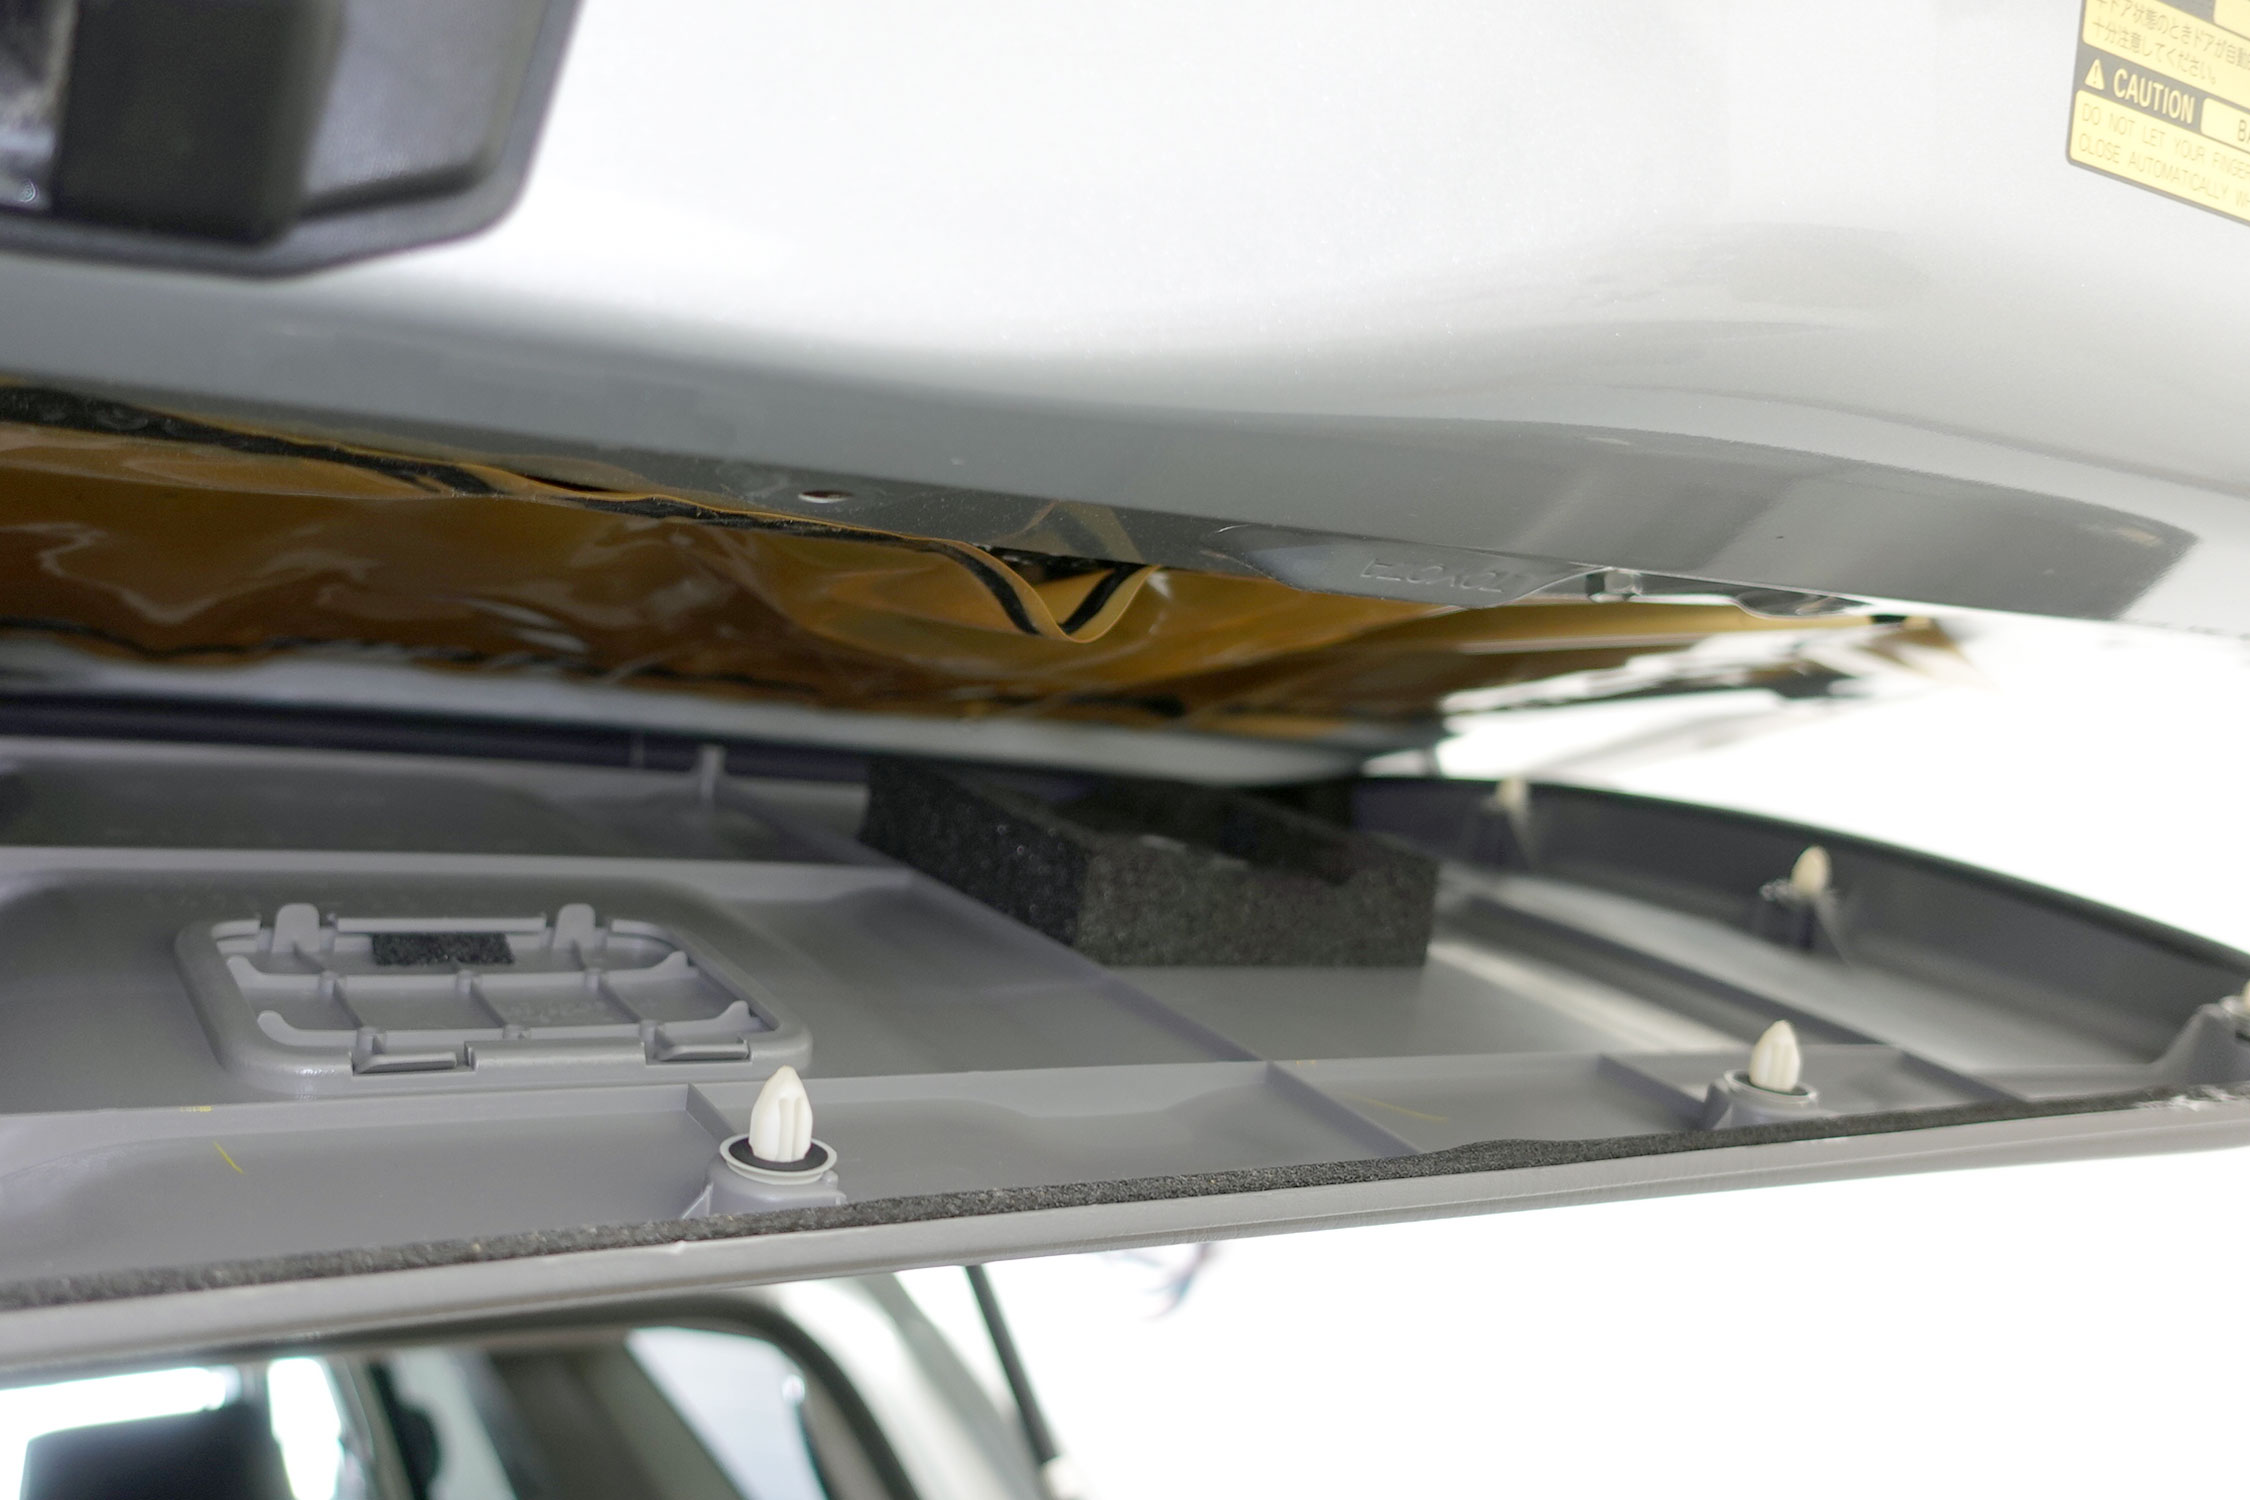
A. Remove the back door service hole cover / plastic vapor barrier.
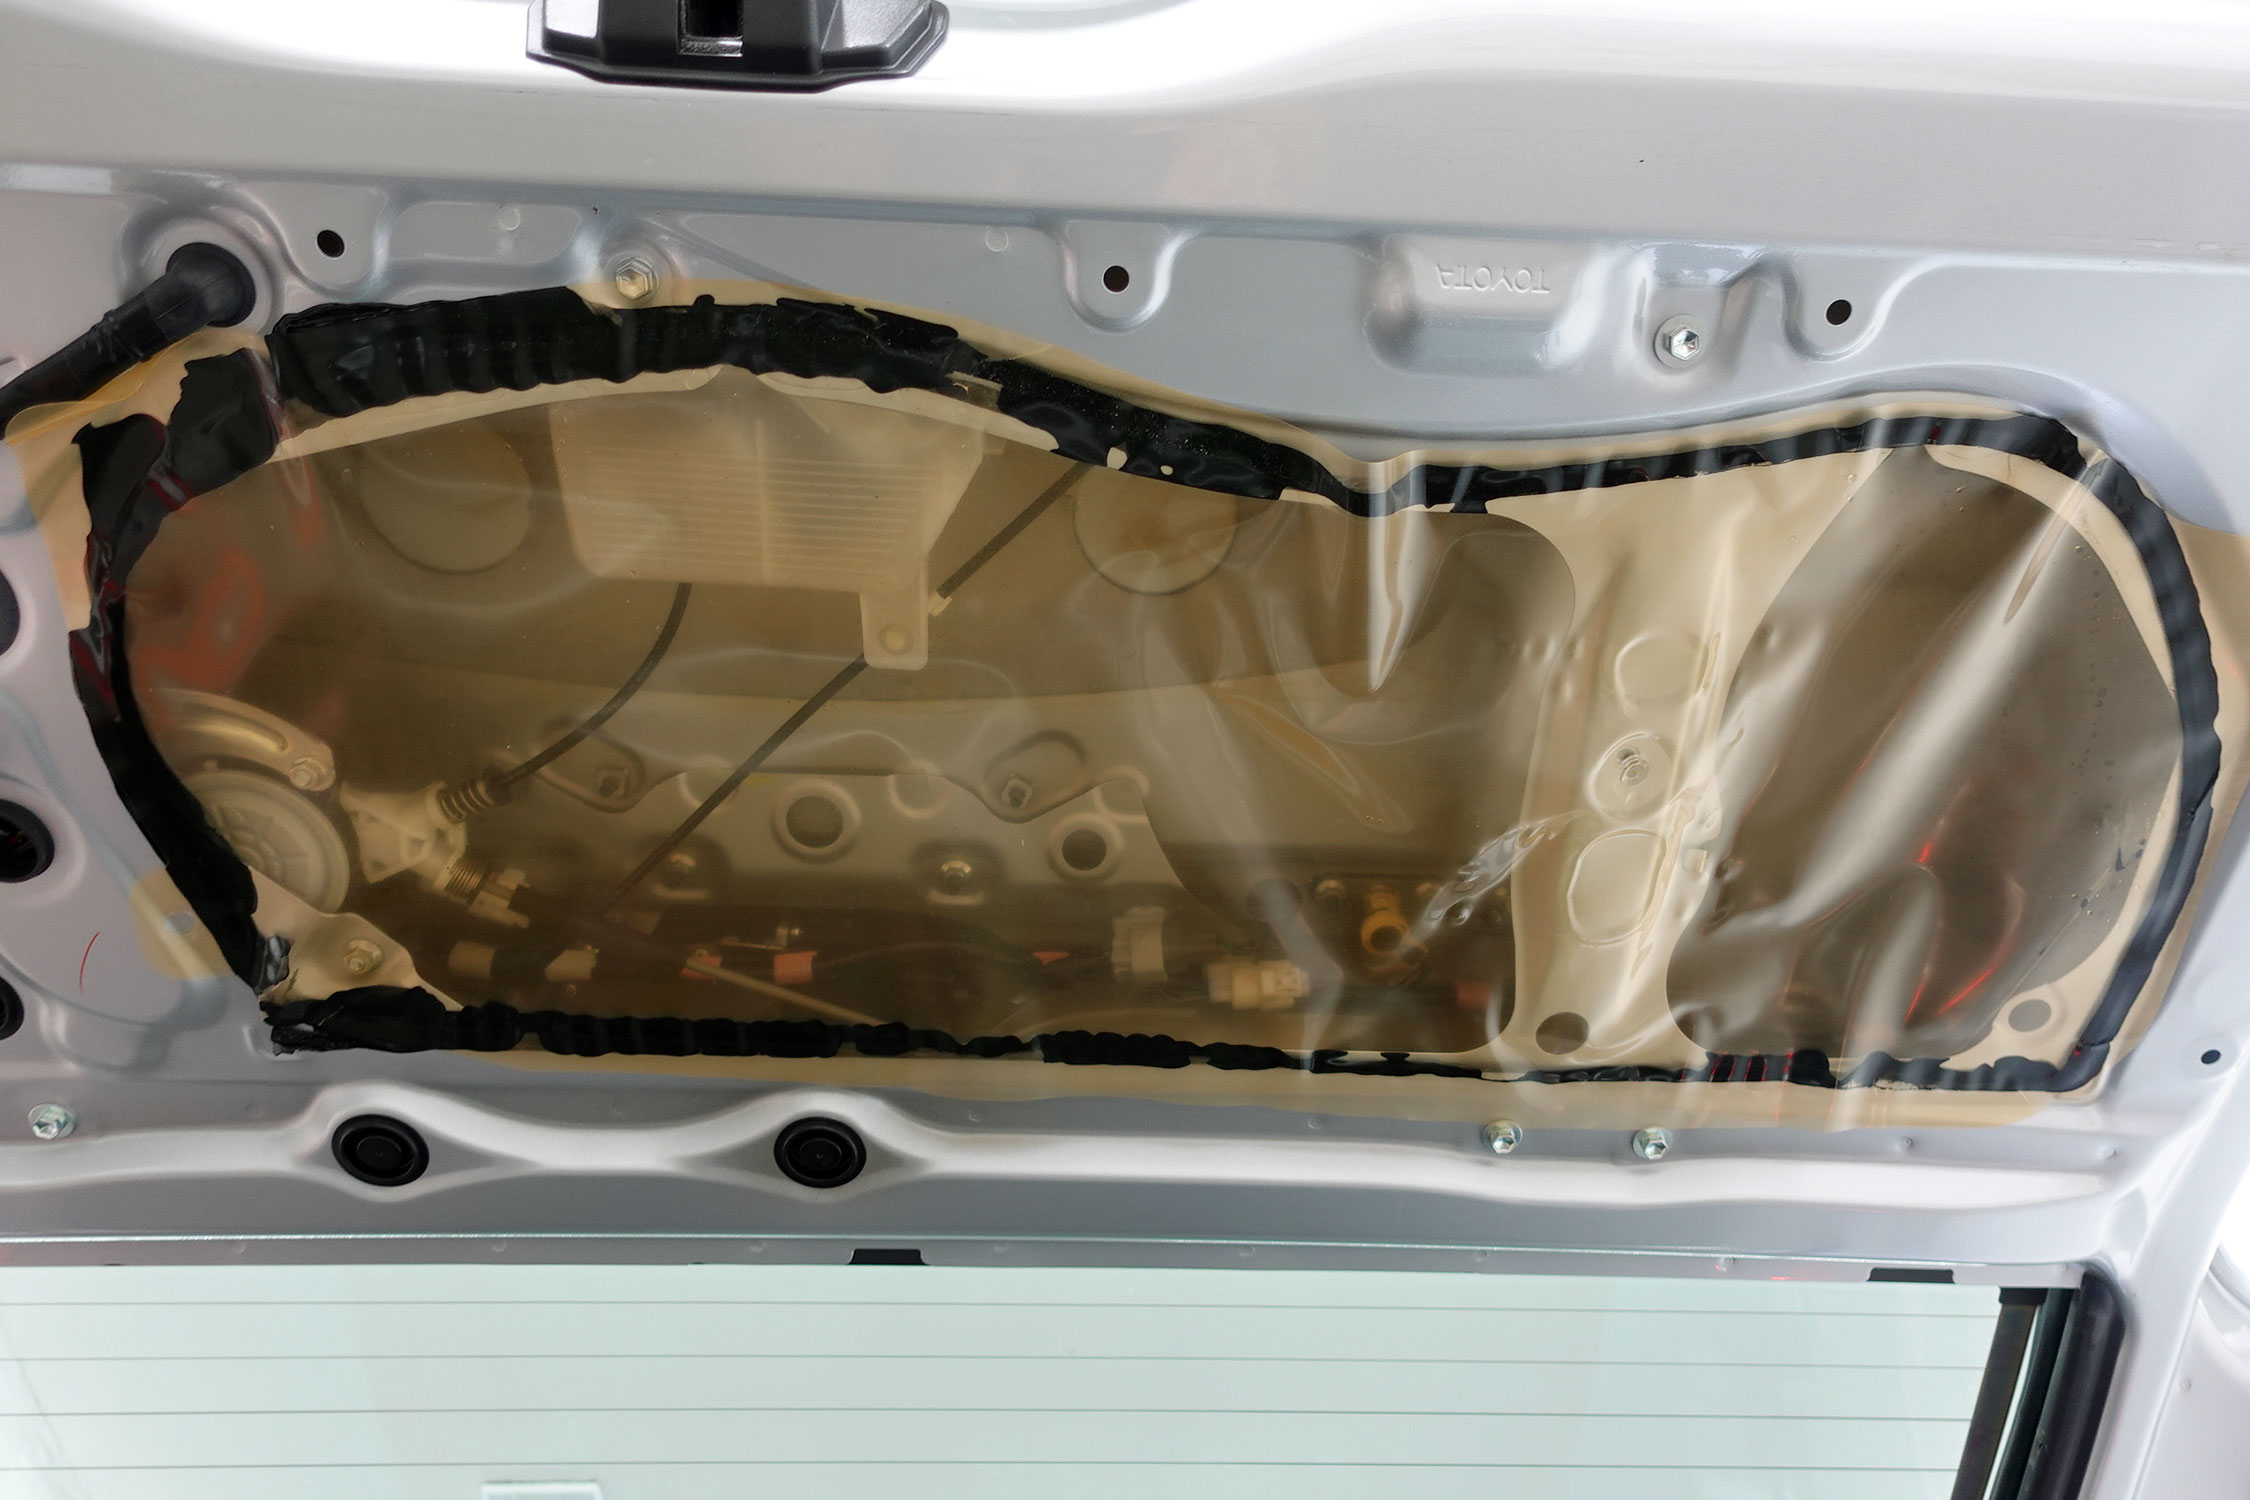
Back door service hole cover / plastic vapor barrier |

Remove the back door service hole cover / plastic vapor barrier |
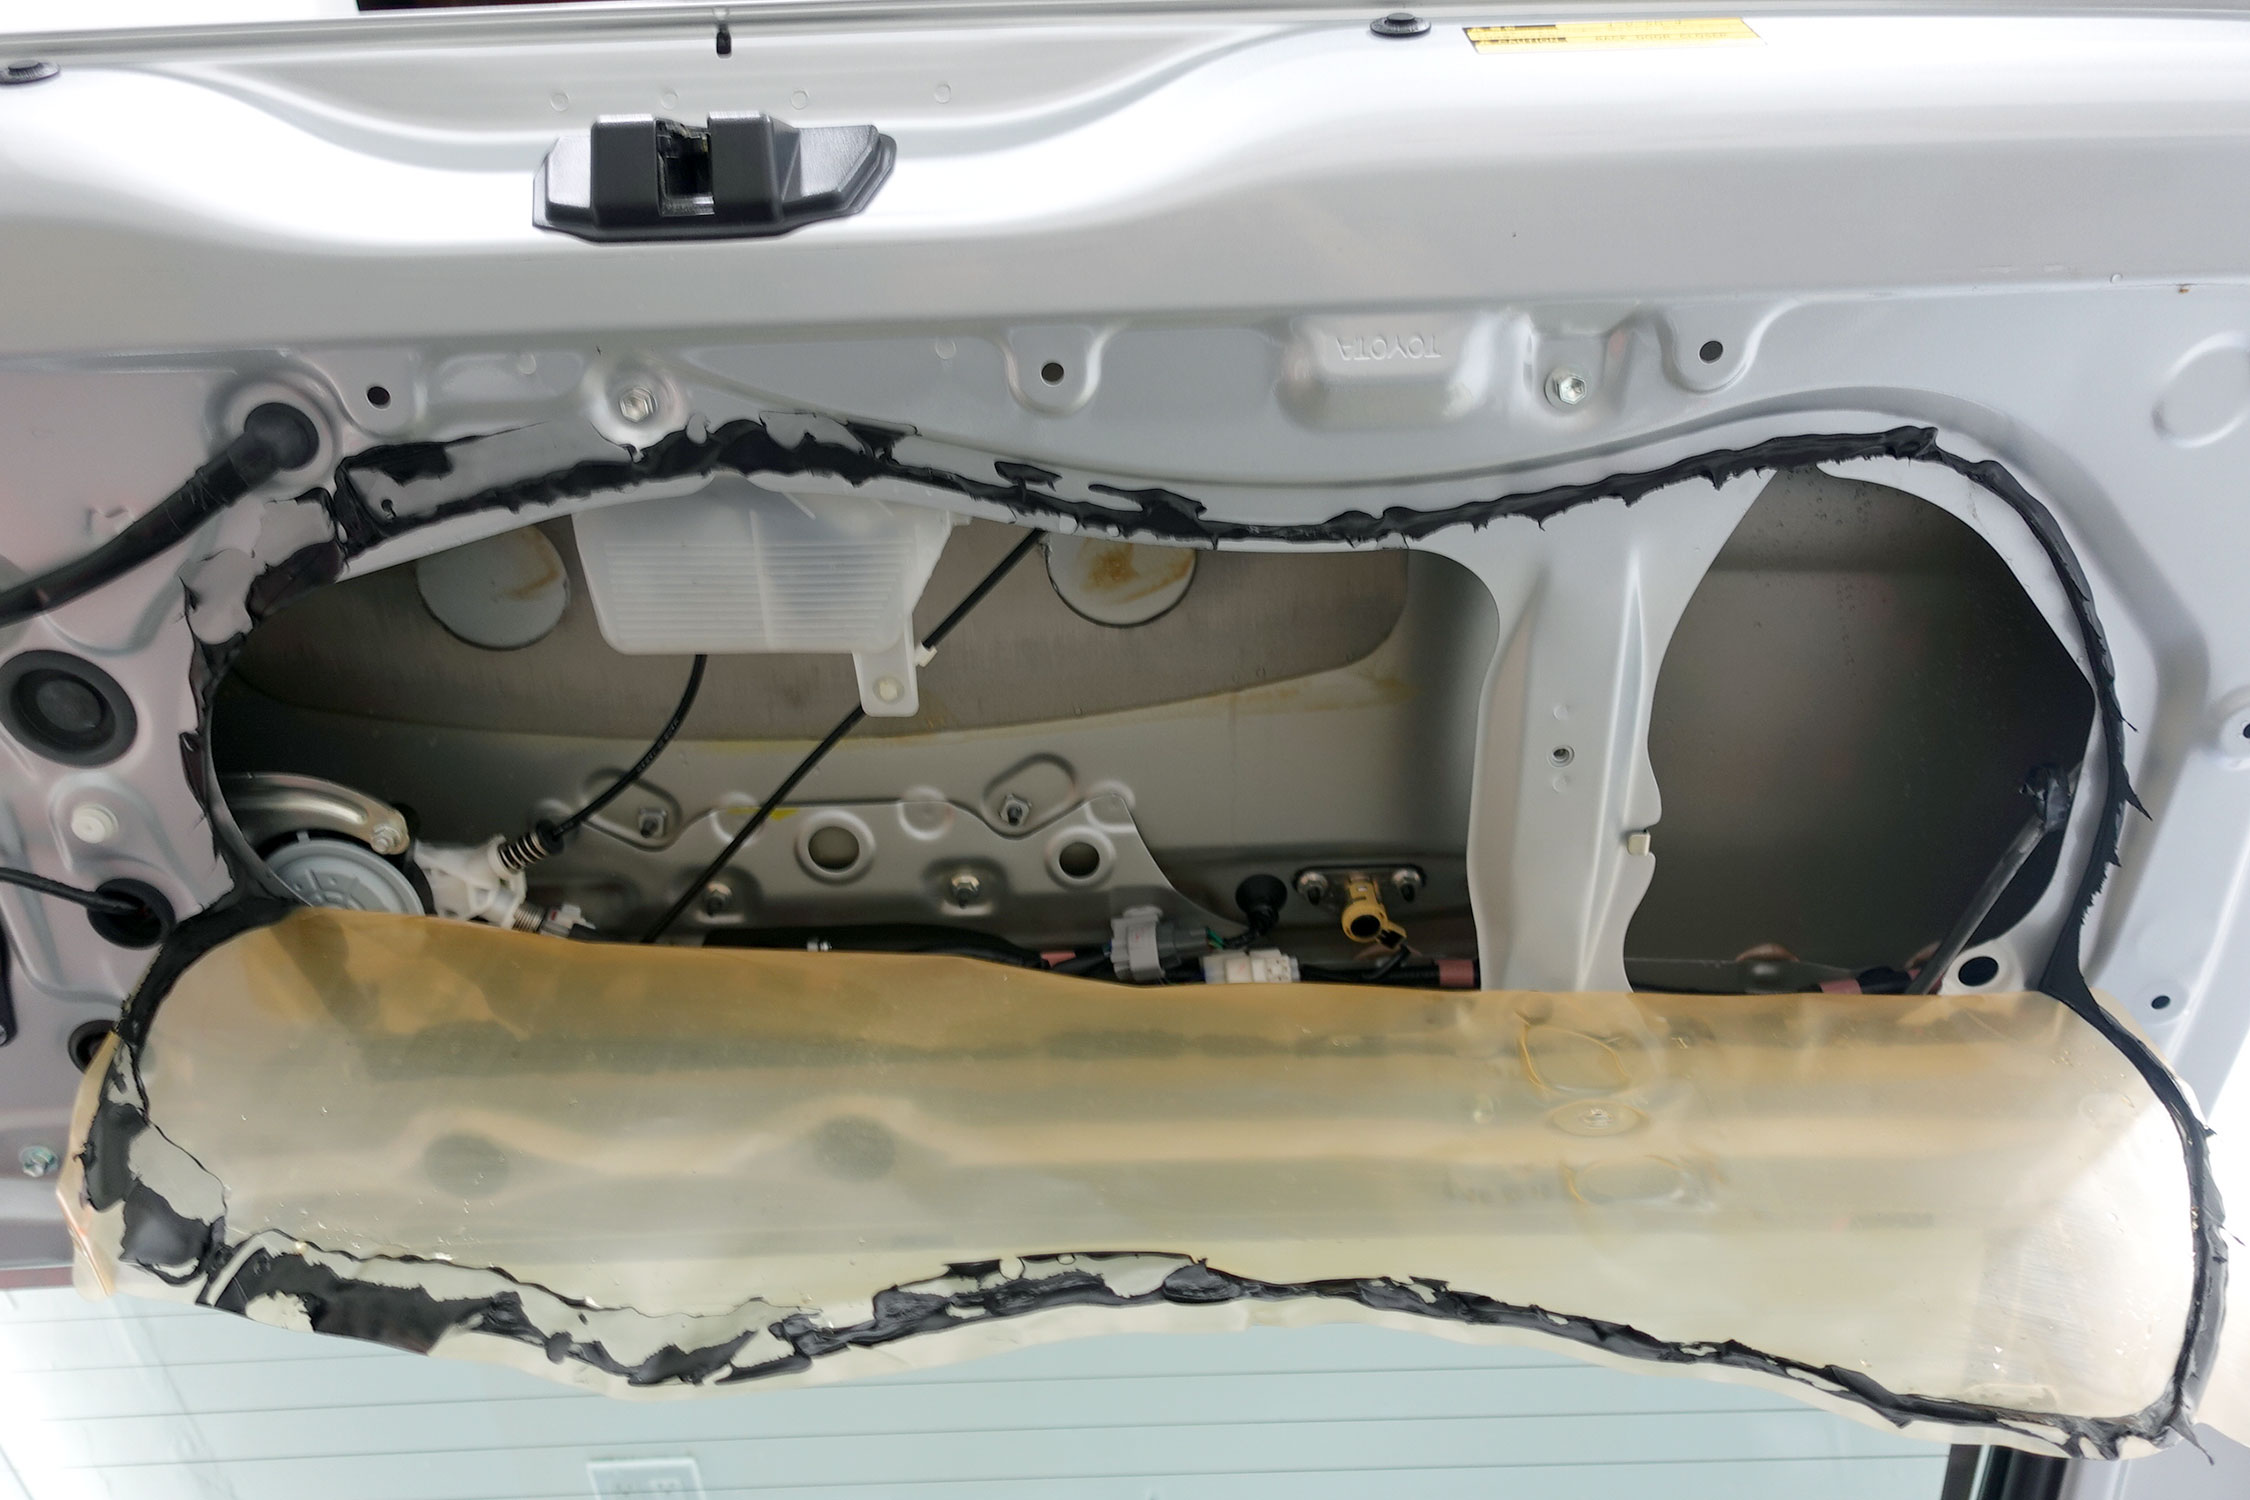
Remove the back door service hole cover / plastic vapor barrier |
B. Remove the 6 10mm nuts holding the garnish to the door.
C. Disengage 3 clips by pulling the garnish, and remove the garnish.
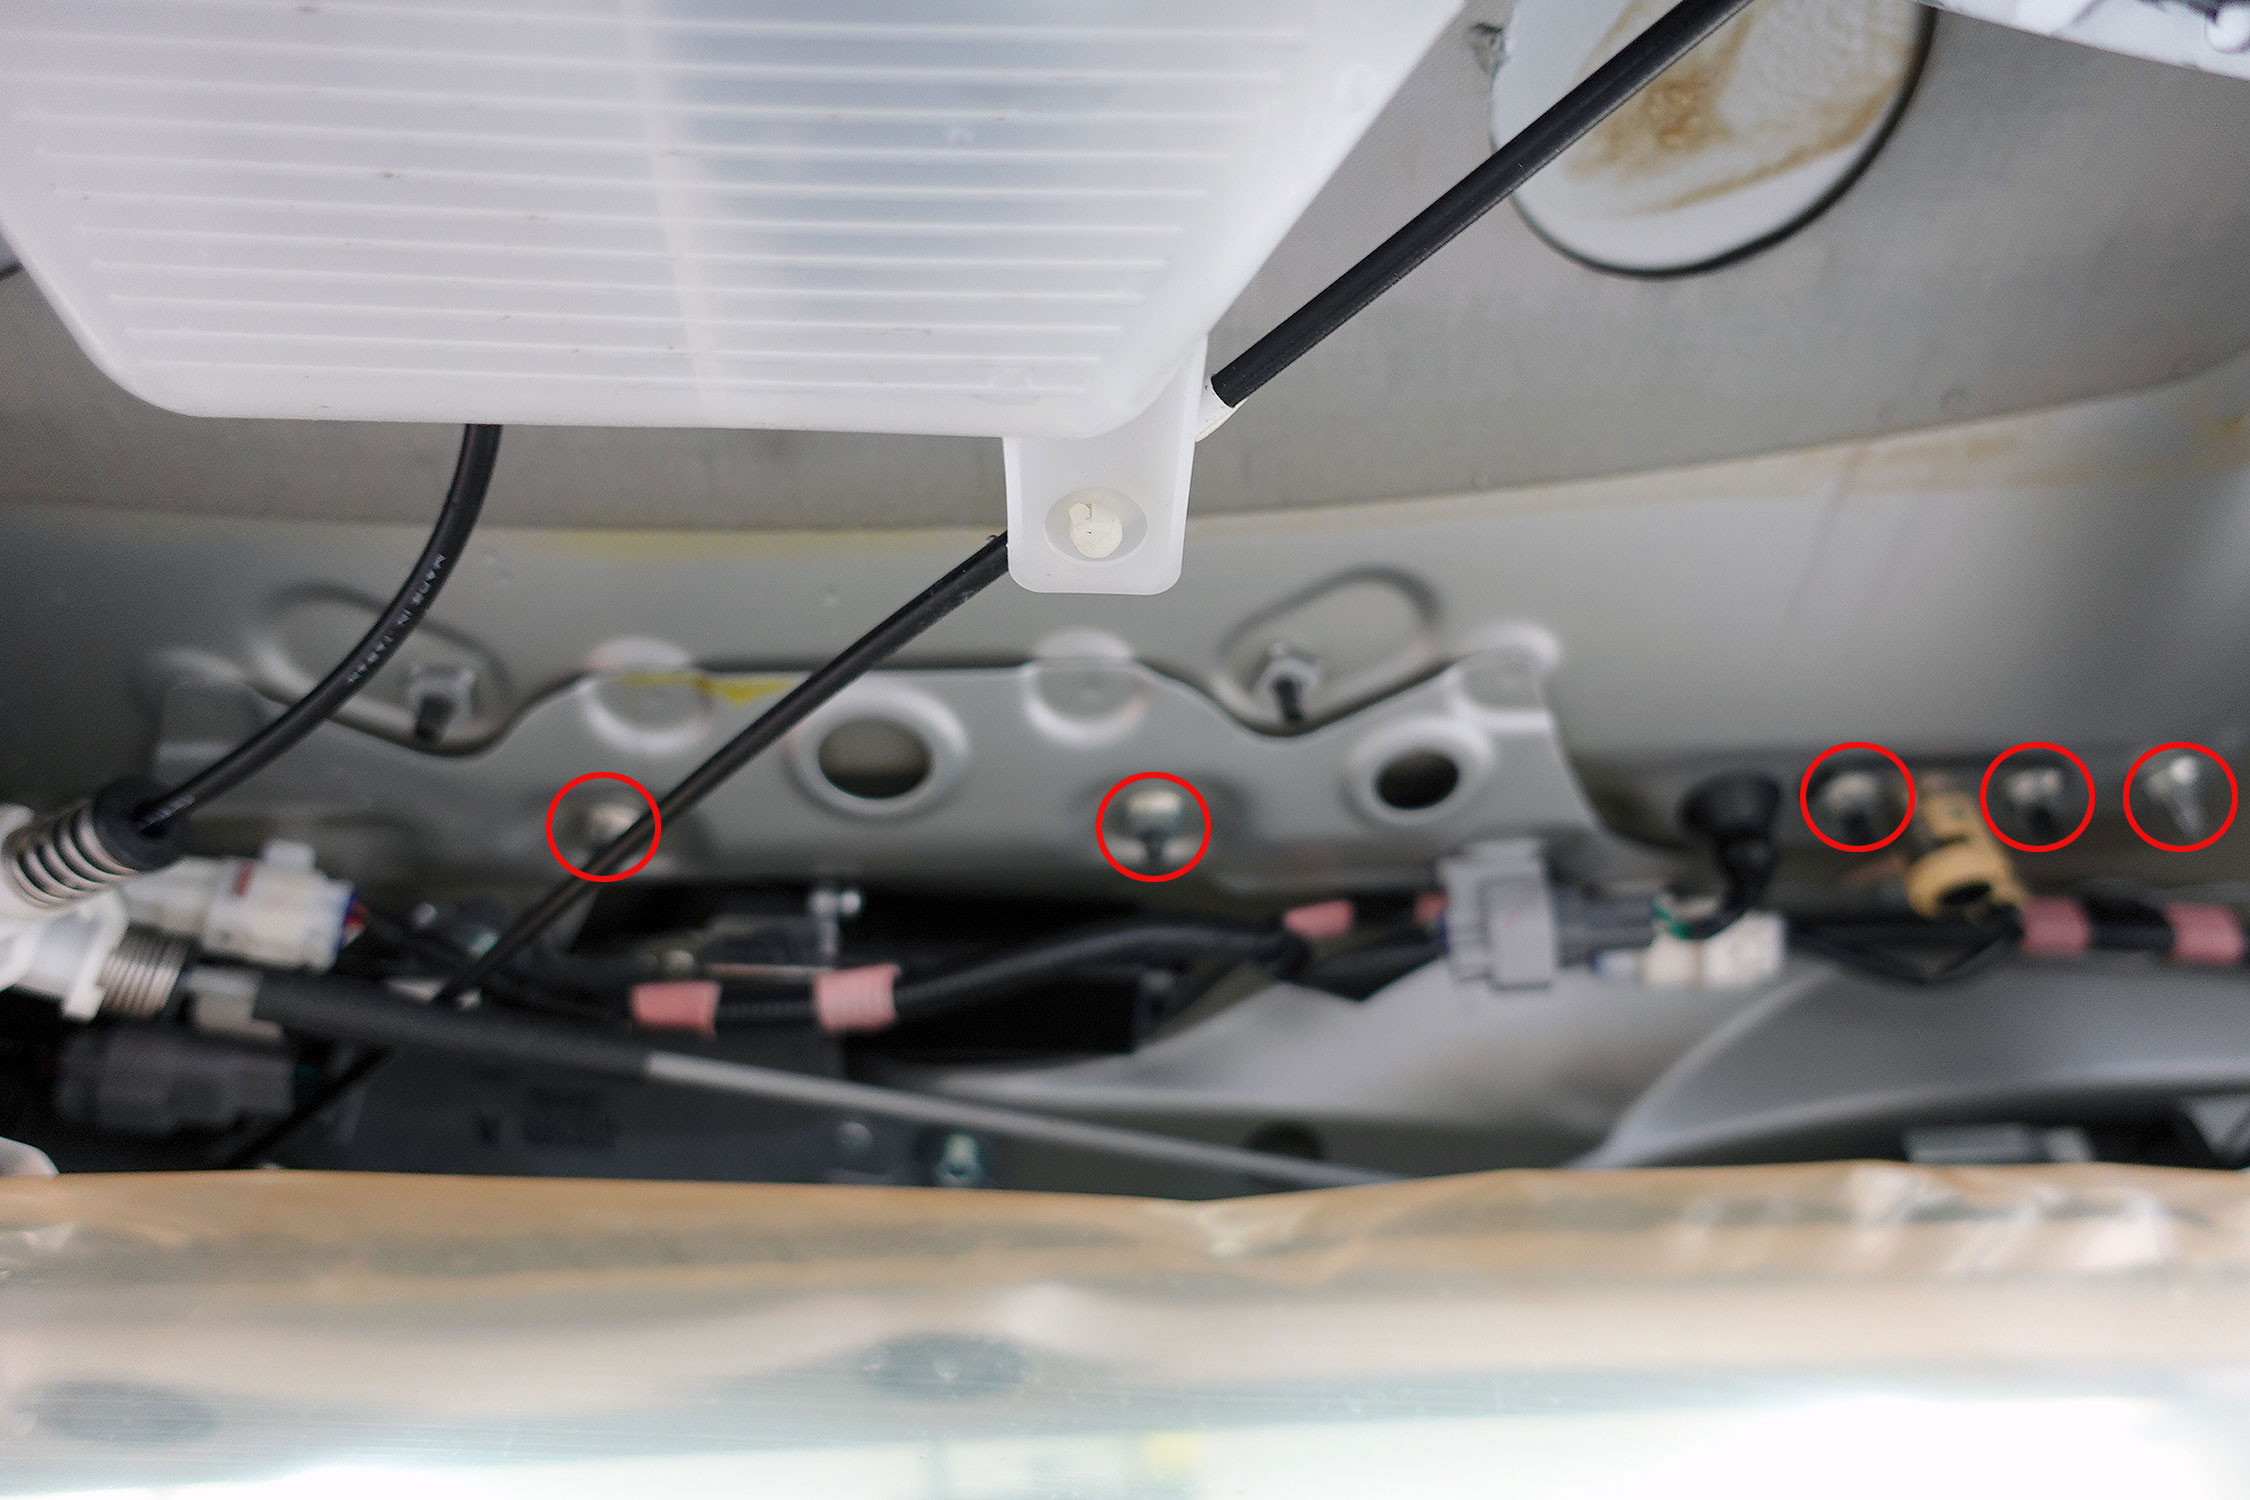
You can see 5 of the six 10mm nuts here |
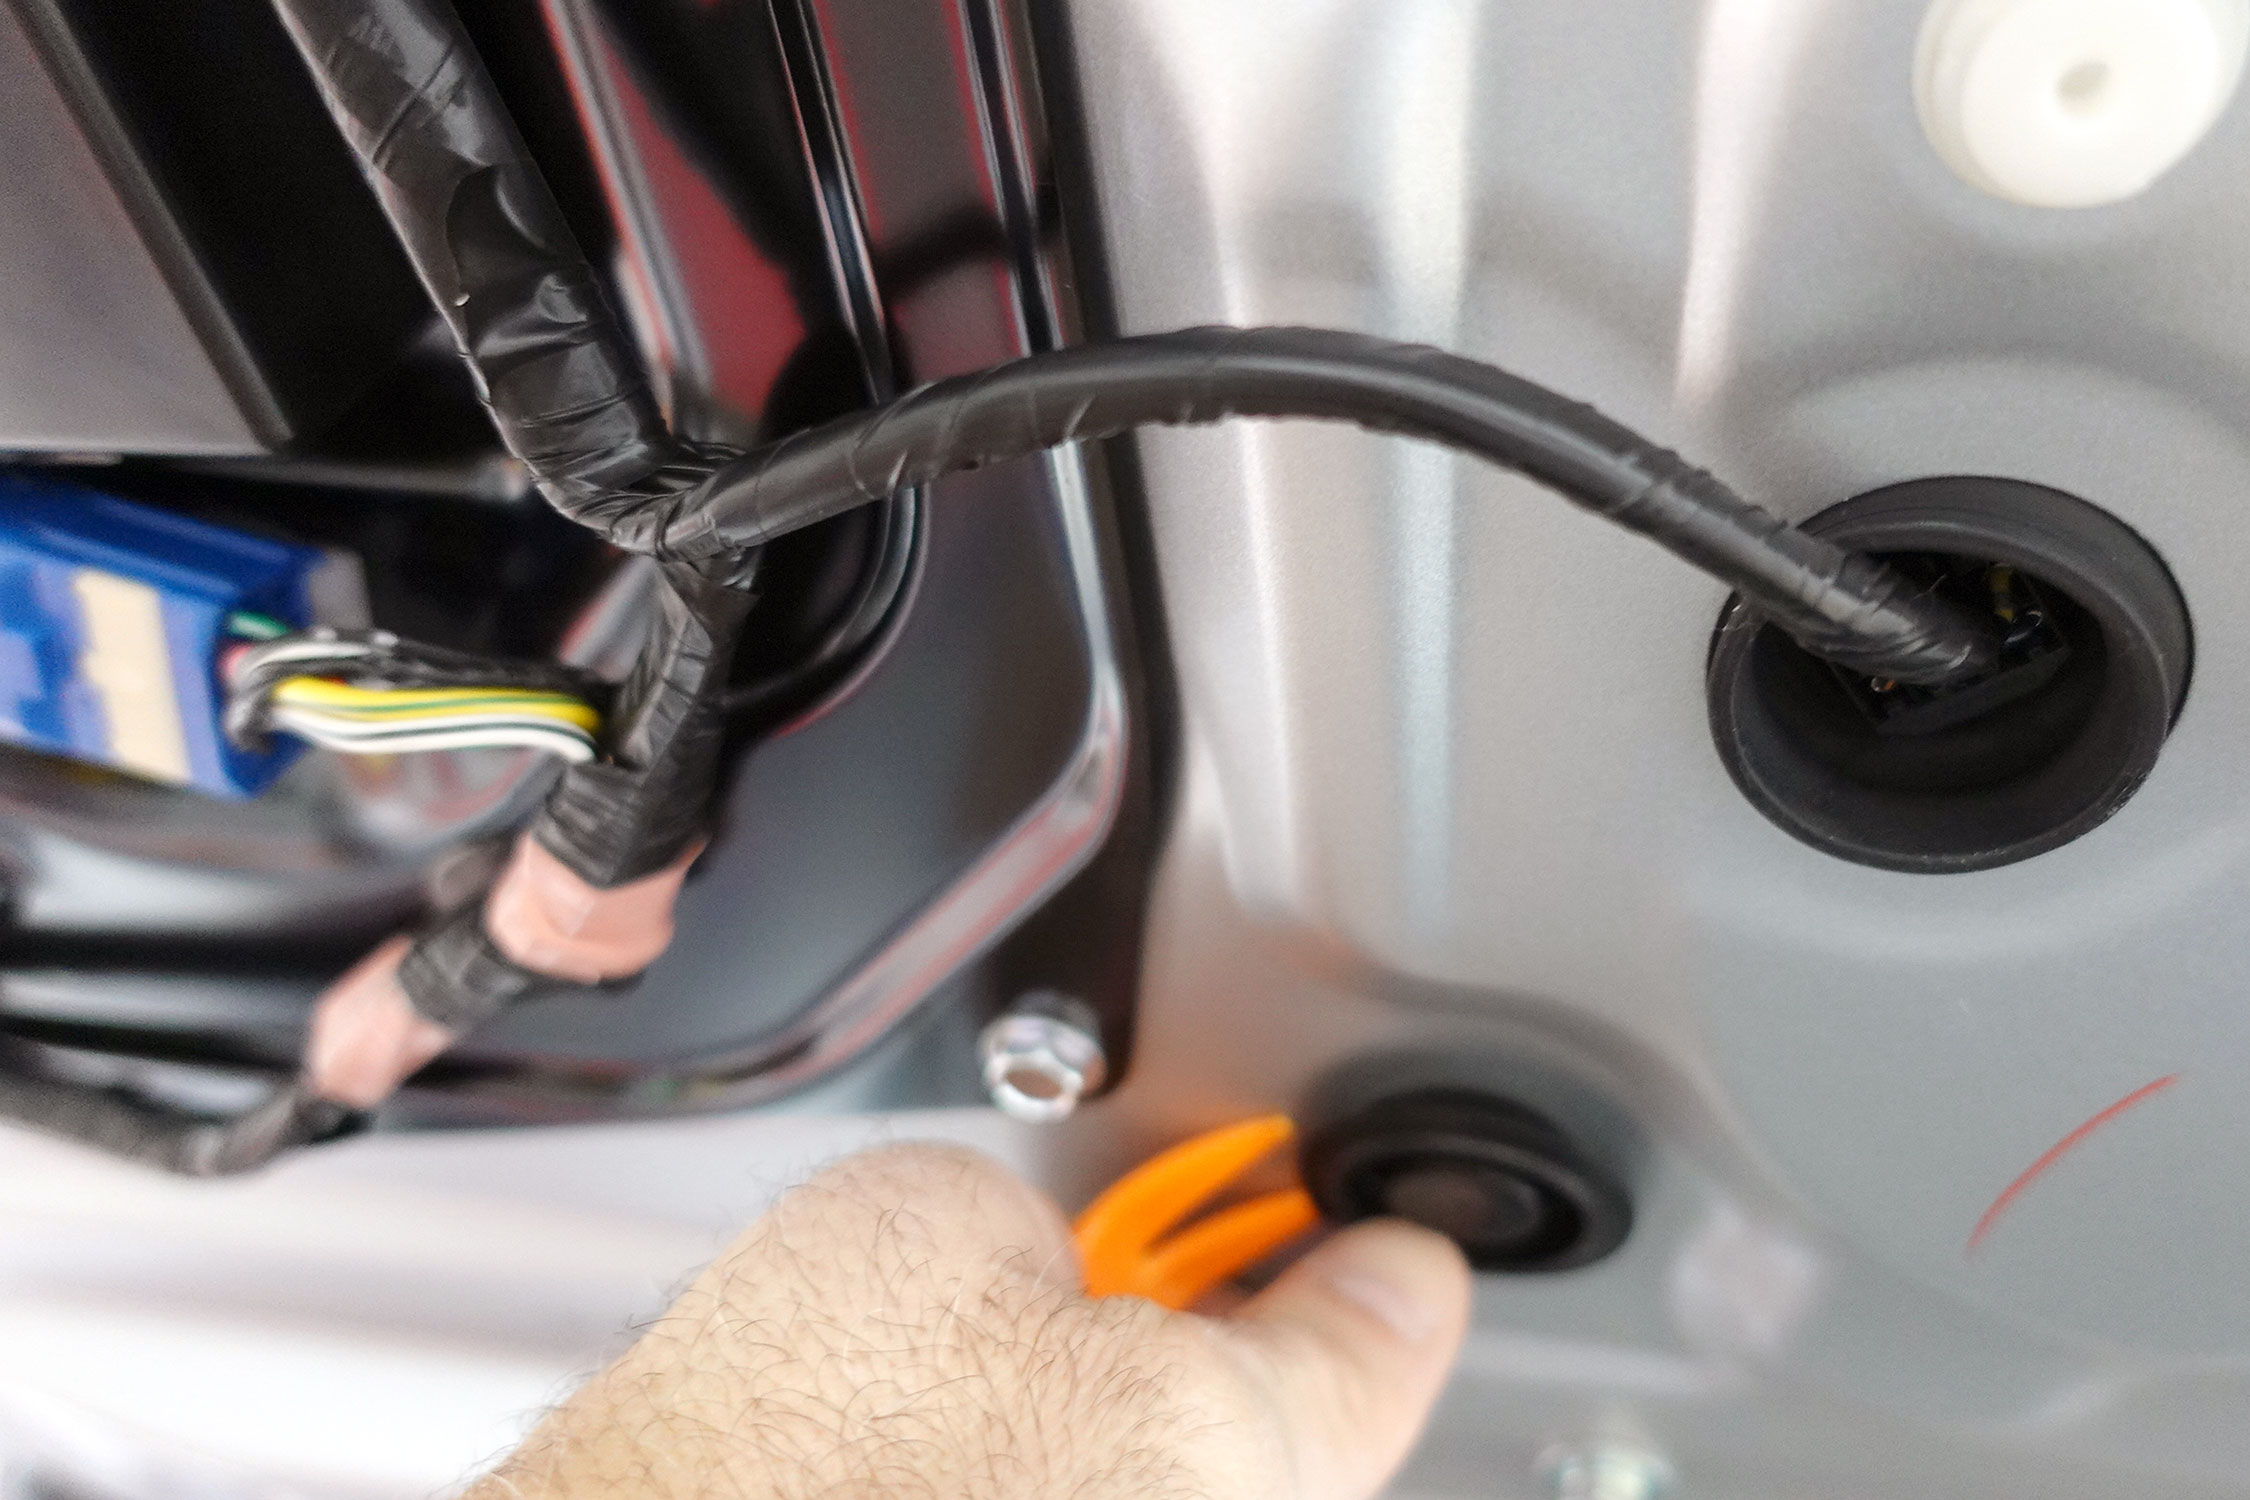
The sixth nut can be accessed by removing this grommet |
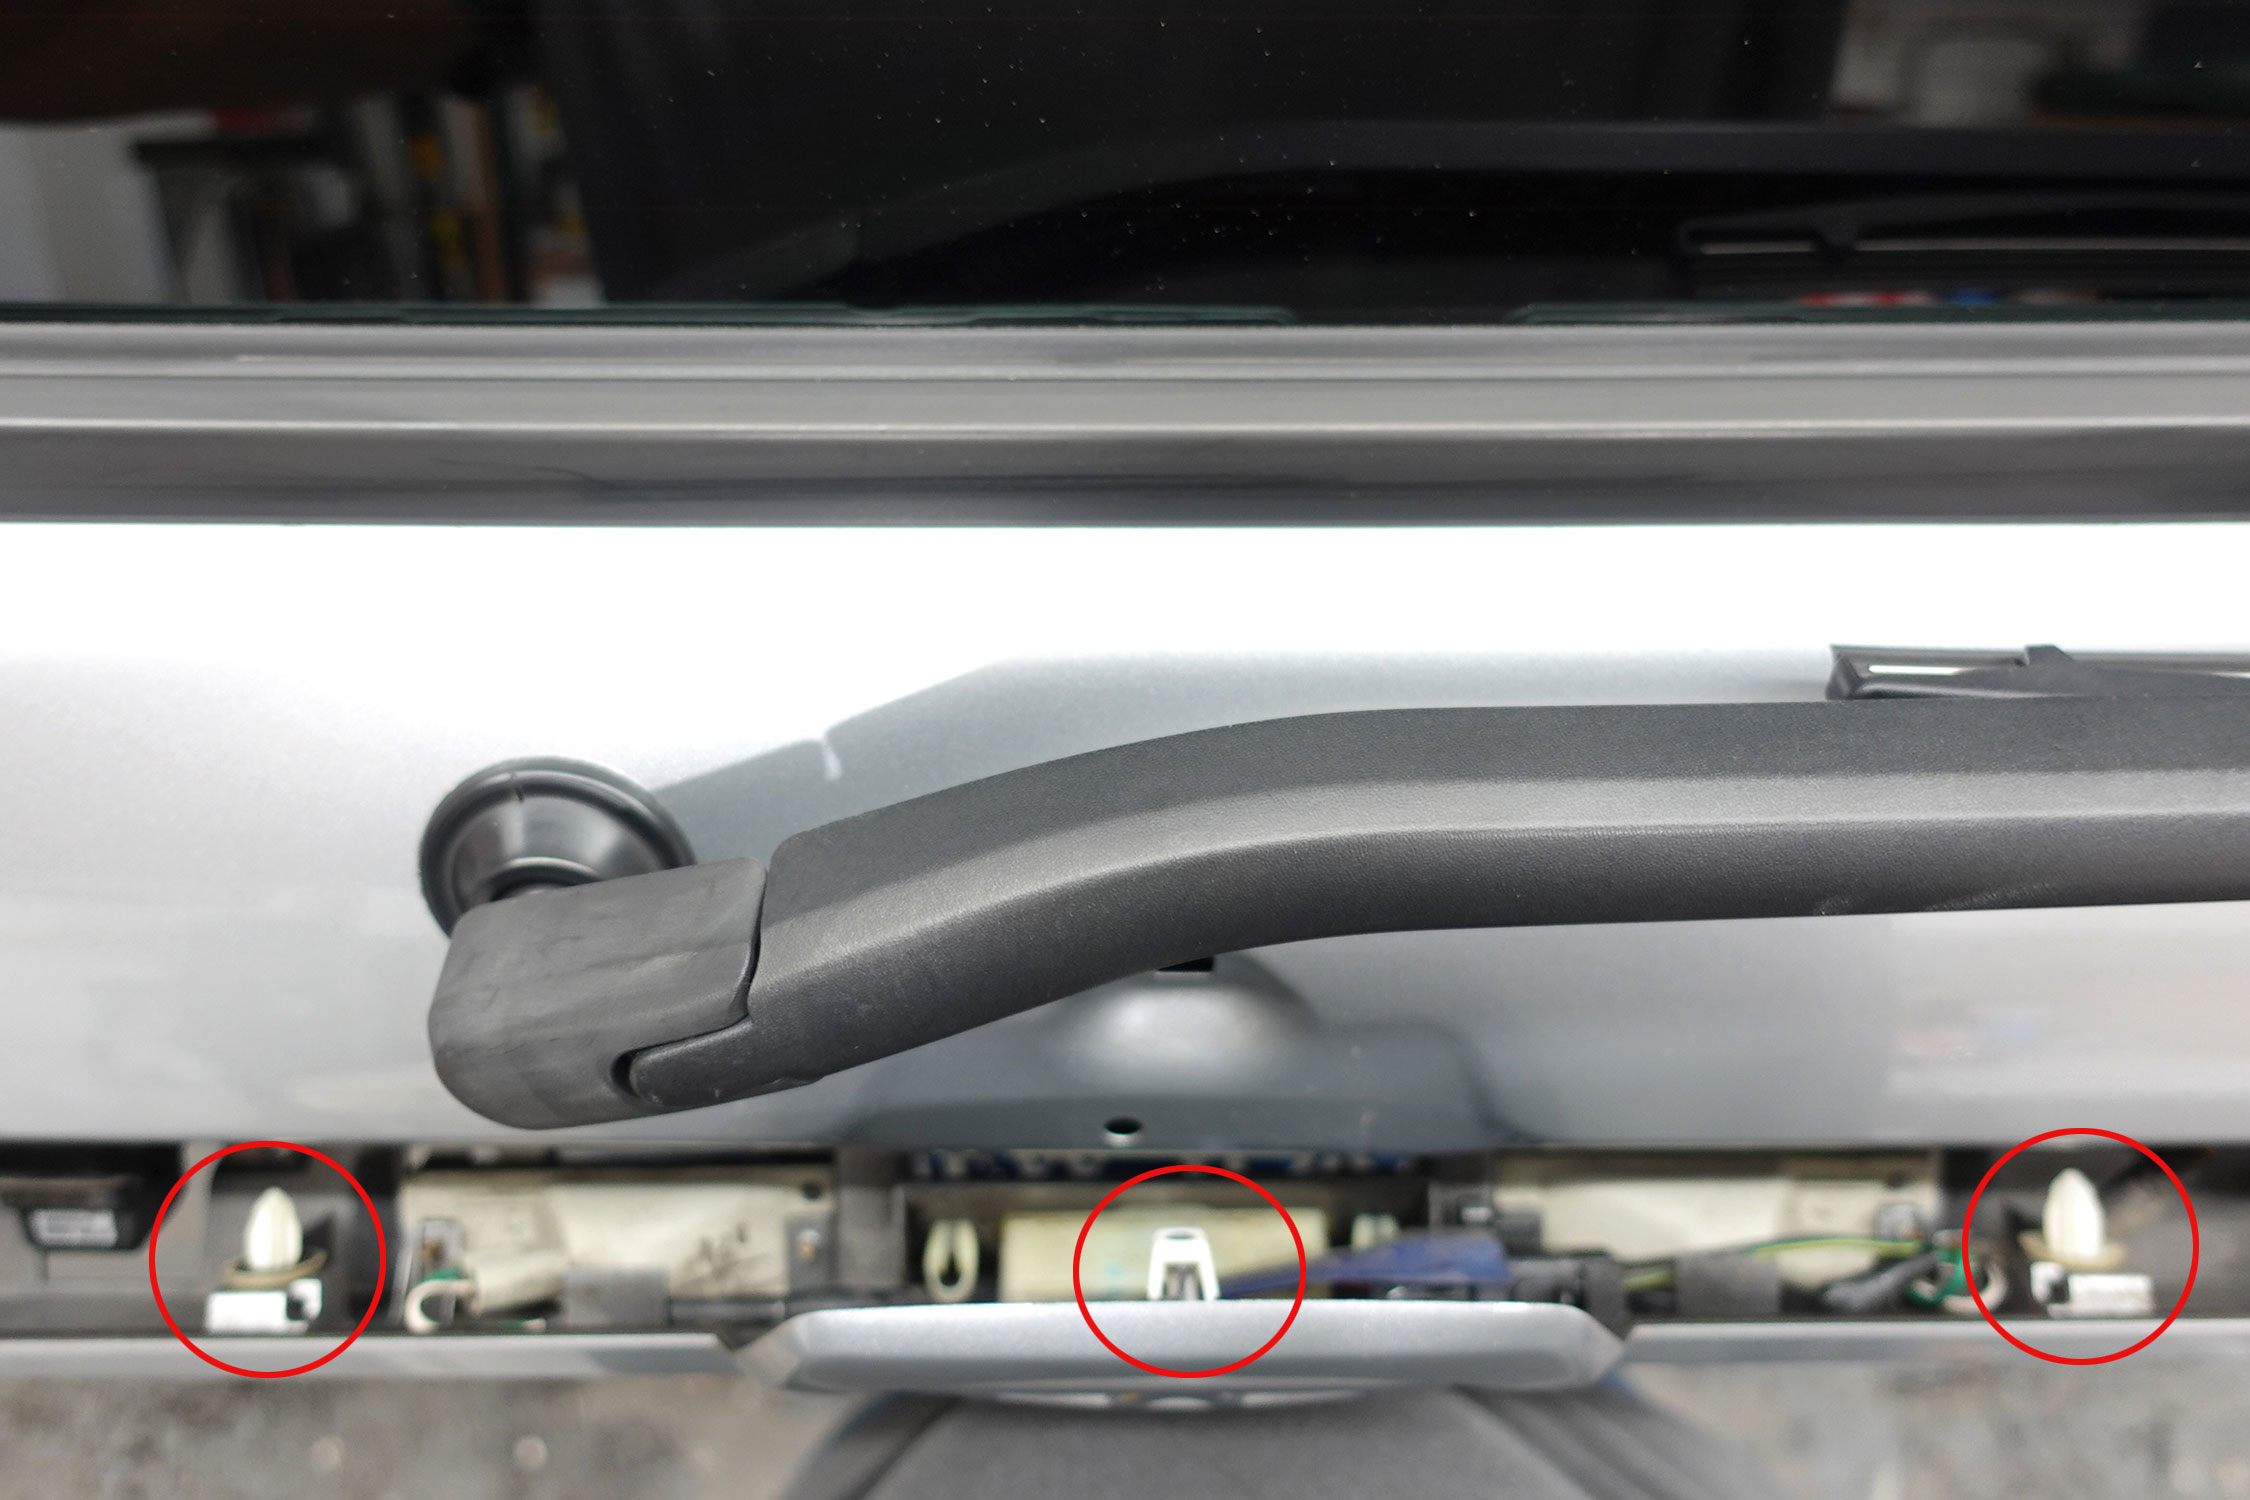
Disengage clips |
D. Remove the Back Door Opener Switch by unplugging the wire harness, removing two phillips screws, then squeeze the two clips to release the switch.
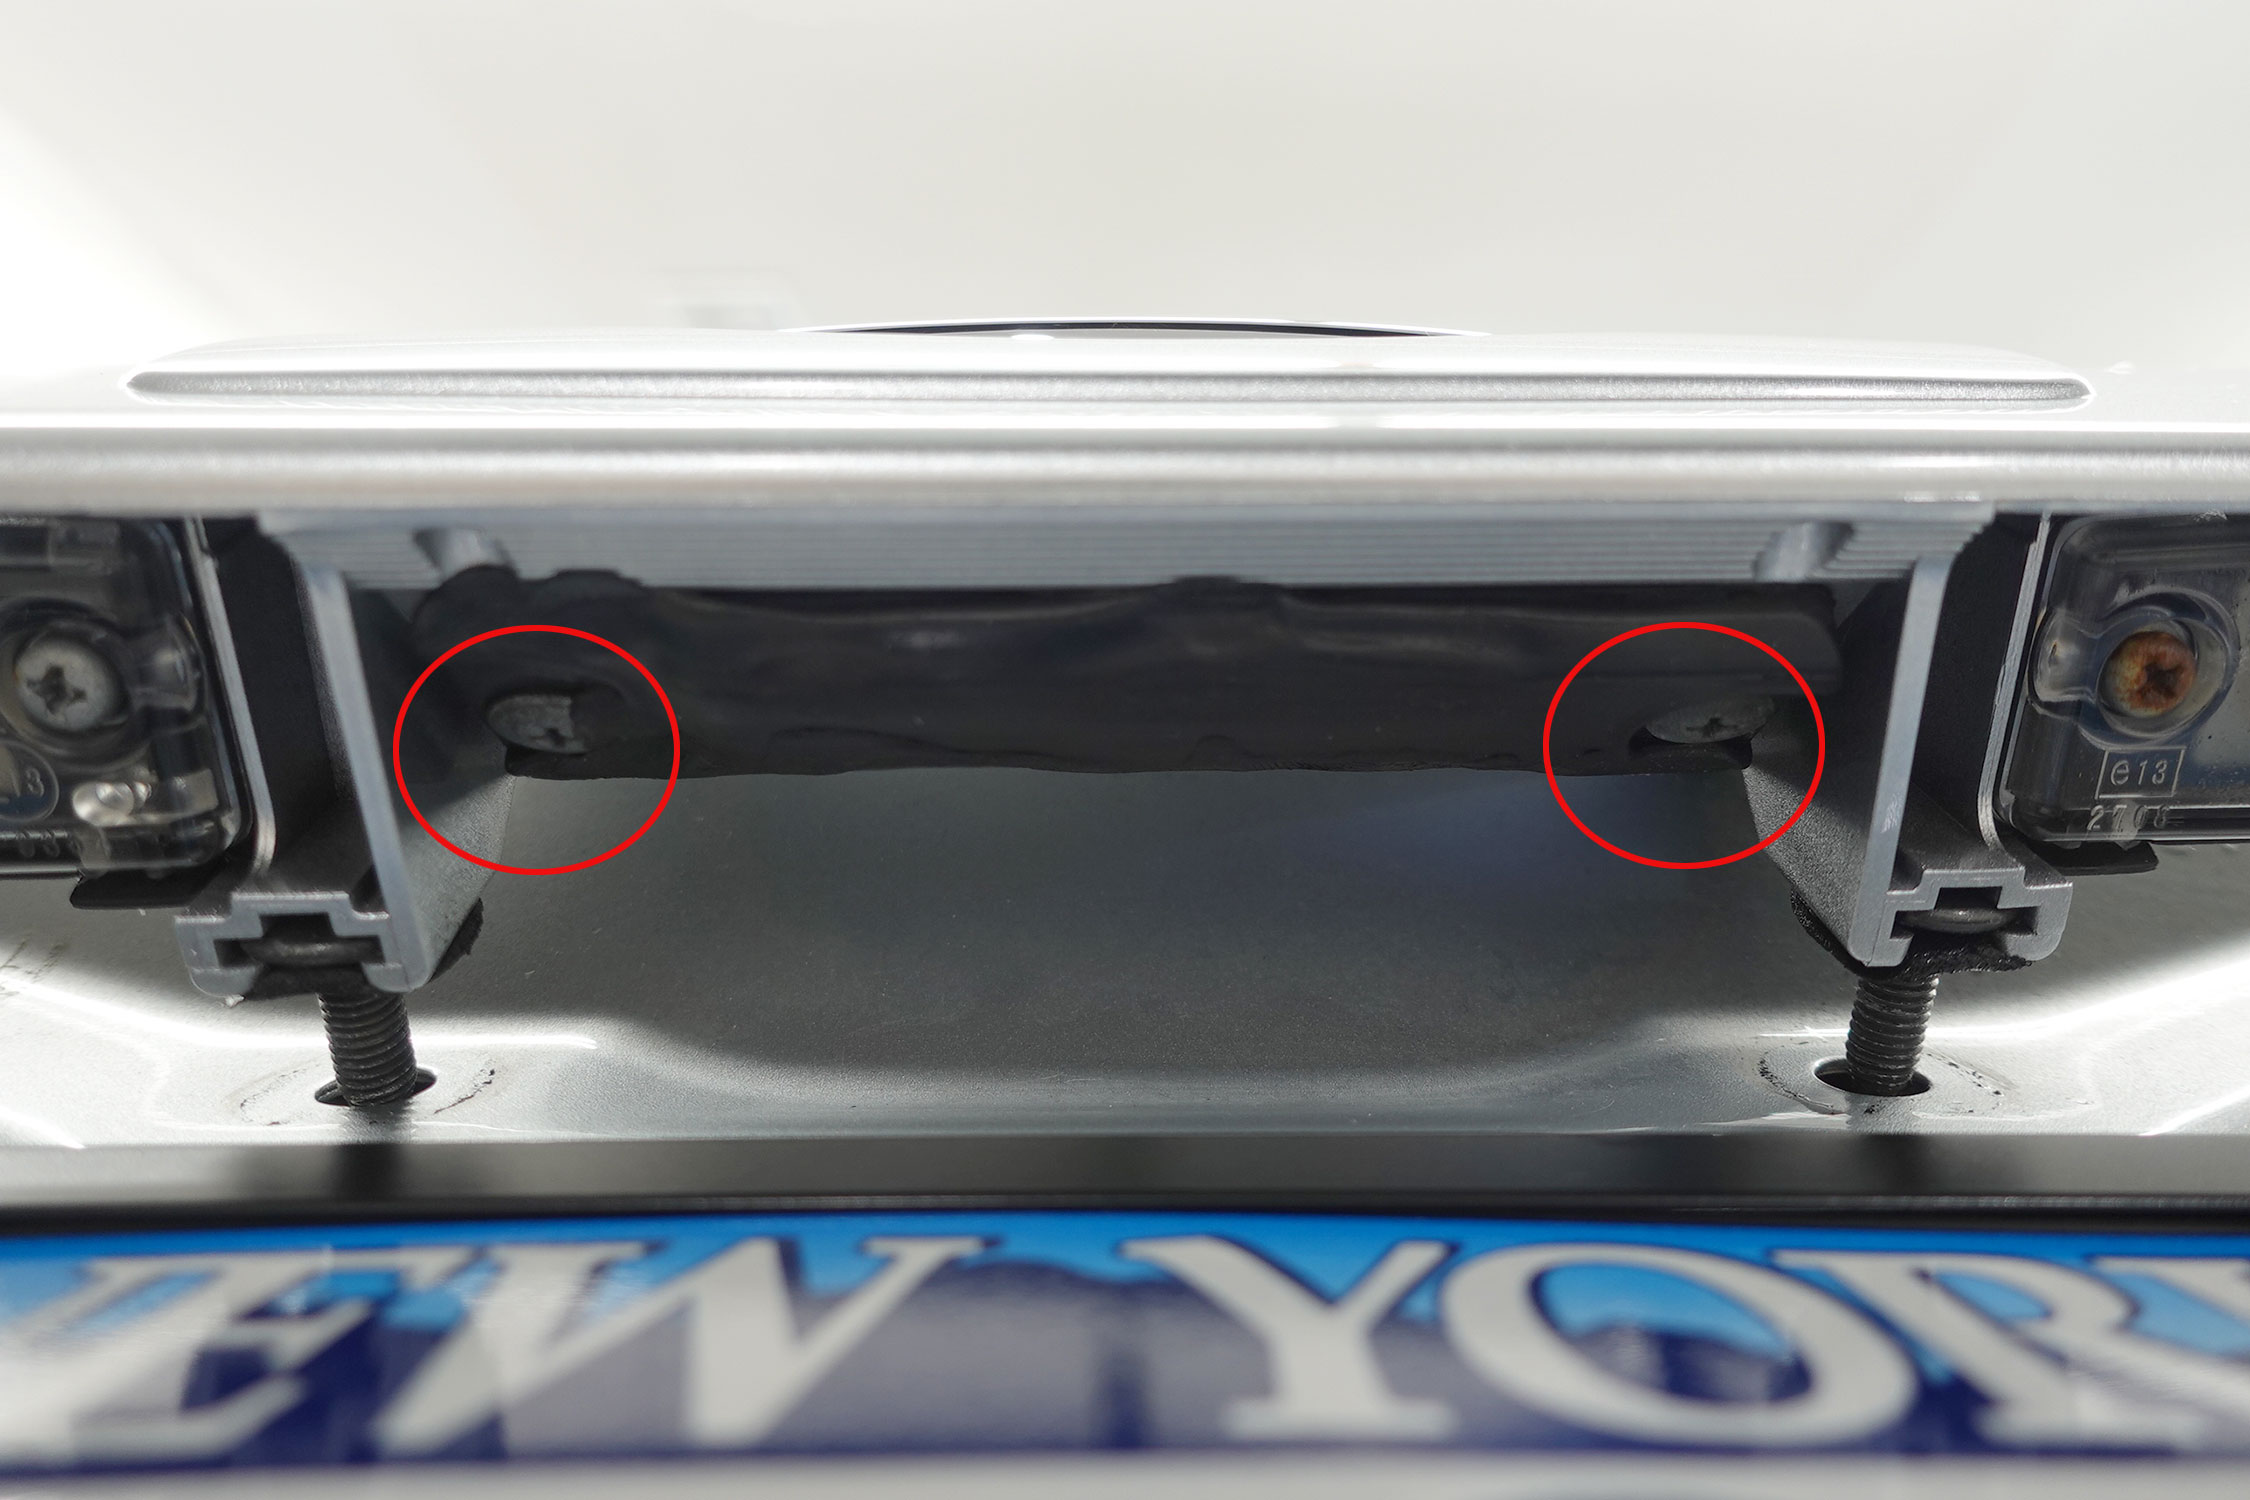
Remove two phillips screws |
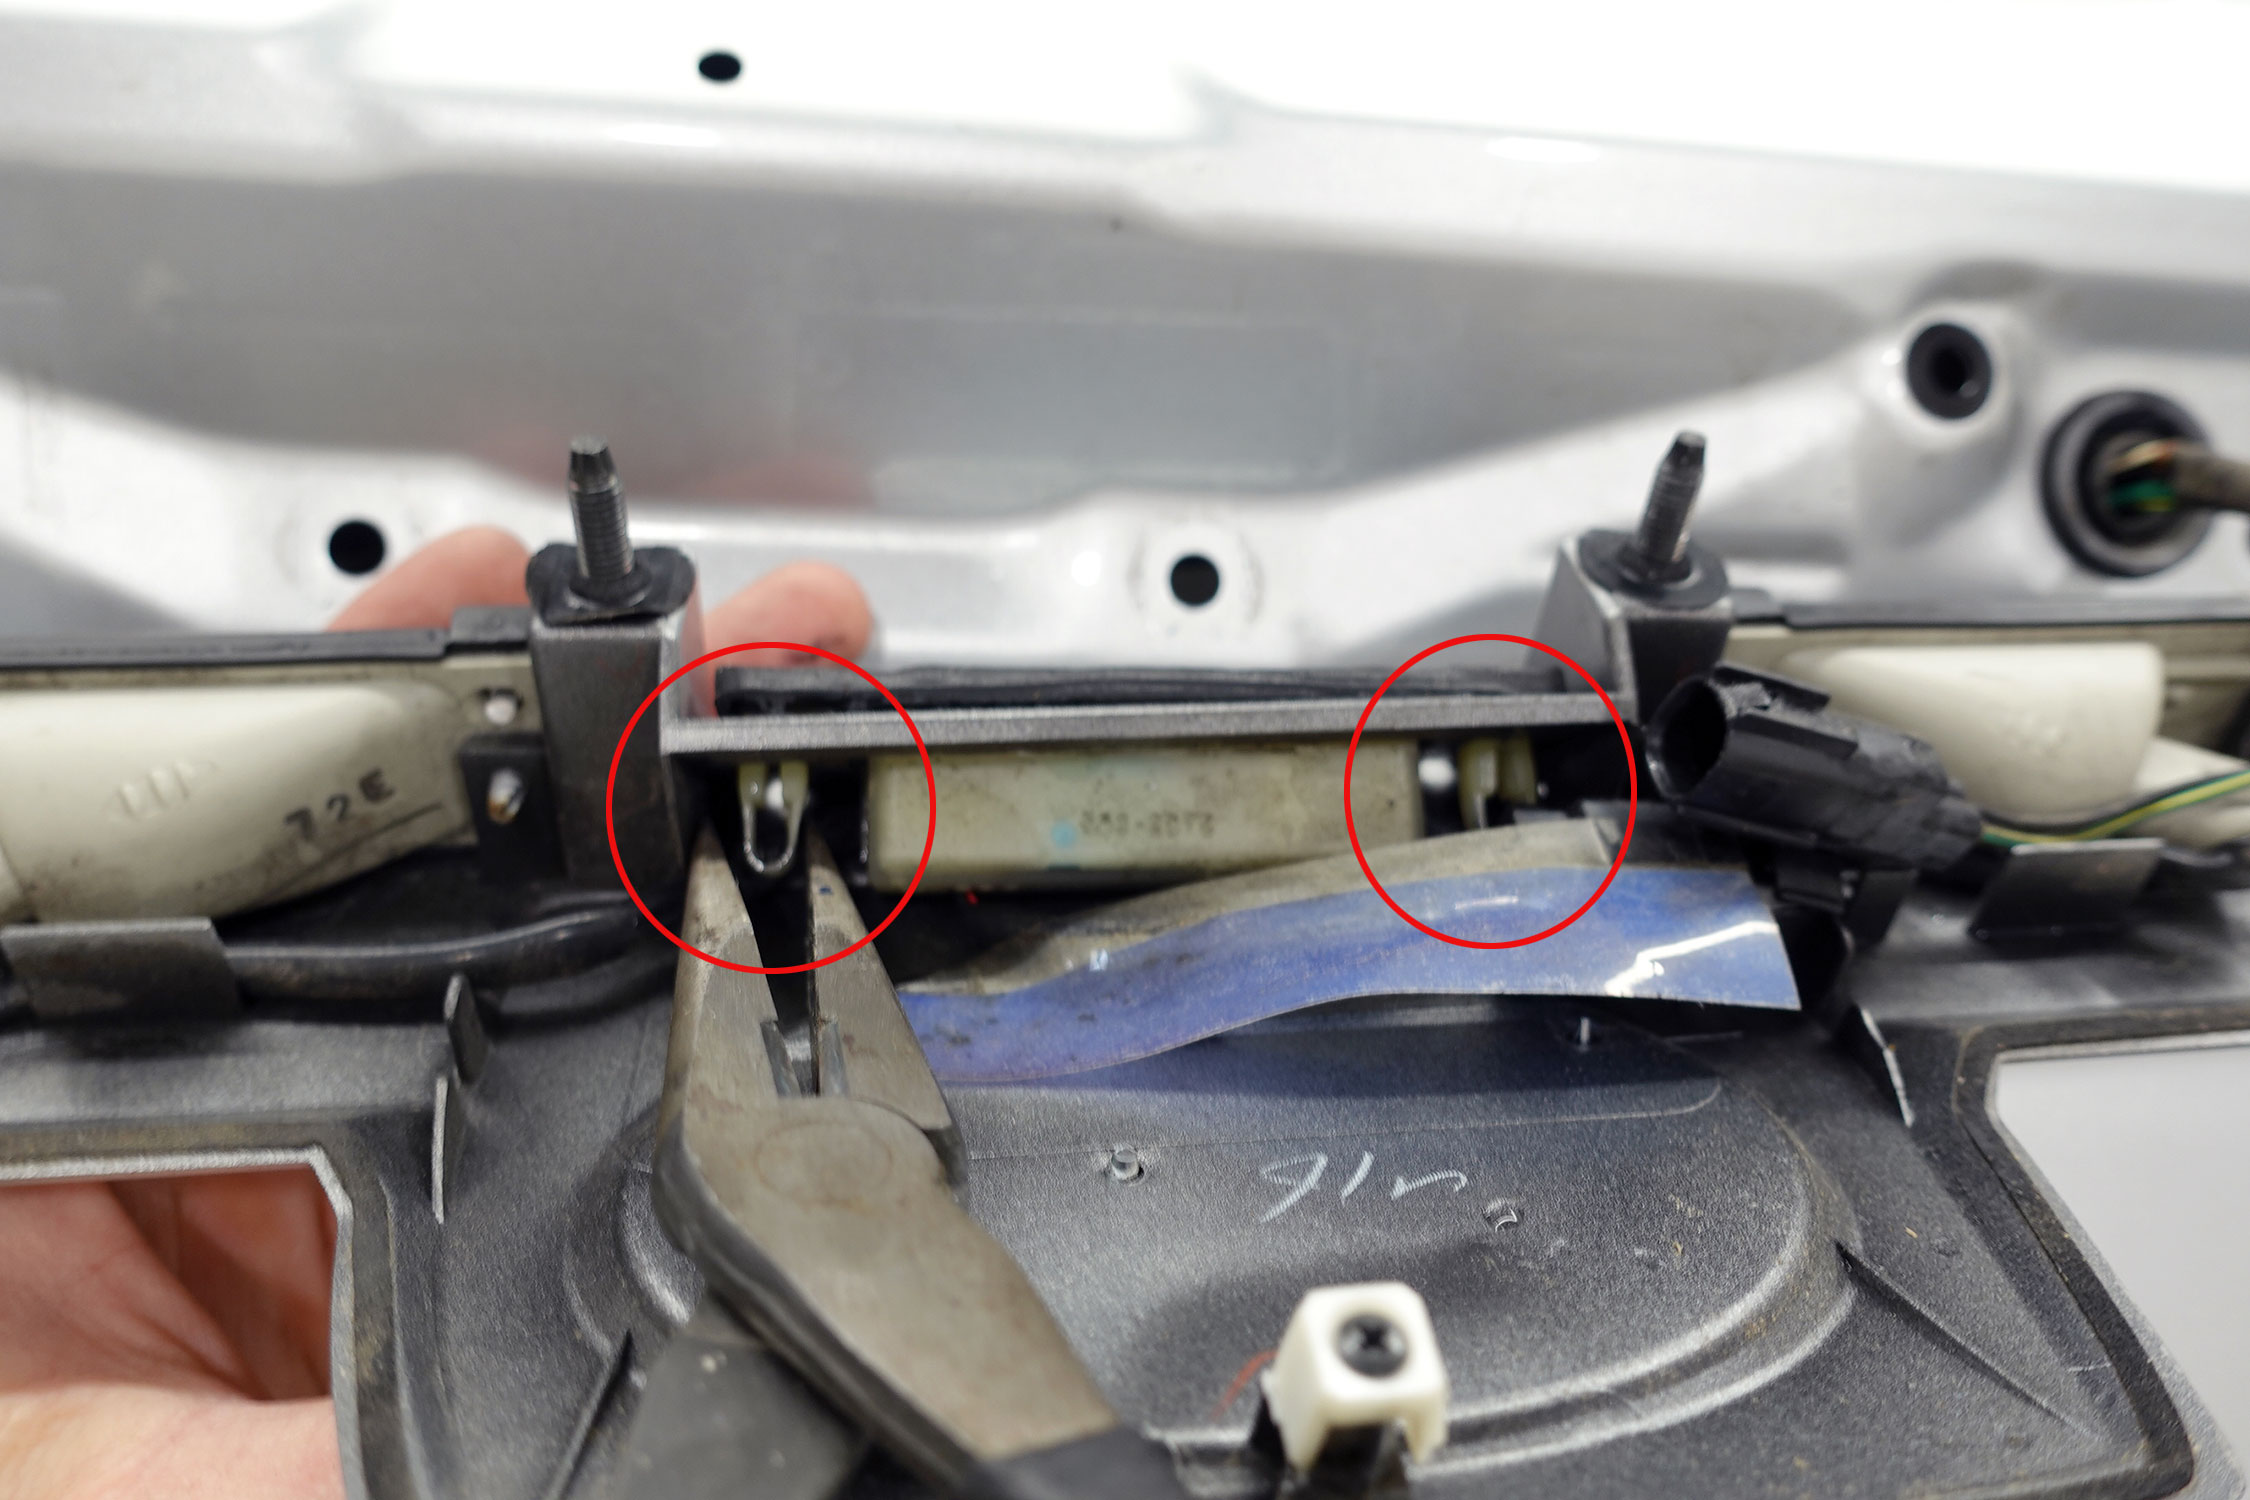
Squeeze two clips to release the switch |
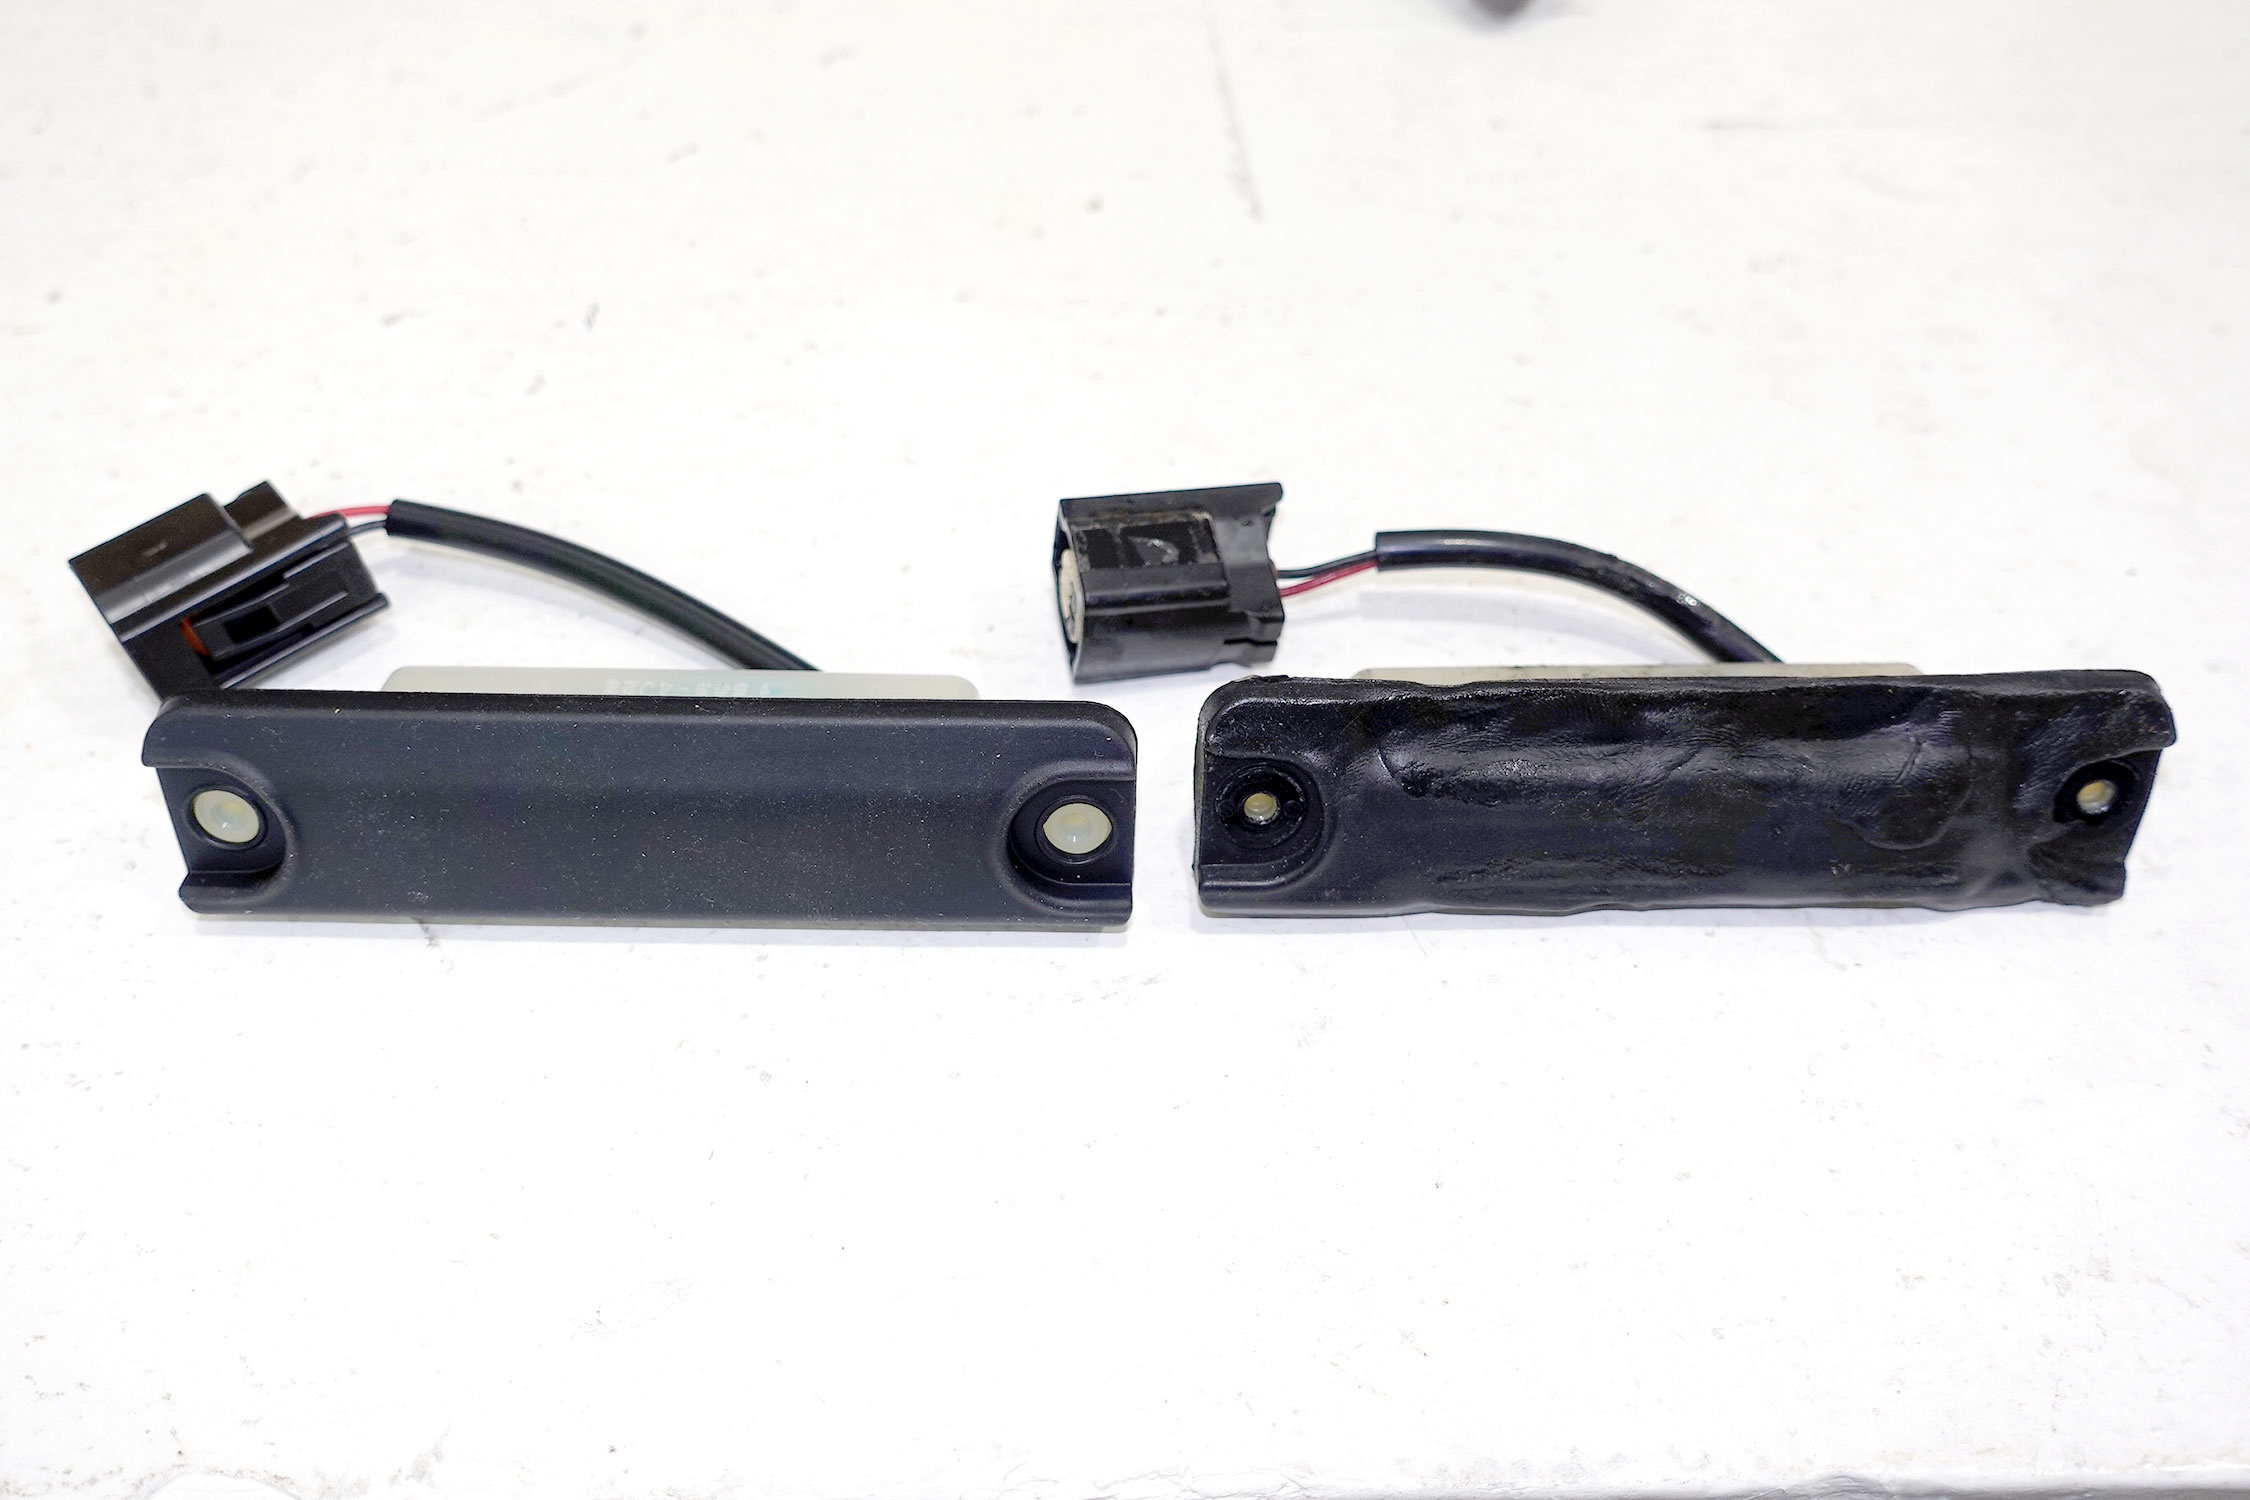
Left - New Exterior Switch
Right - Old Exterior Switch |
New Exterior Hatch Release Switch:
Install the new exterior hatch release switch by reversing the steps above.
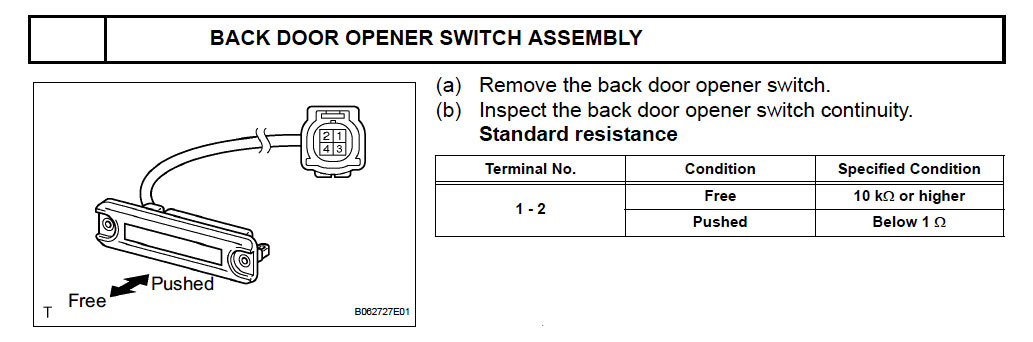
Exterior Hatch Release Switch Assembly |

Replacement Exterior Hatch Release Switch 84840-35010 |
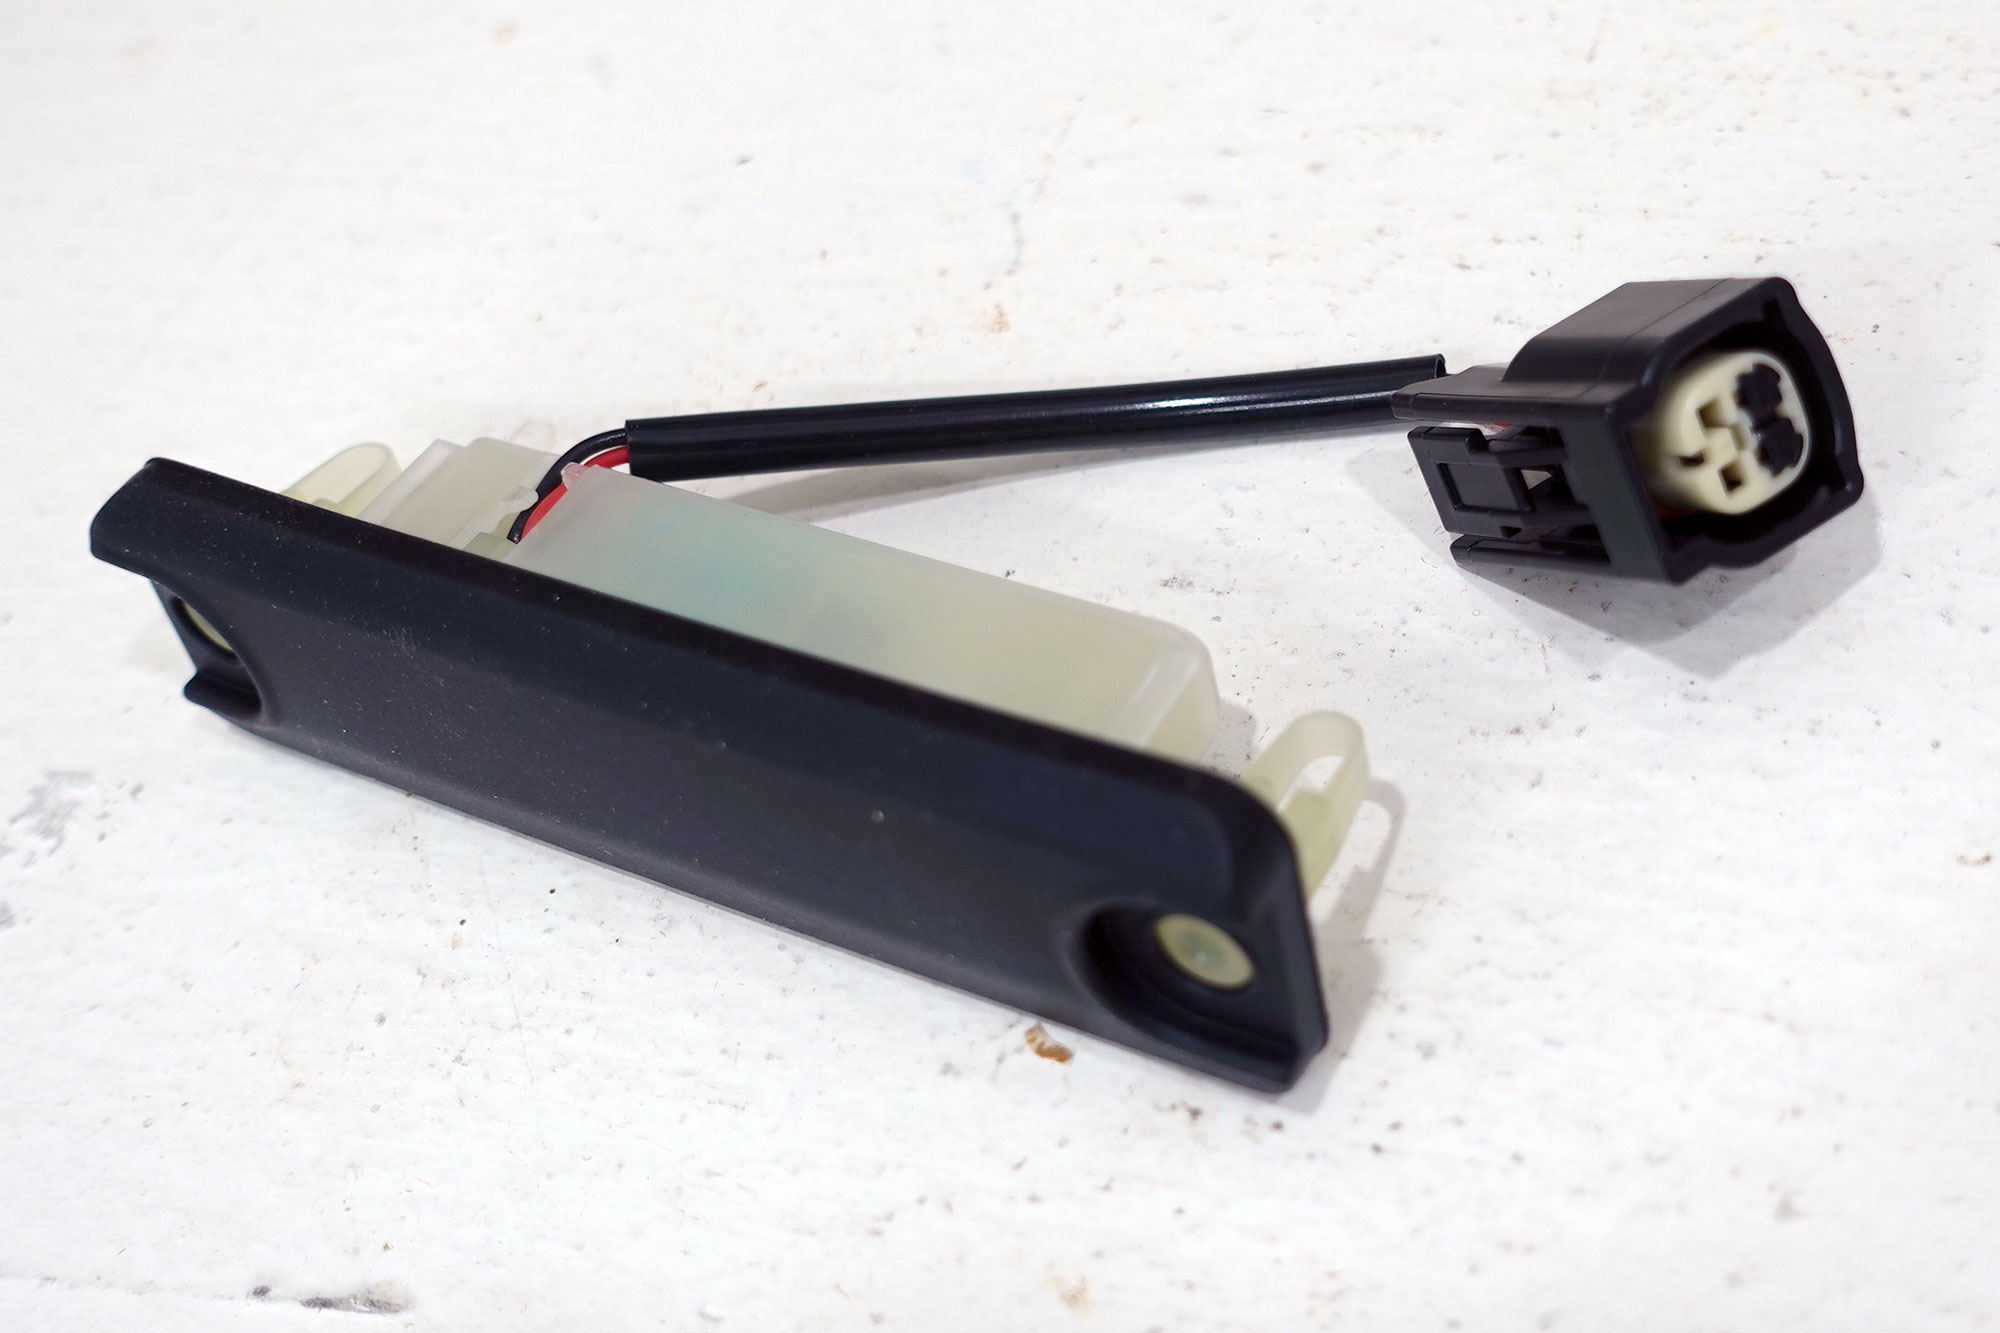
Replacement Exterior Hatch Release Switch 84840-35010 |
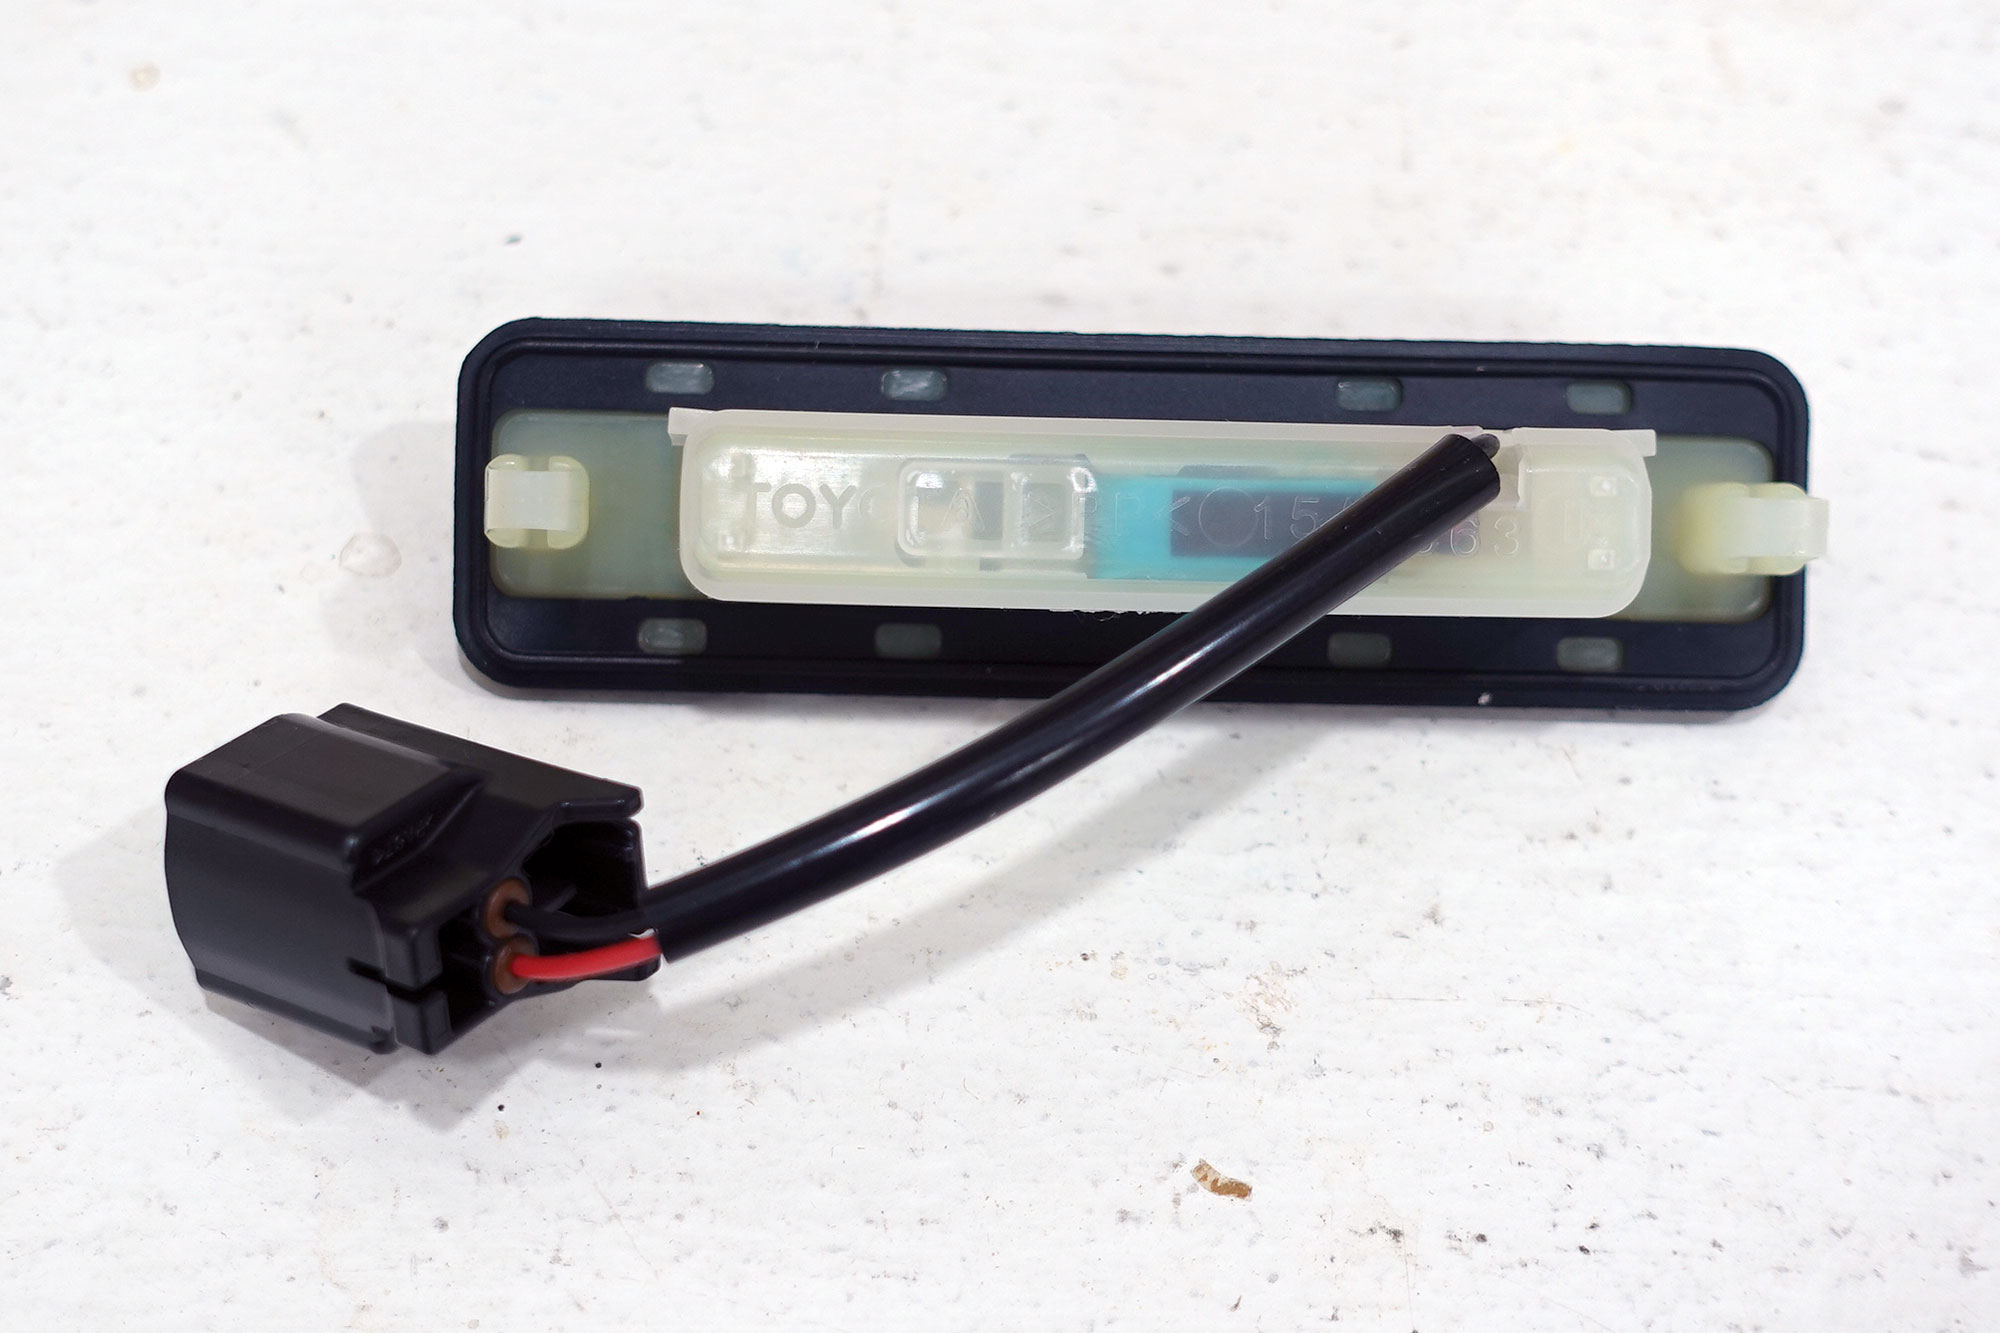
Replacement Exterior Hatch Release Switch 84840-35010 |
|
|