|
Main Menu
|
|
|
|
My 2007 4Runner
|
|
|
|
4Runner History
|
|
|
|
Other
|
|
|
|
|
Concept:
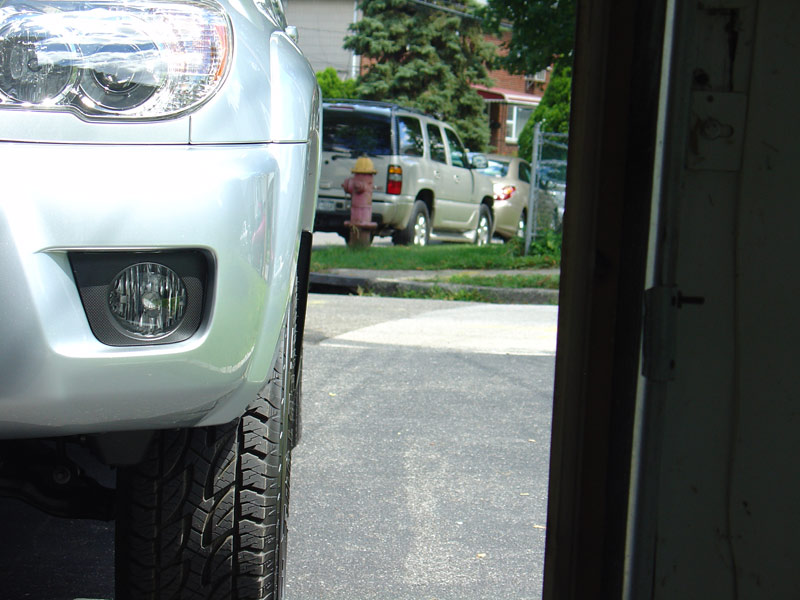
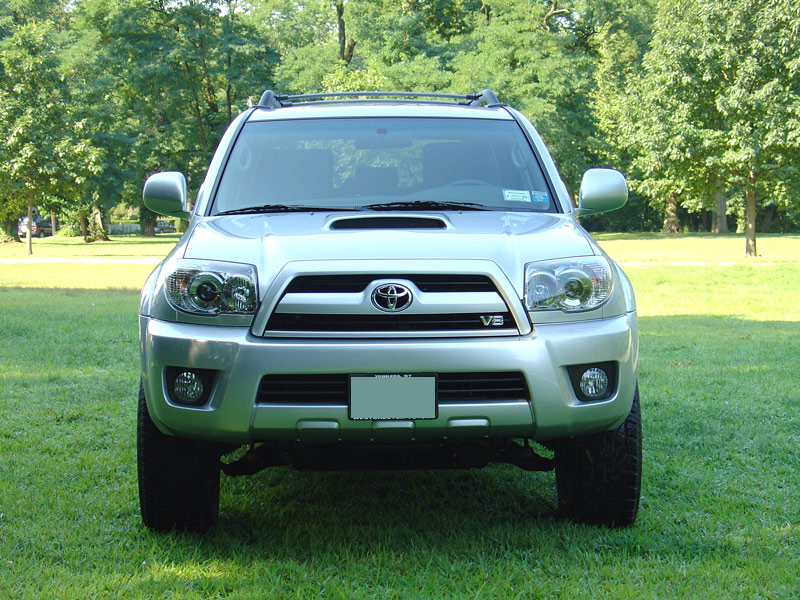
Look at any 4th generation 4Runner and you will notice right away the wheels are set too far inside the fender flares, especially on the 2006-2009 models
that had larger flares as part of the mid generation refreshening. This is quite noticable especially when comparing my 2007 4Runner to my 1999 4Runner
with the slimmer black highlander flares. The tires on my 1999 are actually outside the fender flares by 1/4", giving a wide agressive stance.
Before - Front
2007 4Runner Sport
265/70/R17 |
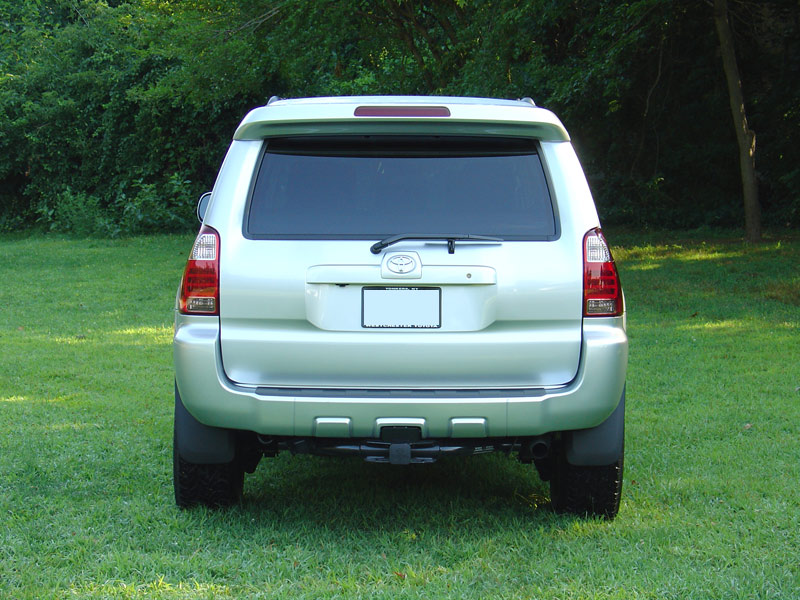
Before - Rear
2007 4Runner Sport
265/70/R17 |
Factory Stock
1999 4Runner Highlander
265/75/R16 |
Even though my 4th generation 2007 4R has been lifted and reshod with new and upsized A/T rubber, it just didn't have that perfect stance with the wheels inset so much.
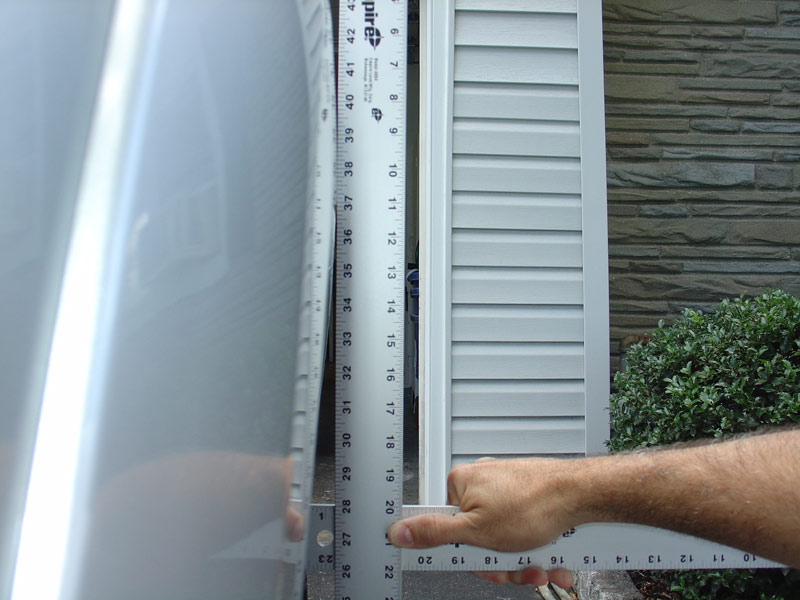
Wheel spacers could correct this by pushing the wheels outward more. The additional tread/trac width (62.0" factory width, 64.50" trac width with spacers)
would be a side benefit as well, offsetting the lift's additional vertical height and providing more stable handling.
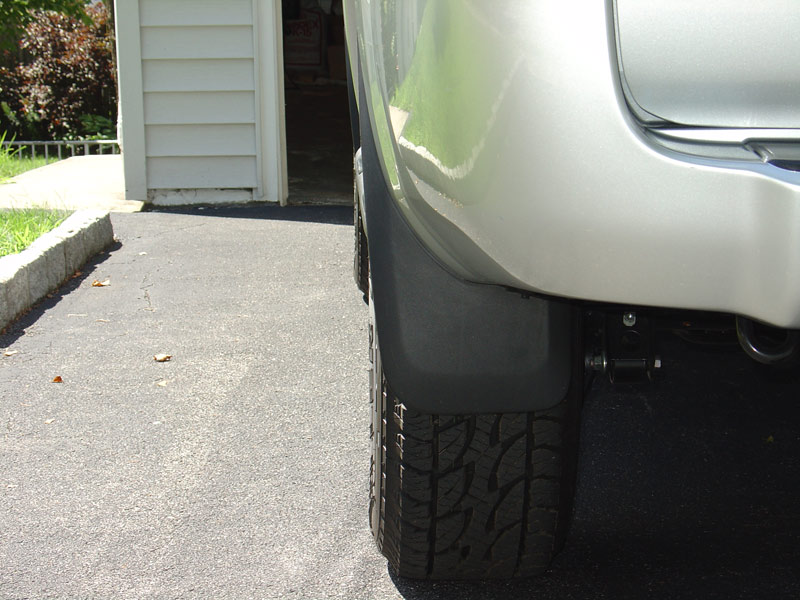
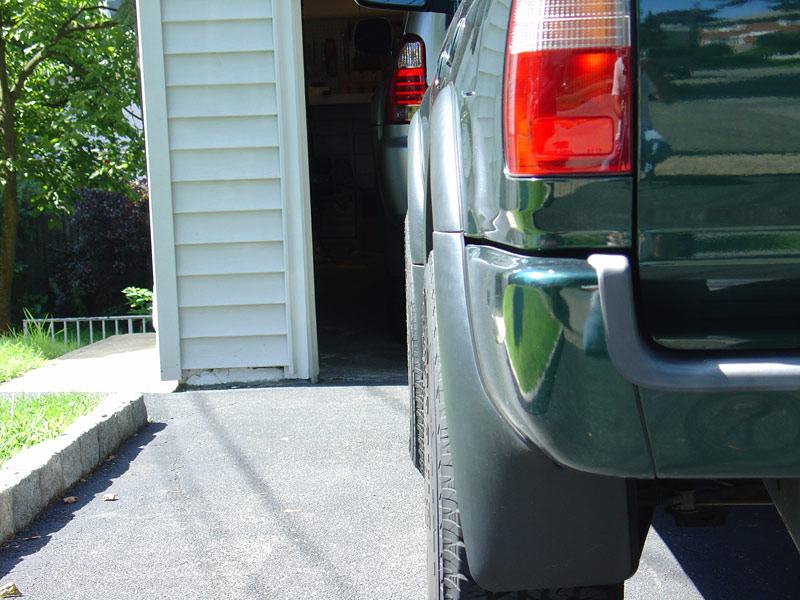
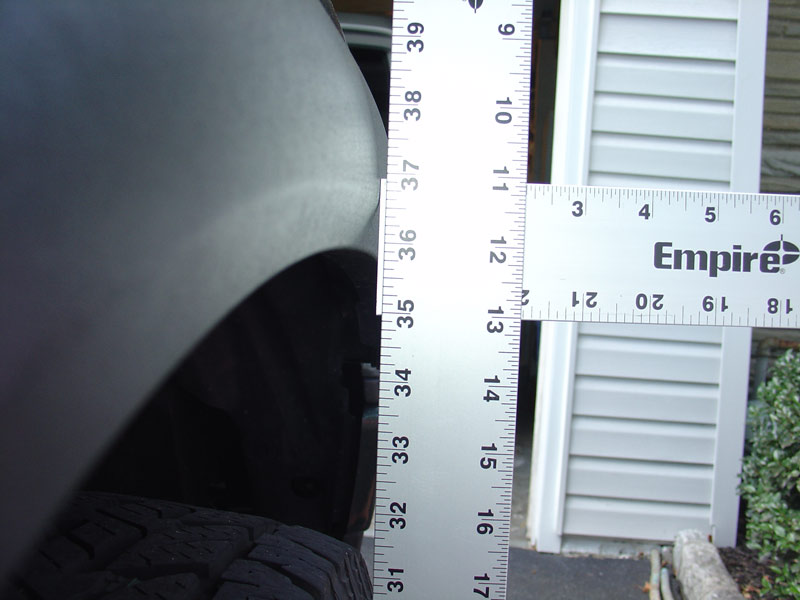
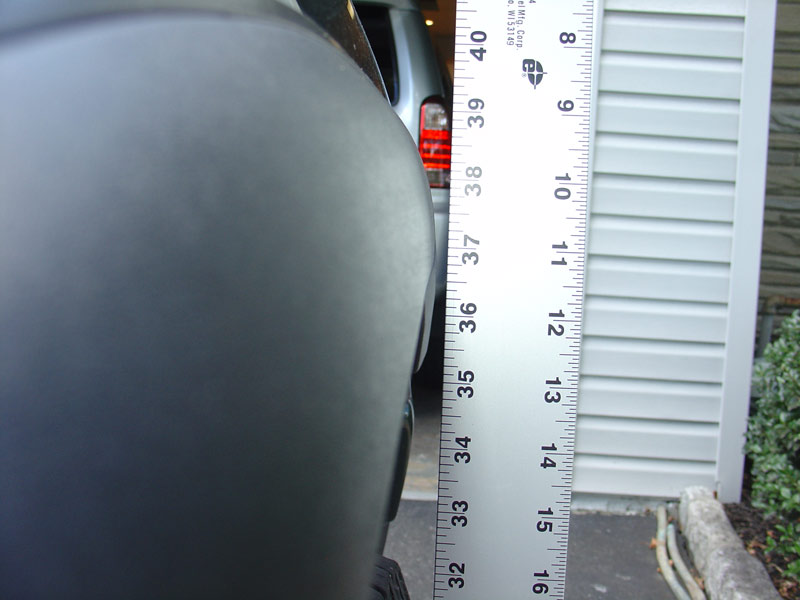
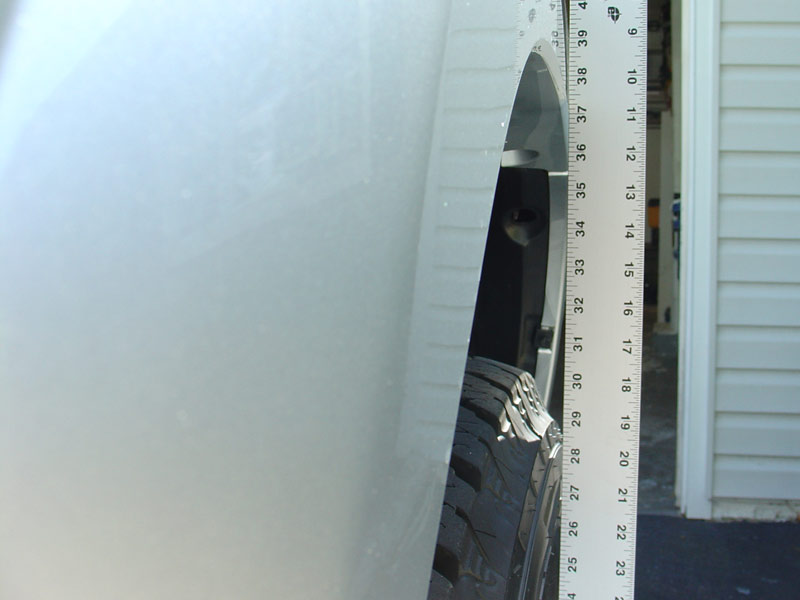
2007 4Runner - Before
You can see the Front tire (left) is inset by 1.25" and the Rear tire (right) by 1.75" |
1999 4Runner
Here you can see that the tires are outside the flares by about 1/4" |
The Toyota 4Runner's factory wheels, as most other recently manufactured factory wheels, are hub-centric. A hub-centric wheel uses a chamfered center bore
that fits onto a corresponding raised section of the hub, centering the wheel perfectly. When the lug nuts are tightened, the weight of the vehicle is
supported solely by the fit between the wheel's center bore and the hub. The wheel bolts or studs then serve simply to hold the wheel onto the hub,
and are loaded only in tension, where they are most strong. If the studs were required to absorb vertical forces, they would be loaded in single shear
which is the weakest arrangement for a fastener.
Alternatively with a lug-centric (non hub centric design), the wheels are located and centered by the taper of the lug nuts or bolts and support the
entire weight of the vehicle.
Taking that information into account, when choosing a wheel spacer, a hub-centric design was my first and most sought after charateristic.
Using a hub centric wheel spacer ensures that your factory wheels positively engage with the spacer, and that it in turn positively engages with the
hub on the vehicle, centering them perfectly to avoid vibration problems. Unfortunately (at the time of original purchase),
there are not many brands of wheel spacer that are hub centric and made for the Toyota 4Runner. In fact I was only able to find one,
Spidertrax.
Other competing wheel spacers manufactured for the Toyota 4Runner are not hub centric, resulting in a set-up that has the potential for vibration,
balancing, and other problems.
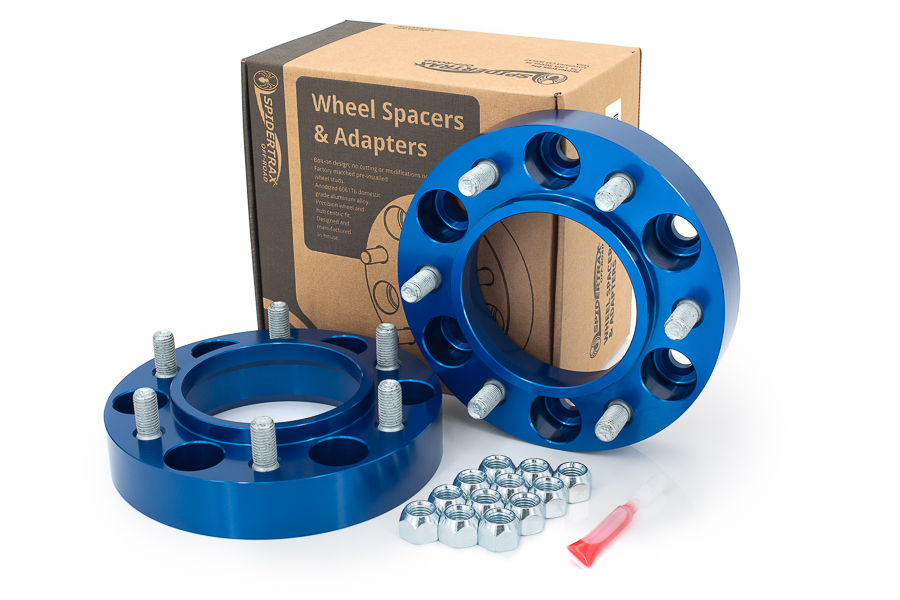
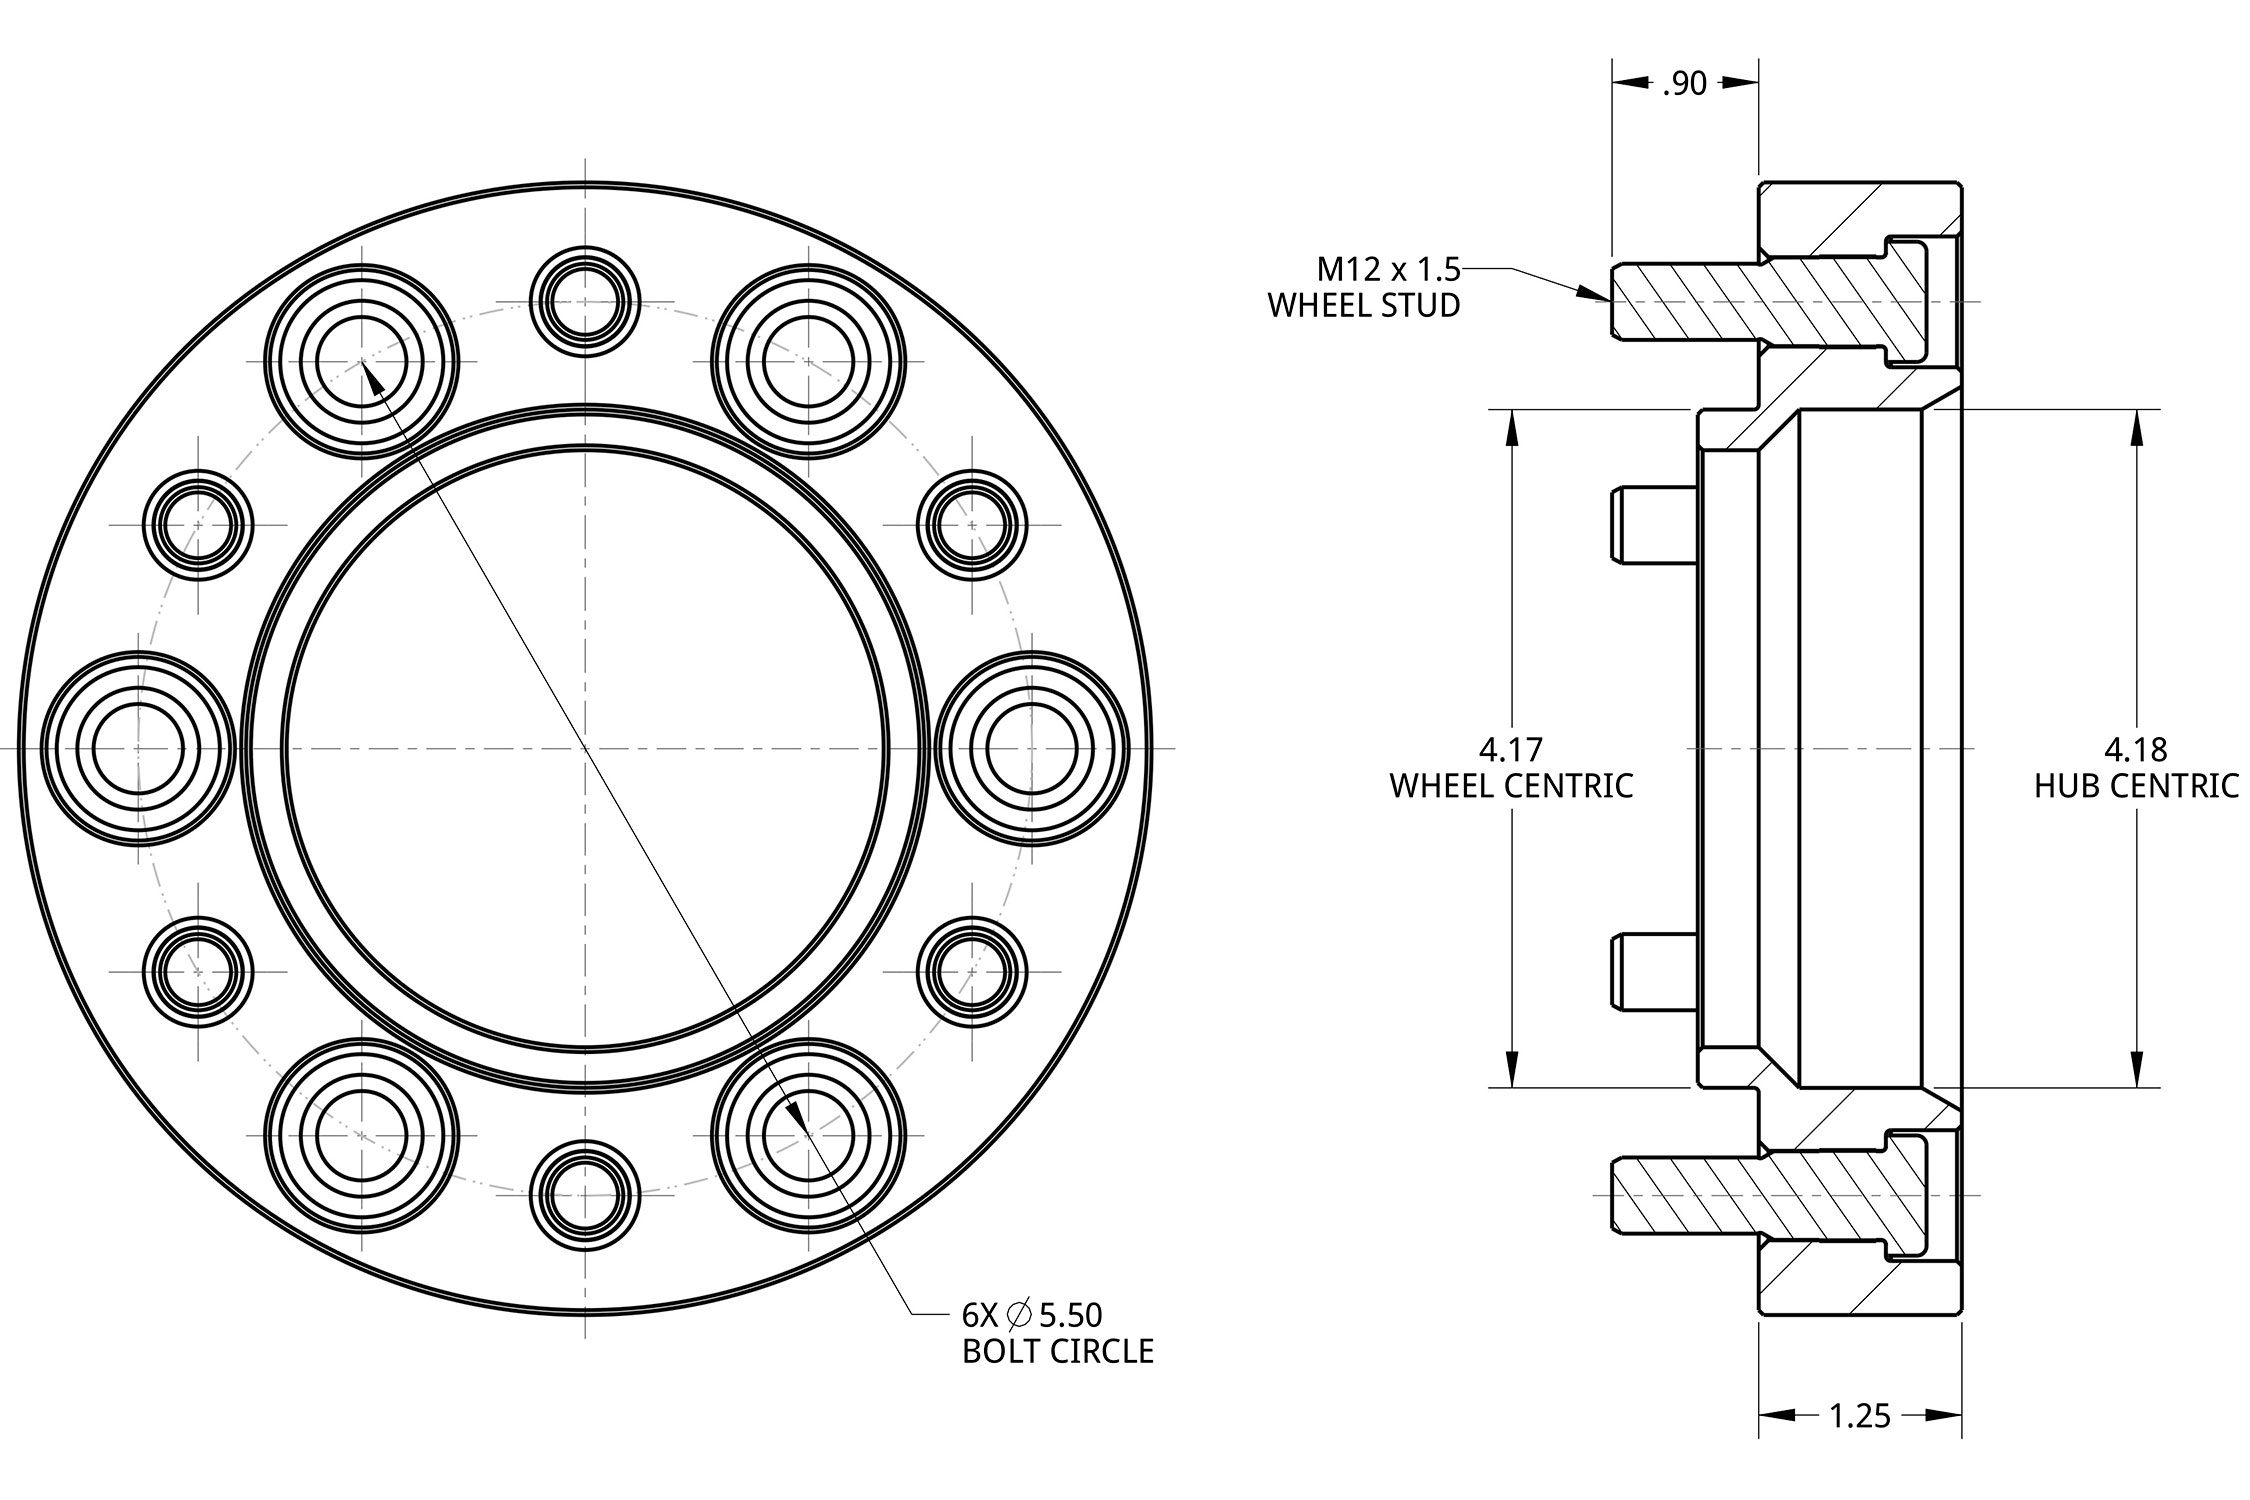
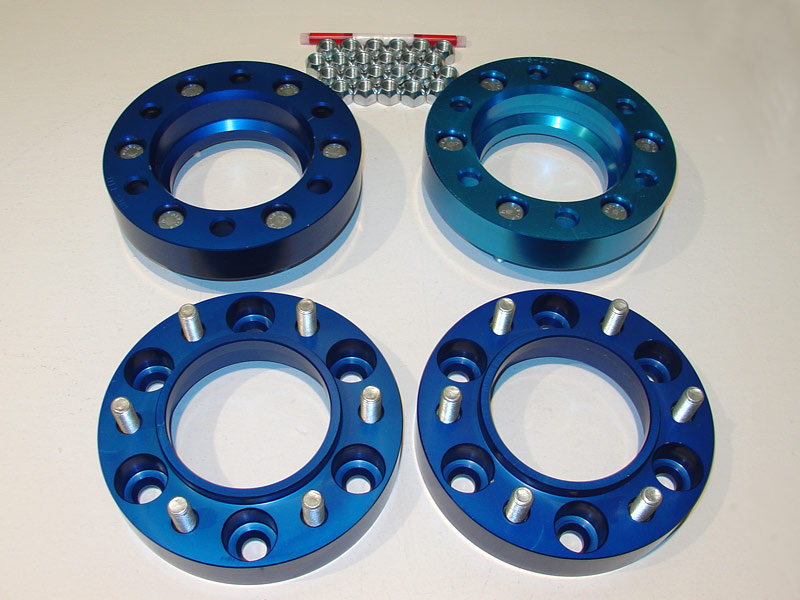
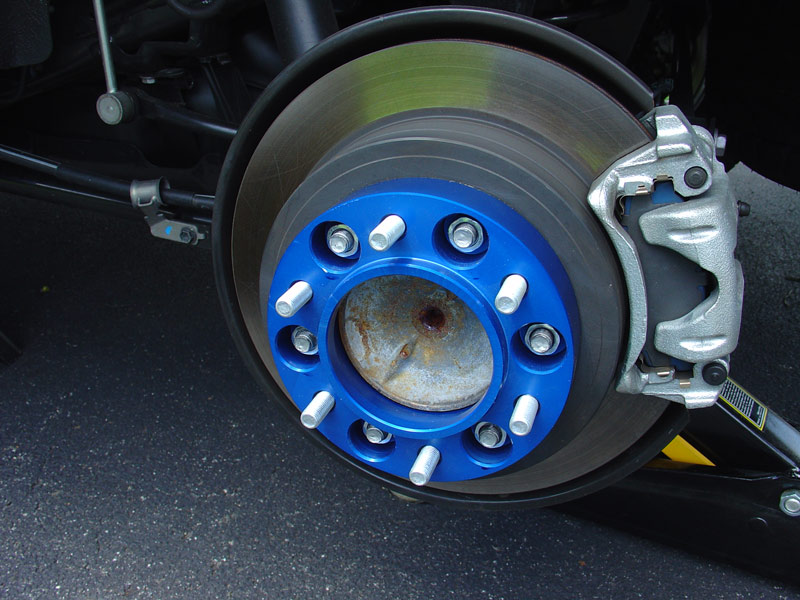
Spidertrax offers a Hub Centric Toyota Wheel Spacer Kit, Part# WHS-007.
They fit various Toyota Hub Centric Axles with a 6 on 5-1/2" bolt pattern and they are 1-1/4" Thick.
Being that they are made to fit various Toyota vehicles such as the 4Runner, FJ Cruiser, Taco and Tundra they are somewhat of a compromise.
Why do i say that, well the Spidertrax spacers are offered for the 4R application, in only one thickness (1.25") and one color (Anodized Blue).
While the hub centric design is a must and the primary and foremost consideration, being able to choose the exact thickness and color would be perfection.
Sizewise, a 1/2" thicker spacer out back would make the tires sit precisely flush on a 2006-2009 4R with the larger flares.
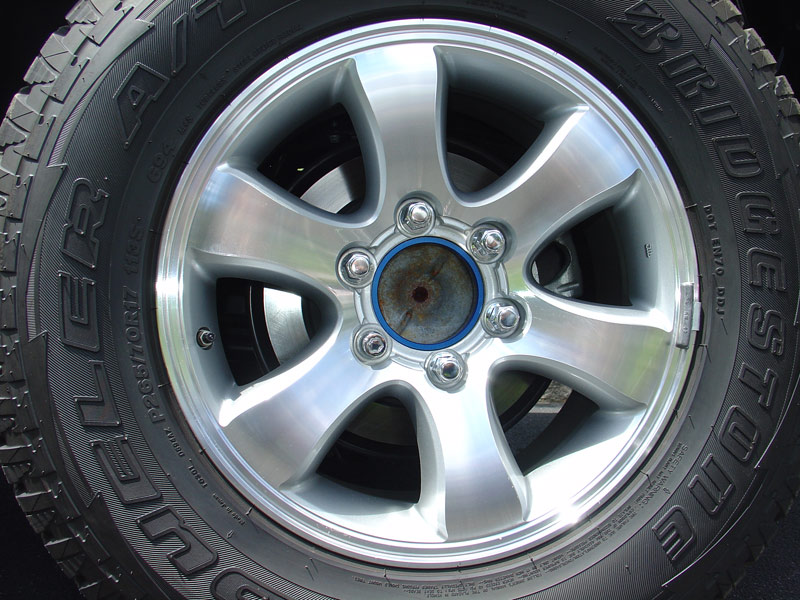
I believe the 1.25" spacers are perfect for the 2003-2005 4R. As far as the color is concerned, sure these are mounted behind the wheel,
but the purist will note that they can be seen through the aluminum factory wheel spokes and if blue is not your thing, then take it or leave it.
These are very minor details that would not, and have not, made me second guess the purchase. The 1.25" spacing makes a very dramatic difference that
is well worth the cost.
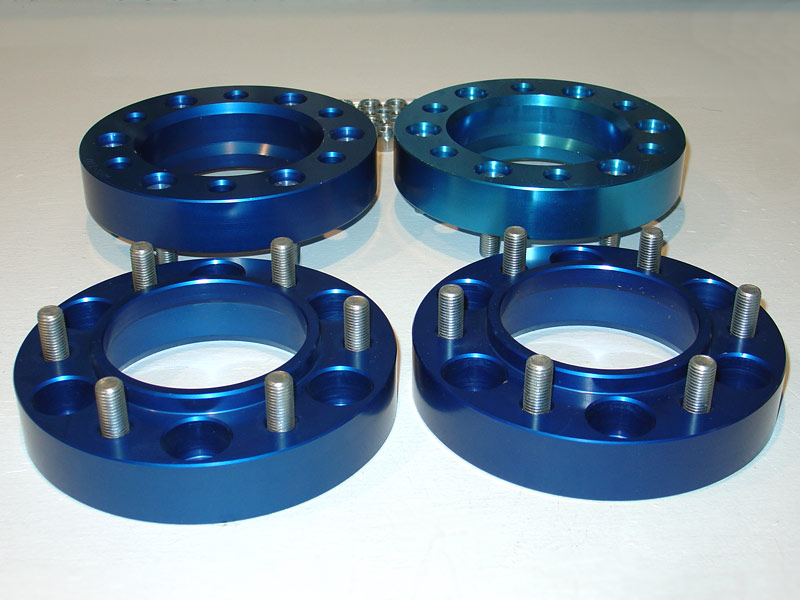
These Spidertrax 1.25" thick, 6 on 5.5" 6061T6 aluminum spacers are an easy way of spacing out front and rear late model Toyota axles that run
hub centric wheels (wheels using shank style lug nuts). Each kit comes with 2 wheel spacers, 12 metric M12x1.5 wheel studs (pre-installed), 12 M12x1.5
lugnuts, and Loctite. The wheel spacers are anodized in dark blue, which is a double anodizing process for twice the corrosion resistance. In addition,
each wheel spacer is both wheel & hub centric for a perfect OEM fit. They are manufactured in the United States of America in Longmont, Colorado.
Spidertrax WHS-007 |
Spidertrax WHS-007 |
Spidertrax WHS-007 Application Guide:
Spidertrax Installation Instructions
1980-Up 4 Runner (w/o Locking Hubs)
1995-Up Tacoma 4WD (w/o Locking Hubs)
2000-2006 Tundra
1993-1998 T100 (w/o Locking Hubs)
2007-Up FJ Cruiser
Each kit comes with 2 wheel spacers, 12 M12x1.5 Grade 10.9+ 4140 wheel studs (pre-installed and are coated with GEOMET for 10X the corrosion resistance over zinc),
12 lug nuts, and a package of thread locker.
Each wheel spacer is anodized in blue, using a double anodizing process for twice the corrosion resistance.
In addition, each wheel spacer is wheel and hub centric for a perfect fit. Proudly made in the USA.

Spidertrax WHS-007 |
Spidertrax WHS-007 |
Spidertrax WHS-007 |
Installation:
Installation is simple and straightforward and can be done with one person working alone.
Perform the complete install on one corner at a time.
Loosen the lug nuts on the wheel before jacking the vehicle up.
Then jack up and place a jack stand under the vehicle at the proper location. Release the weight of the vehicle from the jack and onto the stand.
Remove the 6 lug nuts and take off the wheel. I took the opportunity to wax the wheels at this time, including the lug nuts. With the wheels removed
from the vehicle it is much easier to wax all the way into the lug nut area. Clean the hub area with a wire brush if needed to ensure the spacer
will seat flush. Using the included red thread sealant (loctite), coat each of the 6 factory wheel studs. Place the wheel spacer over the studs
and hand tighten the included Spidertrax lug nuts, facing the tapered end towards the spacer. A torque wrench is highly recommended and what I like
to do is to first torque down the lug nuts, in a star pattern of course, first to 40ft. lbs., then to 60ft. lbs., then up to the final 83 ft. lb. value.
Tip for the front installation: Before starting, lock the center differential and put the 4WD selector in 4Lo.
This keeps the wheels from spinning while tightening the lug nuts.
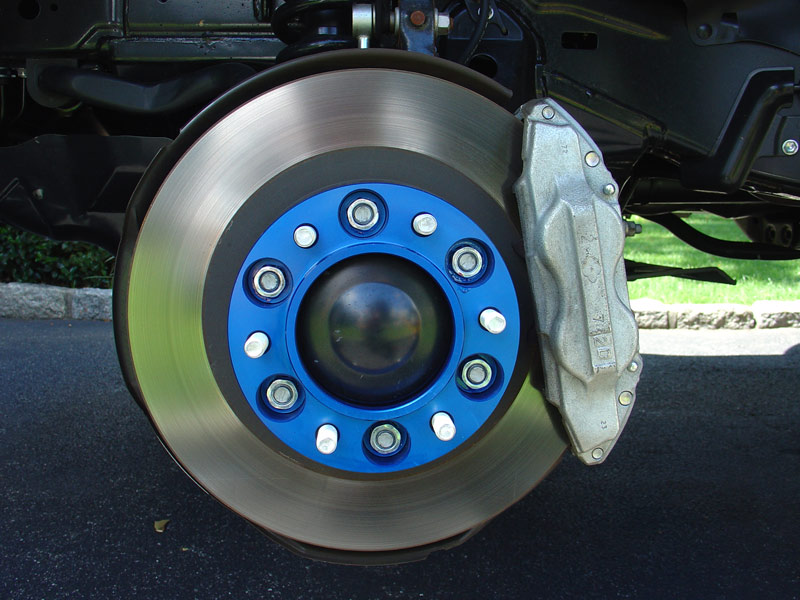
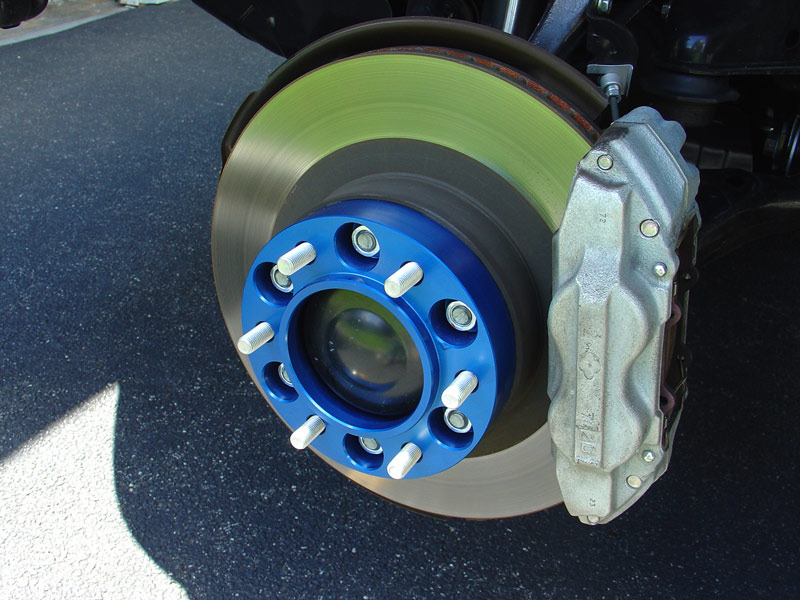

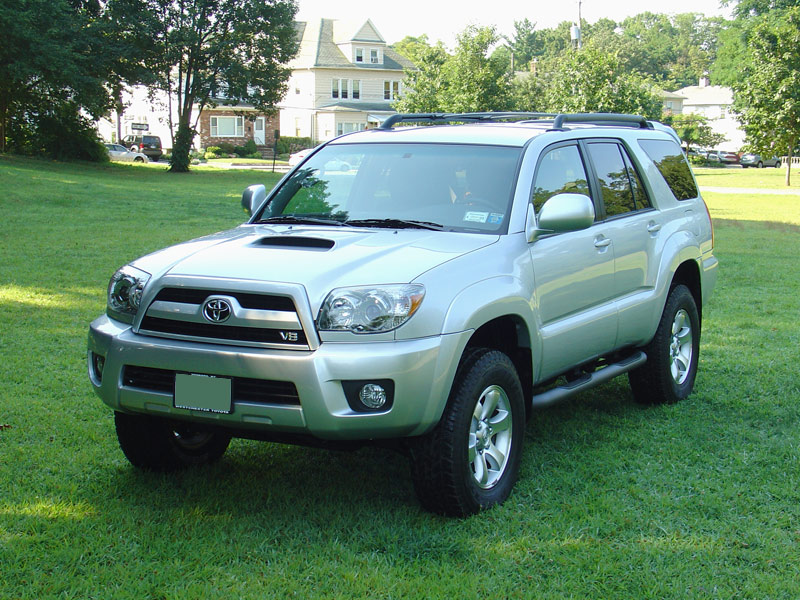
Front Wheel Spacers Installed, Wheel now sits flush with flare |
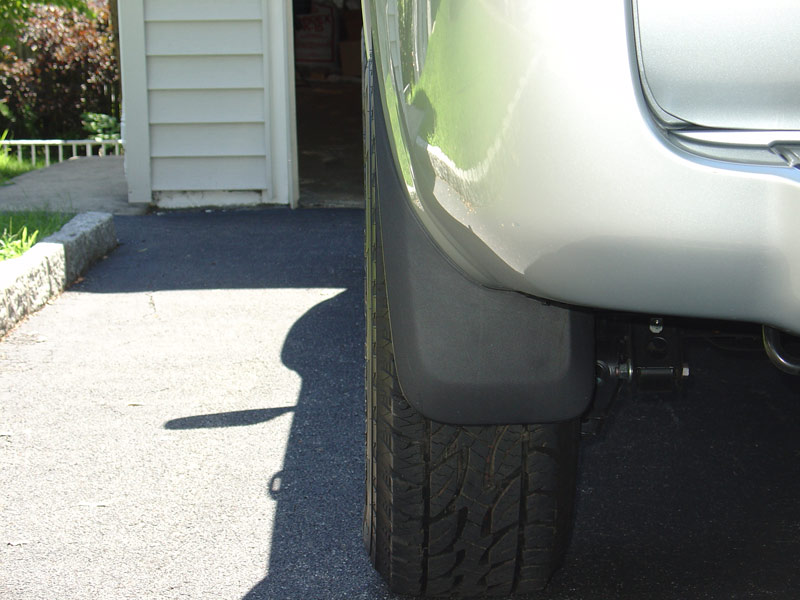
Tip for the rear installation: Before starting, engage the parking brake. This keeps the wheels from spinning while tightening the lug nuts.


Rear Wheel Spacers Installed, Wheel now sits only 1/2" tucked inside of flare |
Pictures after wheel spacer installation:

After
Front 1.25" width wheel spacers installed |
After
Rear 1.25" width wheel spacers installed |

|

|
|
|
|
Tire Rubbing:
Although not an issue for me, many people install spacers to gain extra clearance between the upper control arm and the tires. This can be the case when
installing 285mm width tires or installing wider or different offset wheels. Again I had no tire rubbing before installing the wheel spacers.
But after the installation was complete and I headed out for a test drive, I immediatly noticed tire rub on the inside front plastic wheel liners when
turning the wheel at near full crank, or when encountering inclines/declines while moderatly turning the steering wheel. I anticipated this would be
the case before the install and knew the fix was an easy one.
Trimming the bottom corner of the front bumper and moving the wheel well liner forward:
Please see my Toyota 4Runner Front Bumper Trimming page.
|
|