|
Main Menu
|
|
|
|
My 2007 4Runner
|
|
|
|
4Runner History
|
|
|
|
Other
|
|
|
|
|
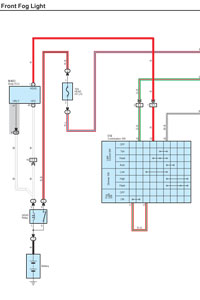
Concept:
The factory fog lights are wired to illuminate via the fog light switch located on the headlamp/turn signal stalk (combination switch), only if the
low beam headlights are switched on. The fog lights also shut off when the high beams are switched on.
My preference is to have the ability to switch the fog lights on anytime, as well as to have them remain on while the high beams are activated.
What needs to be accomplished:
To accomplish this, we need to do two seperate modifications.
Part One:
Fog Mod part one is done so that the fog lights will turn on using the factory switch anytime the ignition is on and the high beams are off.
Remove the fog light relay located in the engine room relay box and bend prong #2 so that it no longer inserts into its usual location.
Prong #2 is the upper right prong when the prongs are facing up at you, it is the upper left prong when the relay in inserted in the relay box (see pic for clarification).
Prong #2 is where the coil side of the fog relay was getting 12V+ power from the headlamp circuit. Take a short piece of 14-18 gague wire and crimp on a
fully insulated female quick disconnect terminal with a 0.187" tab. Do not use a standard 0.250" tab disconnect because it will not fit tightly enough.
Connect the disconnect to the prong of the fog light relay that you just bent.
Run the other end of the wire to an ignition activated 12V+ power source. I specify ignition activated rather than always hot as we want the fogs to be
able to be switched on anytime the vehicle is on, and to shut off automatically when turning the vehicle off. They will work even if only the DRL's are on.
For SR5 and Sport Edition owners you will find ignition activated 12V+ power at the bottom left prong #1 of the IG relay socket. SR5 and Sport Edition
owners do not have an IG relay as that is for the seat heaters which came on Limited Edition's only.
Use an 0.250" insulated male quick disconnect 'crimp type' solderless terminal which plugs directly into this socket.
If you have a Limited and therefore an IG relay, you can obtain ignition activated 12V+ power at the 25amp seat heater fuse. Just substitute
a mini fuse tap for the male disconnect.
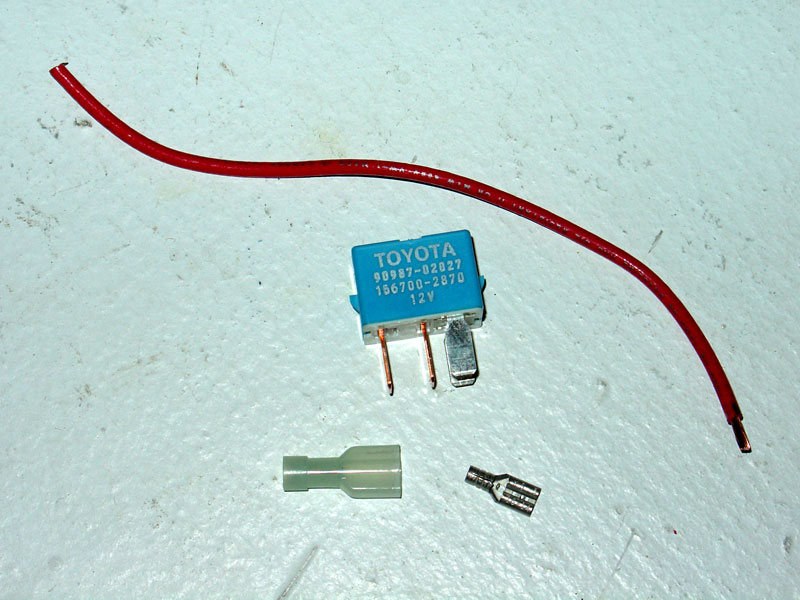
Factory fog light relay |
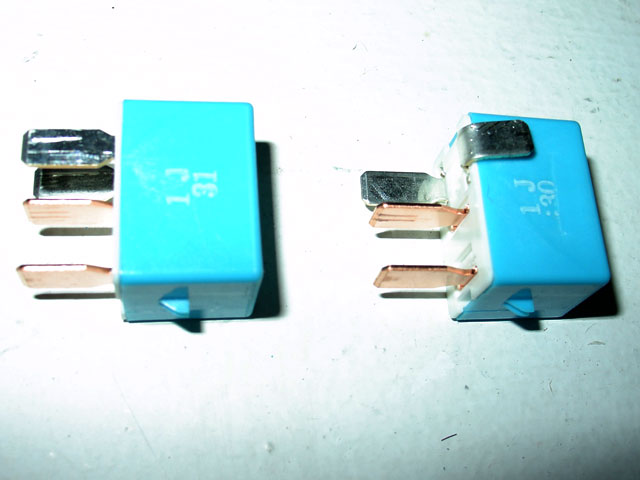
Relay before and
after bending pin #2 |
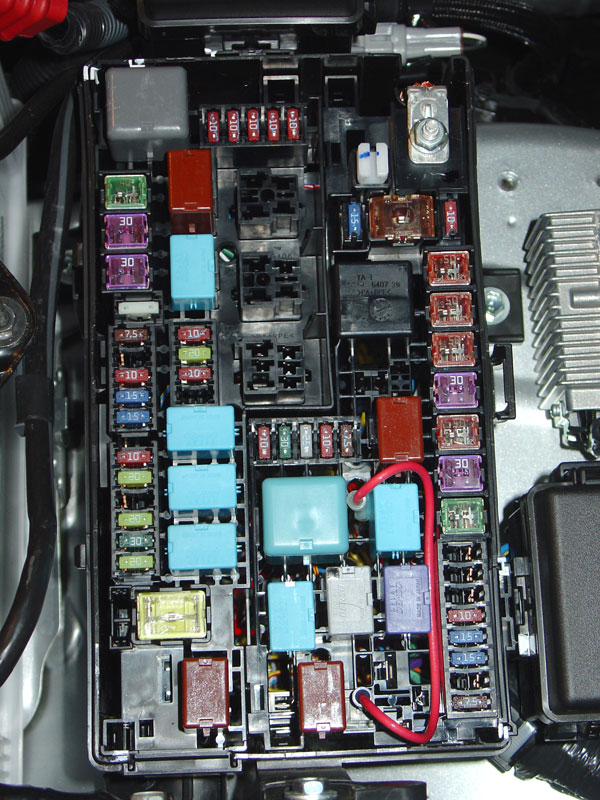
Fog Mod Part one |
Part Two:
Fog Mod part two is done so that the fog lights will remain on (if the factory switch is in the on position) while the high beams are activated.
Remove the three philips screws securing the steering column lower trim cover. Only one screw is visible while the steering wheel is straight.
Turn the wheel to reveal the other two. Pull the panel down and to the right to remove. Unplug the C12 combination switch harness and connect wires
going to pin 16 and 17 together. I used a blue 3M Scotchlok Electrical IDC (insulation displacement connection) connector to do so.
For 2005-2009 4Runners, the wire at pin #16 is white with a black stripe, this is your ground wire. The wire at pin #17 is red with a green
stripe, this is where ground is needed so that when the fogs are switched on ground is passed to pin #11 then to pin #10 and on to the
front fog lamp relay. This will allow the fog lights to remain lit while the high beams are switched on. There is also a red with green
stripe wire in this harness at pin #7, this is NOT the wire you want to connect to.
Please note that for 2003-2004 pin #17 is a solid blue wire, connect this together to the white with black stripe wire going to pin #16.
Again, there is also a red with green stripe wire in the 2003-2004 harness at pin #7, this is NOT the wire you want to connect to.
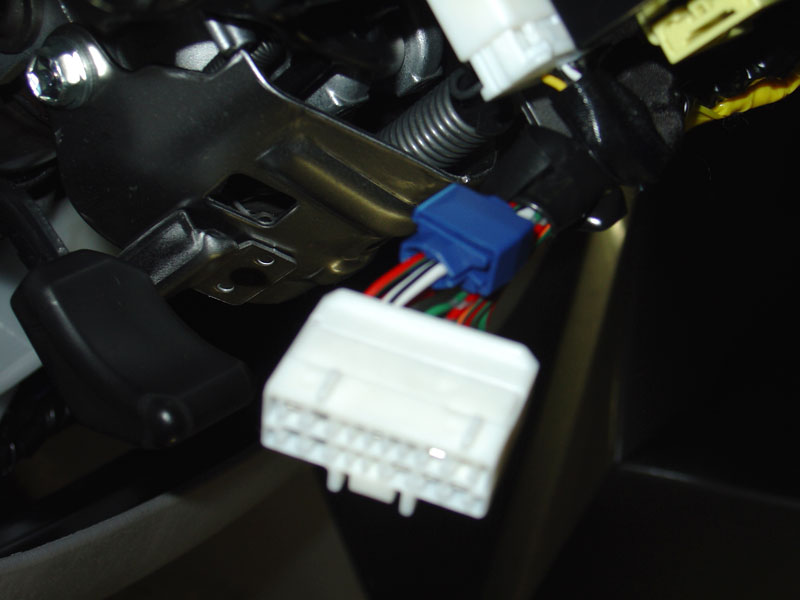
Fog Mod Part two |
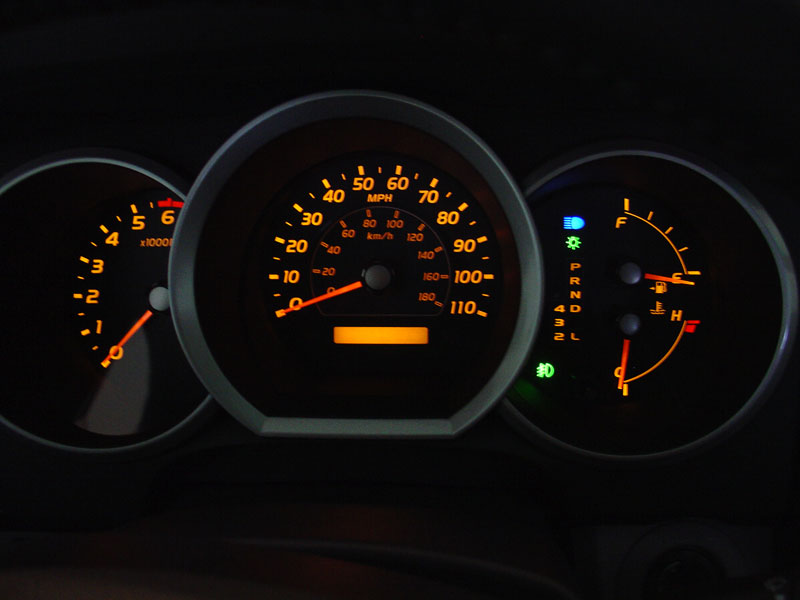
Dash showing
high beam, low beam and fog light
indicators all on at same time |
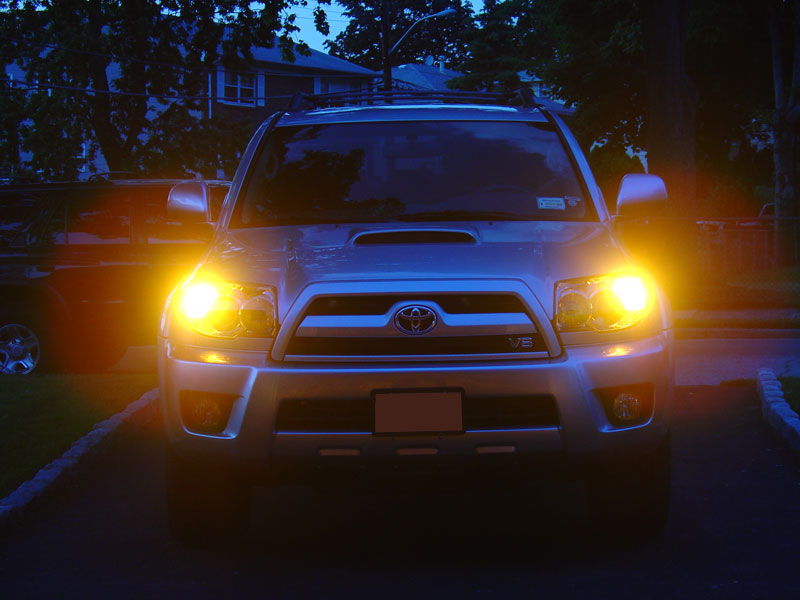
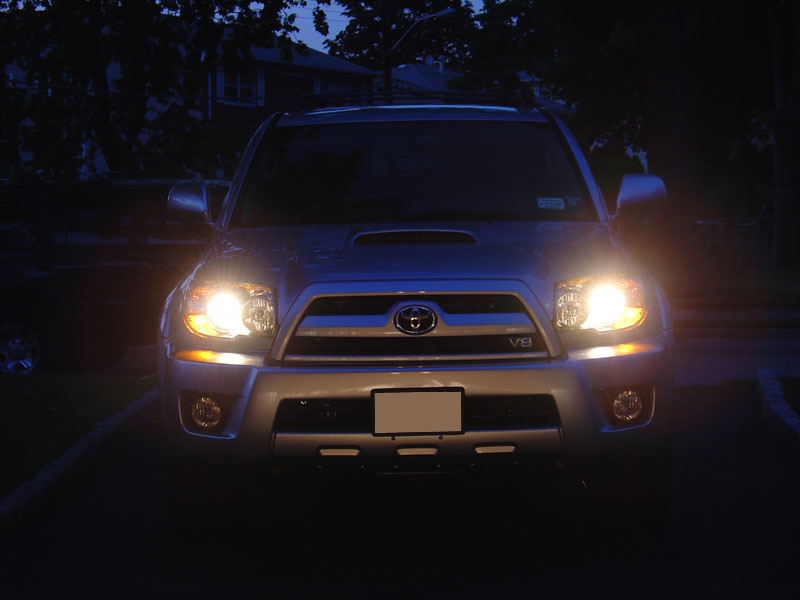
Results.
DRLs
(Parking lights look exactly like this,
except tail lights are on as well) |
Low beams |
High beams |
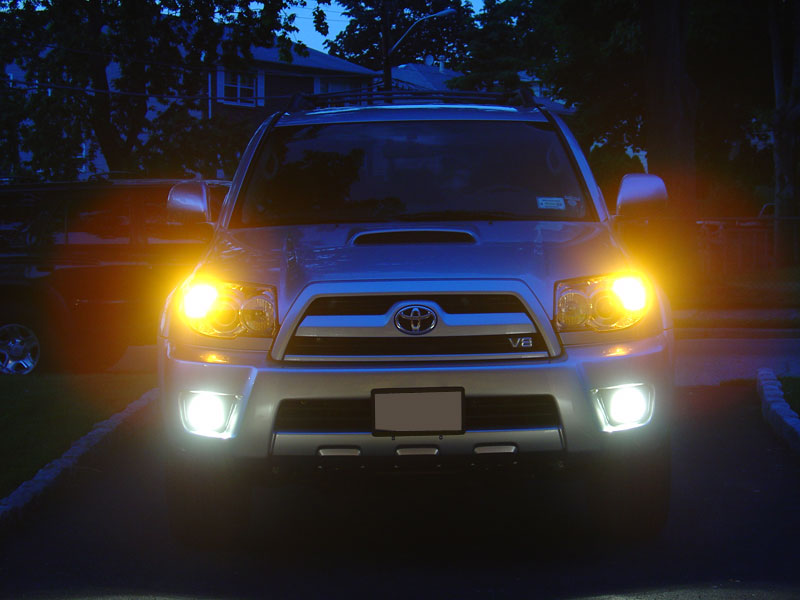
DRLs and fogs
Available only after performing
Fog Mod Part one |
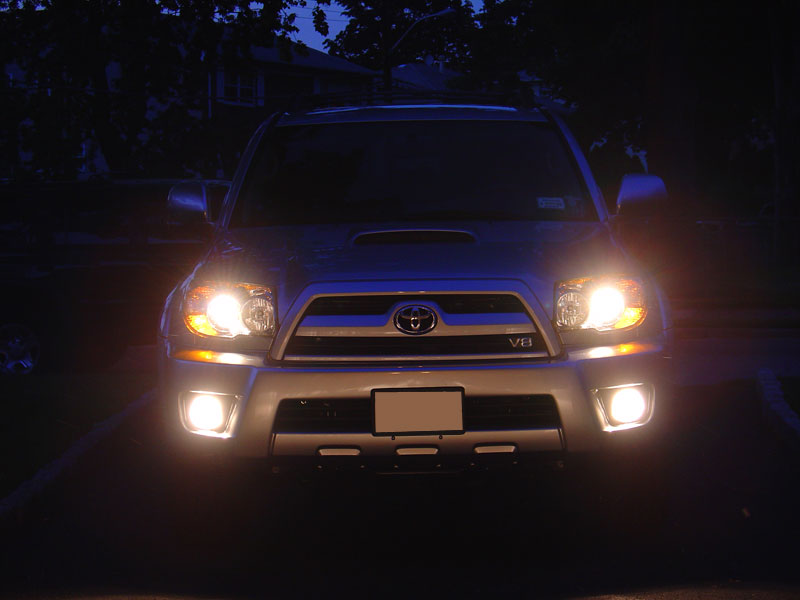
Low beams and fogs |
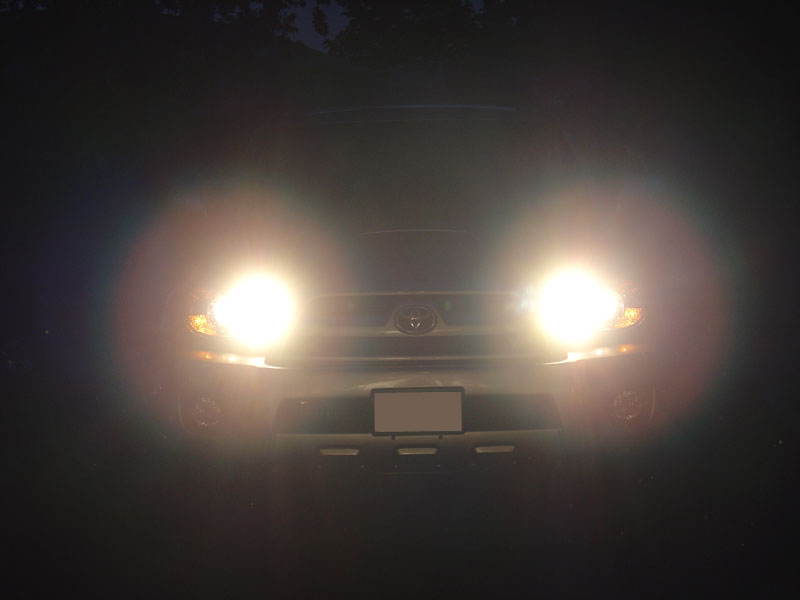
High beams and fogs
Available only after performing
Fog Mod Part two |
Part Three: (DRL Mod))
If you are looking to have your fog lights on ONLY, and all other lights off, you need to perform the
DRL Mod with On-Off-Auto Functionality.

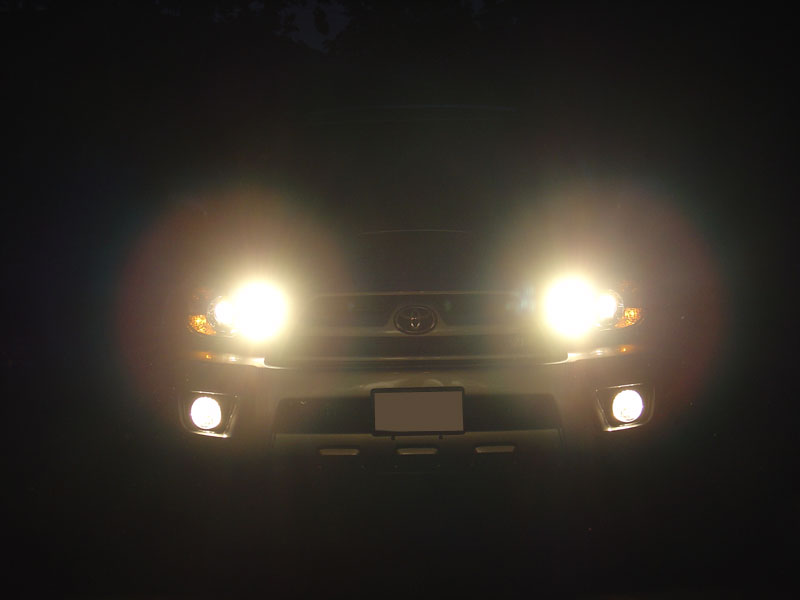
Fog Lights On |
|
|


